Help Center » Memo for Slack
Requesting acknowledgements
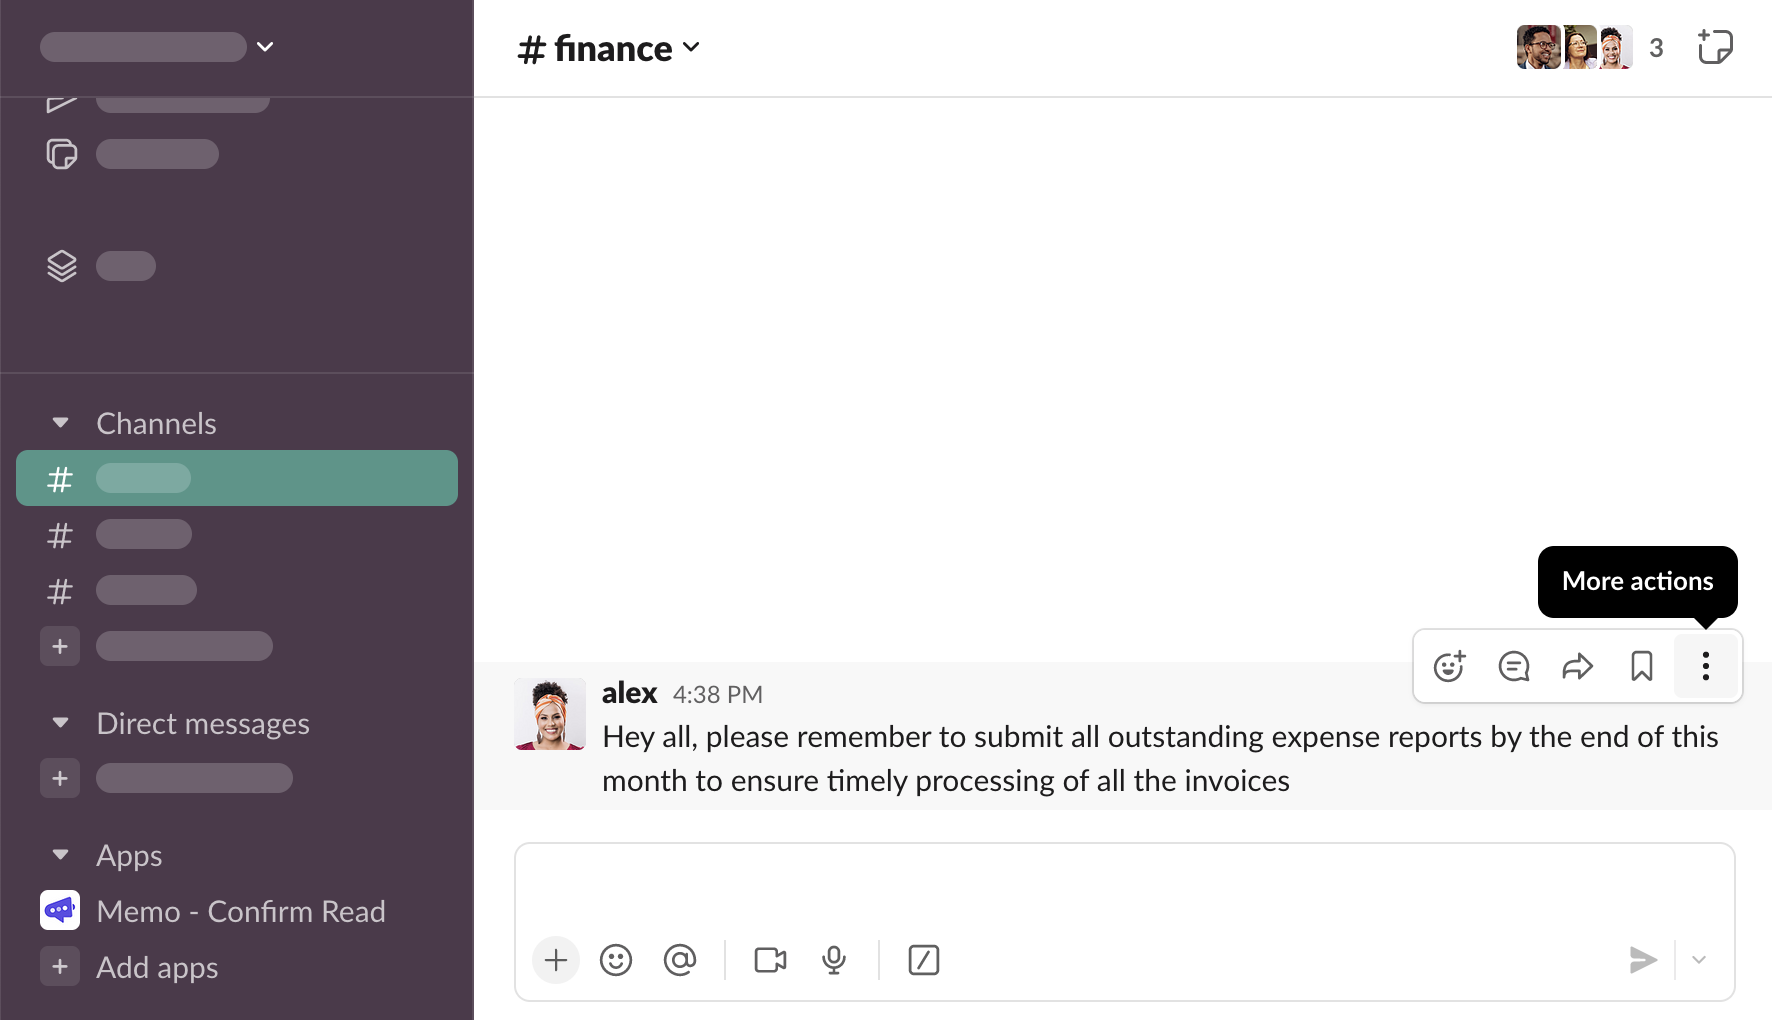
Request acknowledgements on an existing Slack message
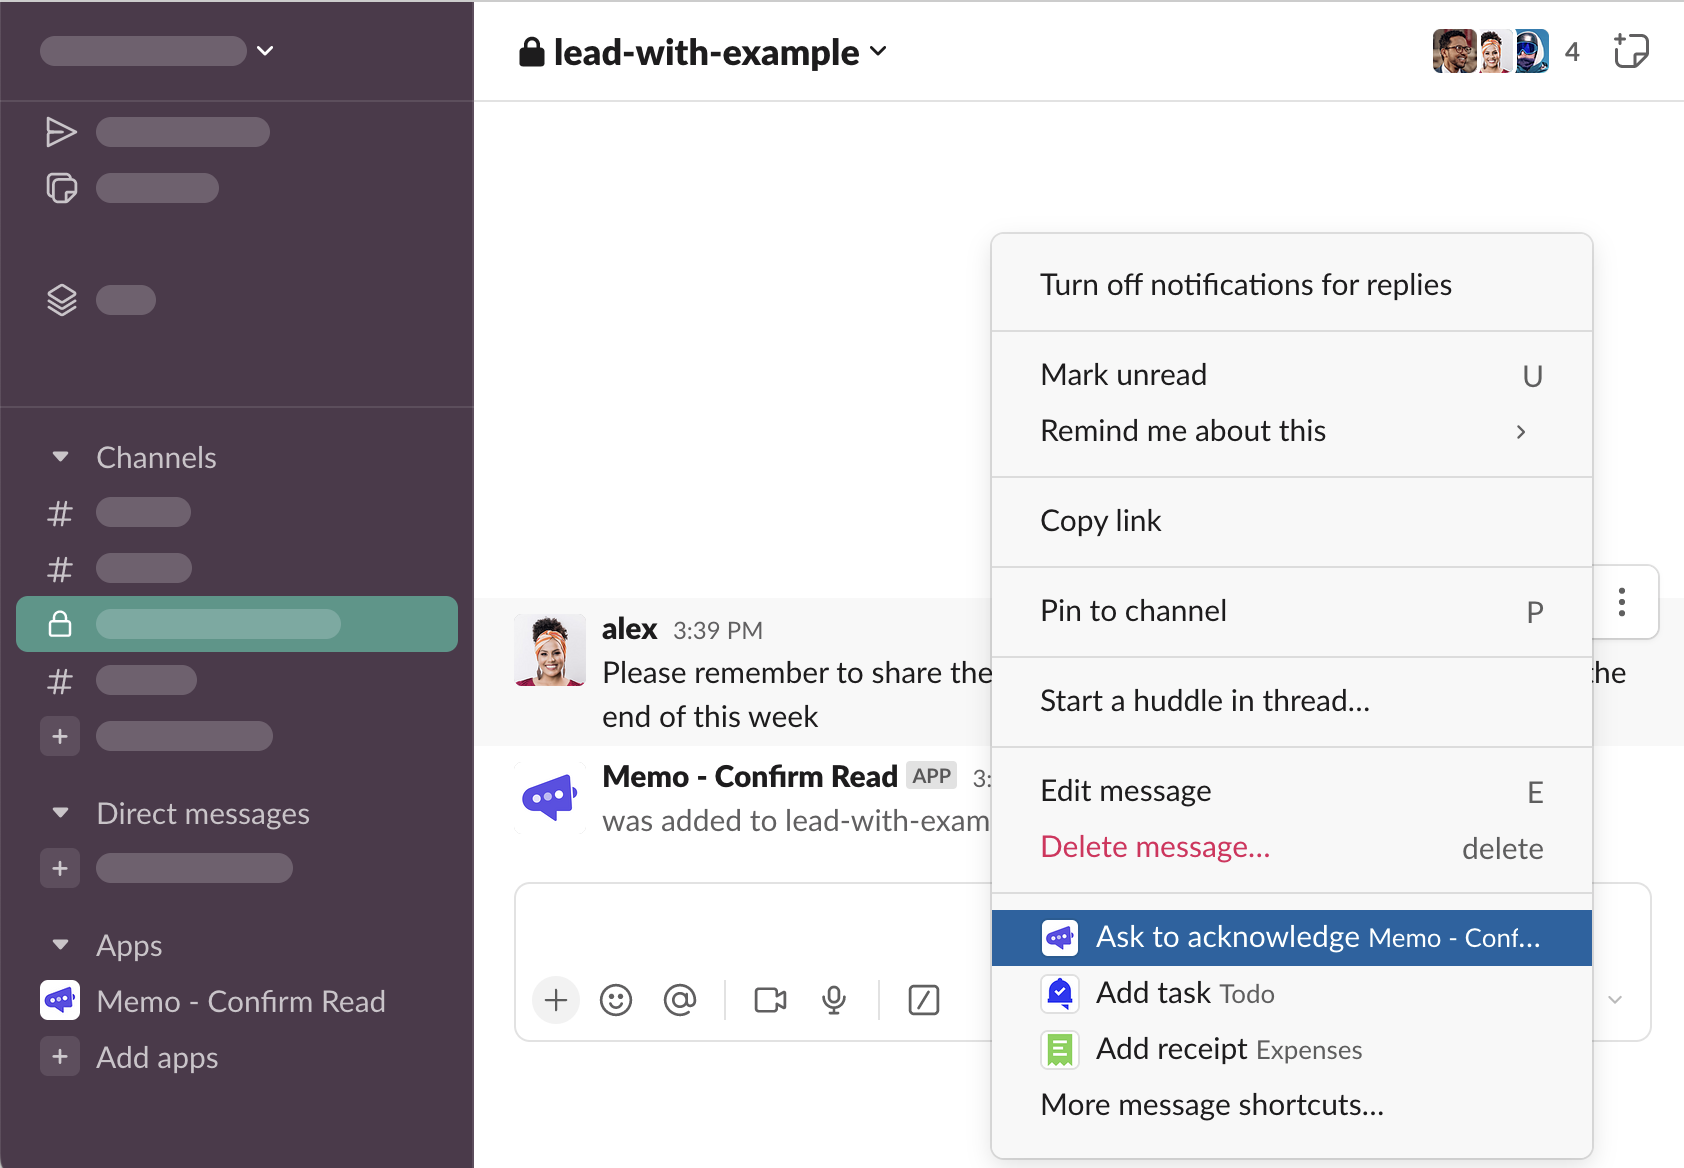
Hover over a message, click “⋮ More actions”
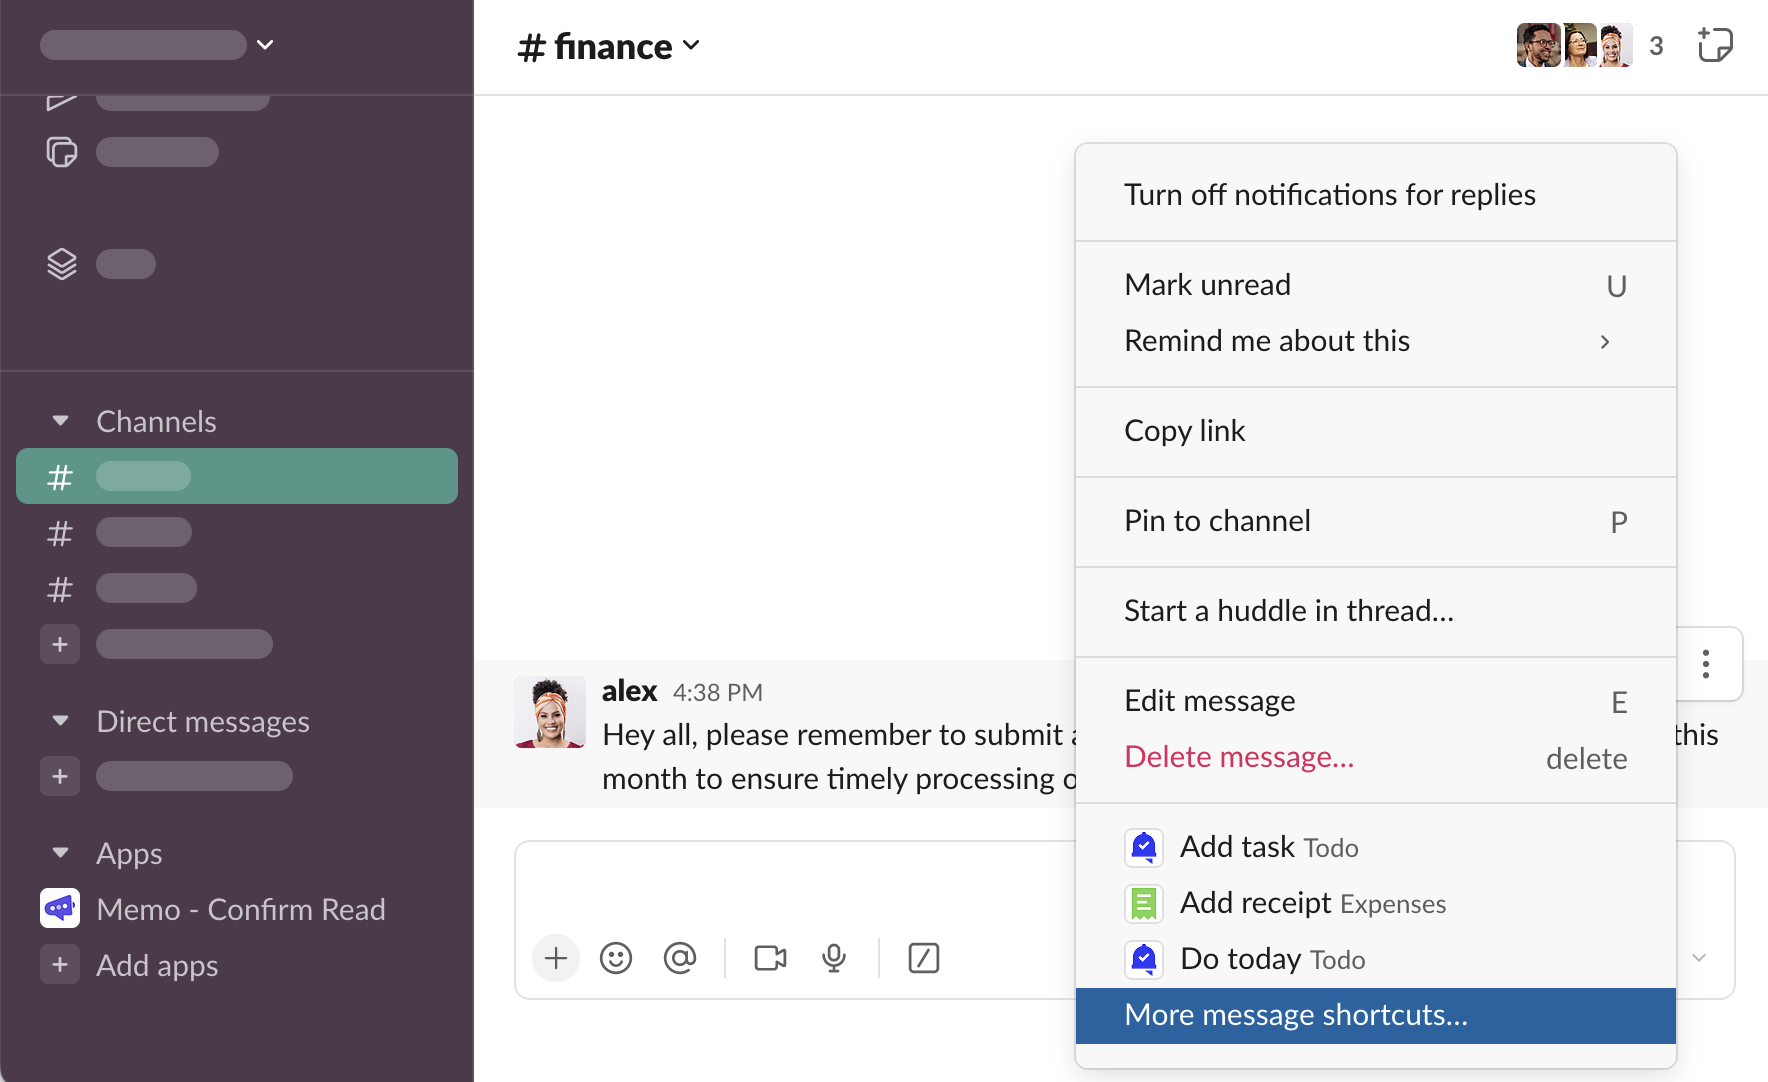
You will see the message shortcuts you use most often. When starting working with Memo, you likely won’t see Memo on the list. Click “More message shortcuts…”
Scroll down to see Memo’s shortcut…
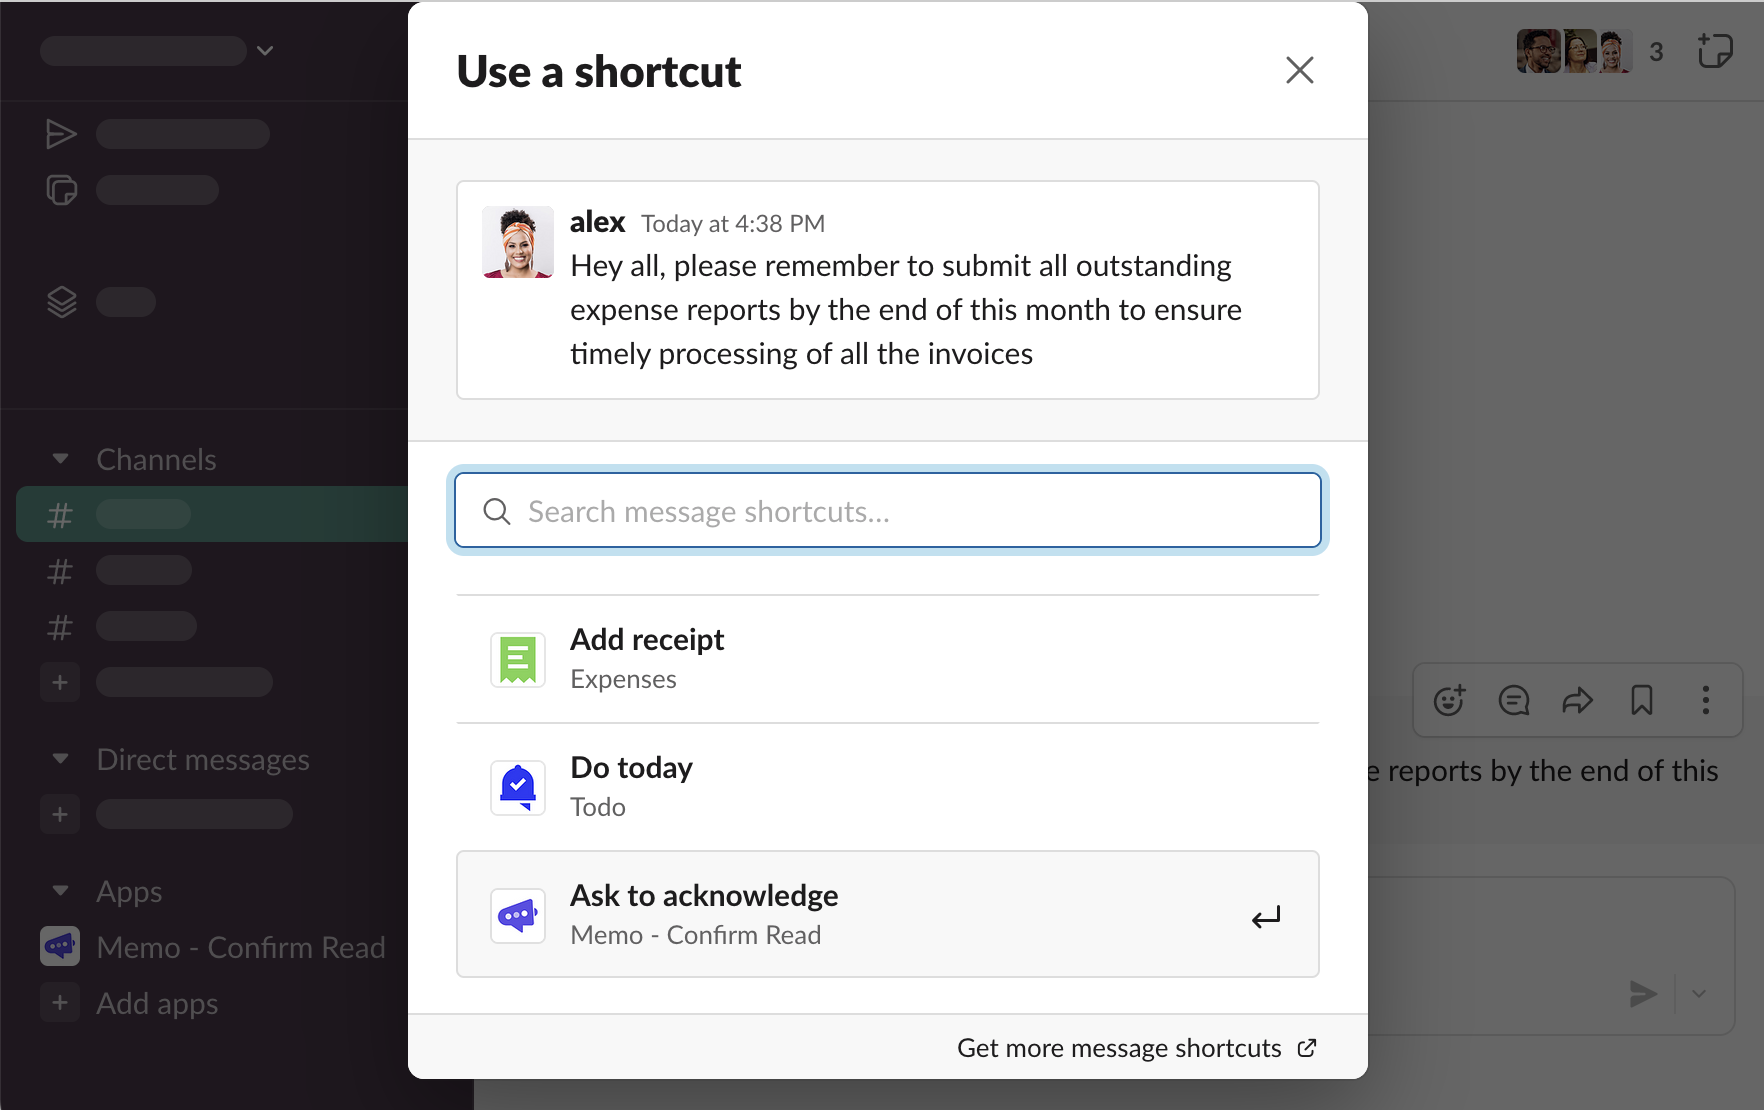
… or use search
.png)
Click “Ask to acknowledge” to trigger the shortcut that opens a form modal with request configuration.
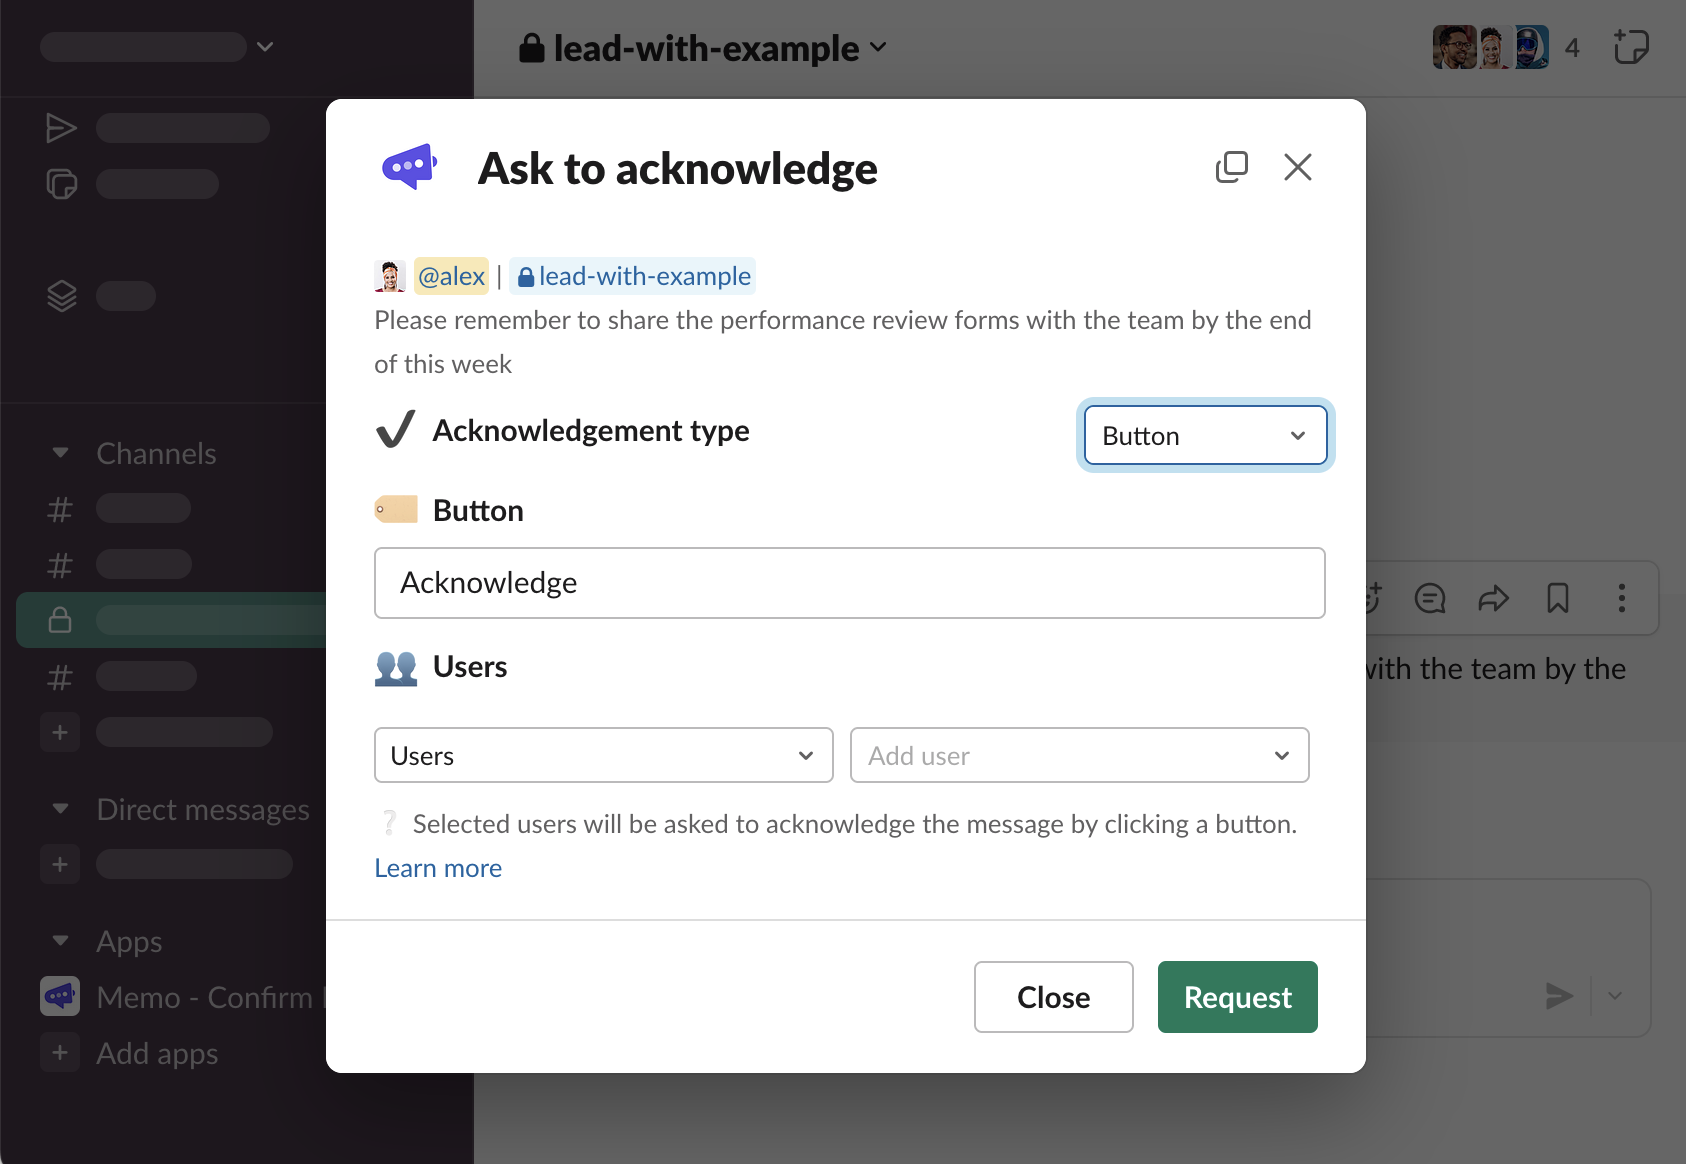
Request acknowledgements
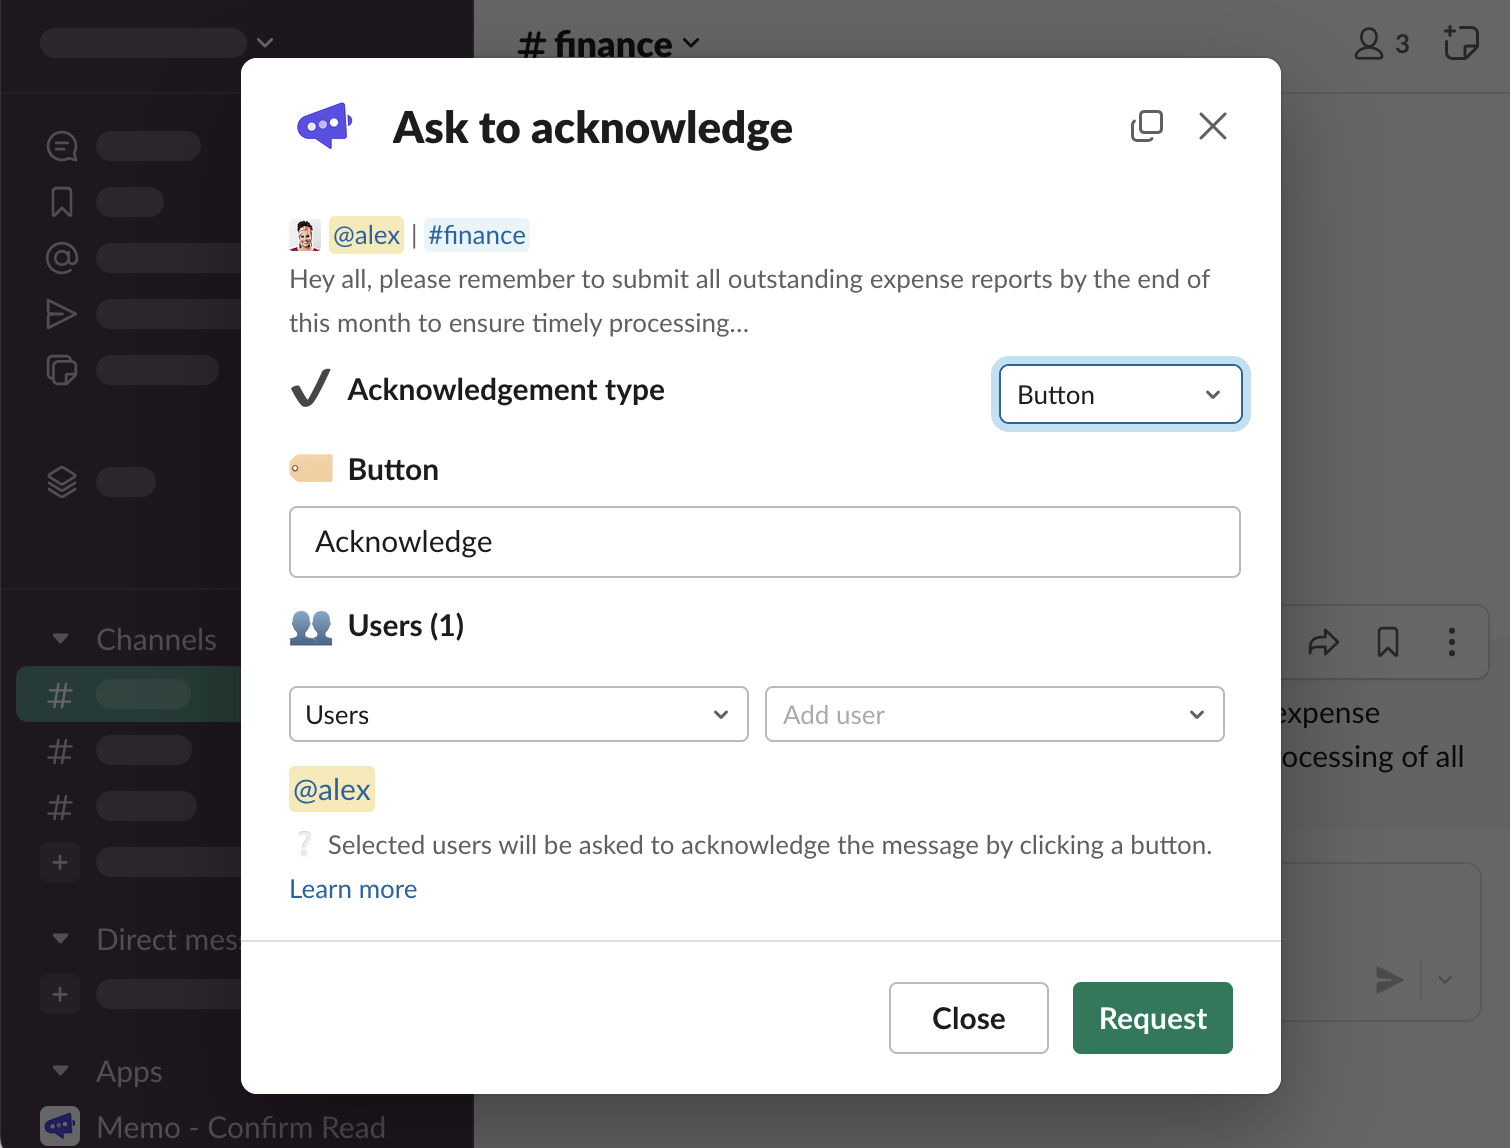
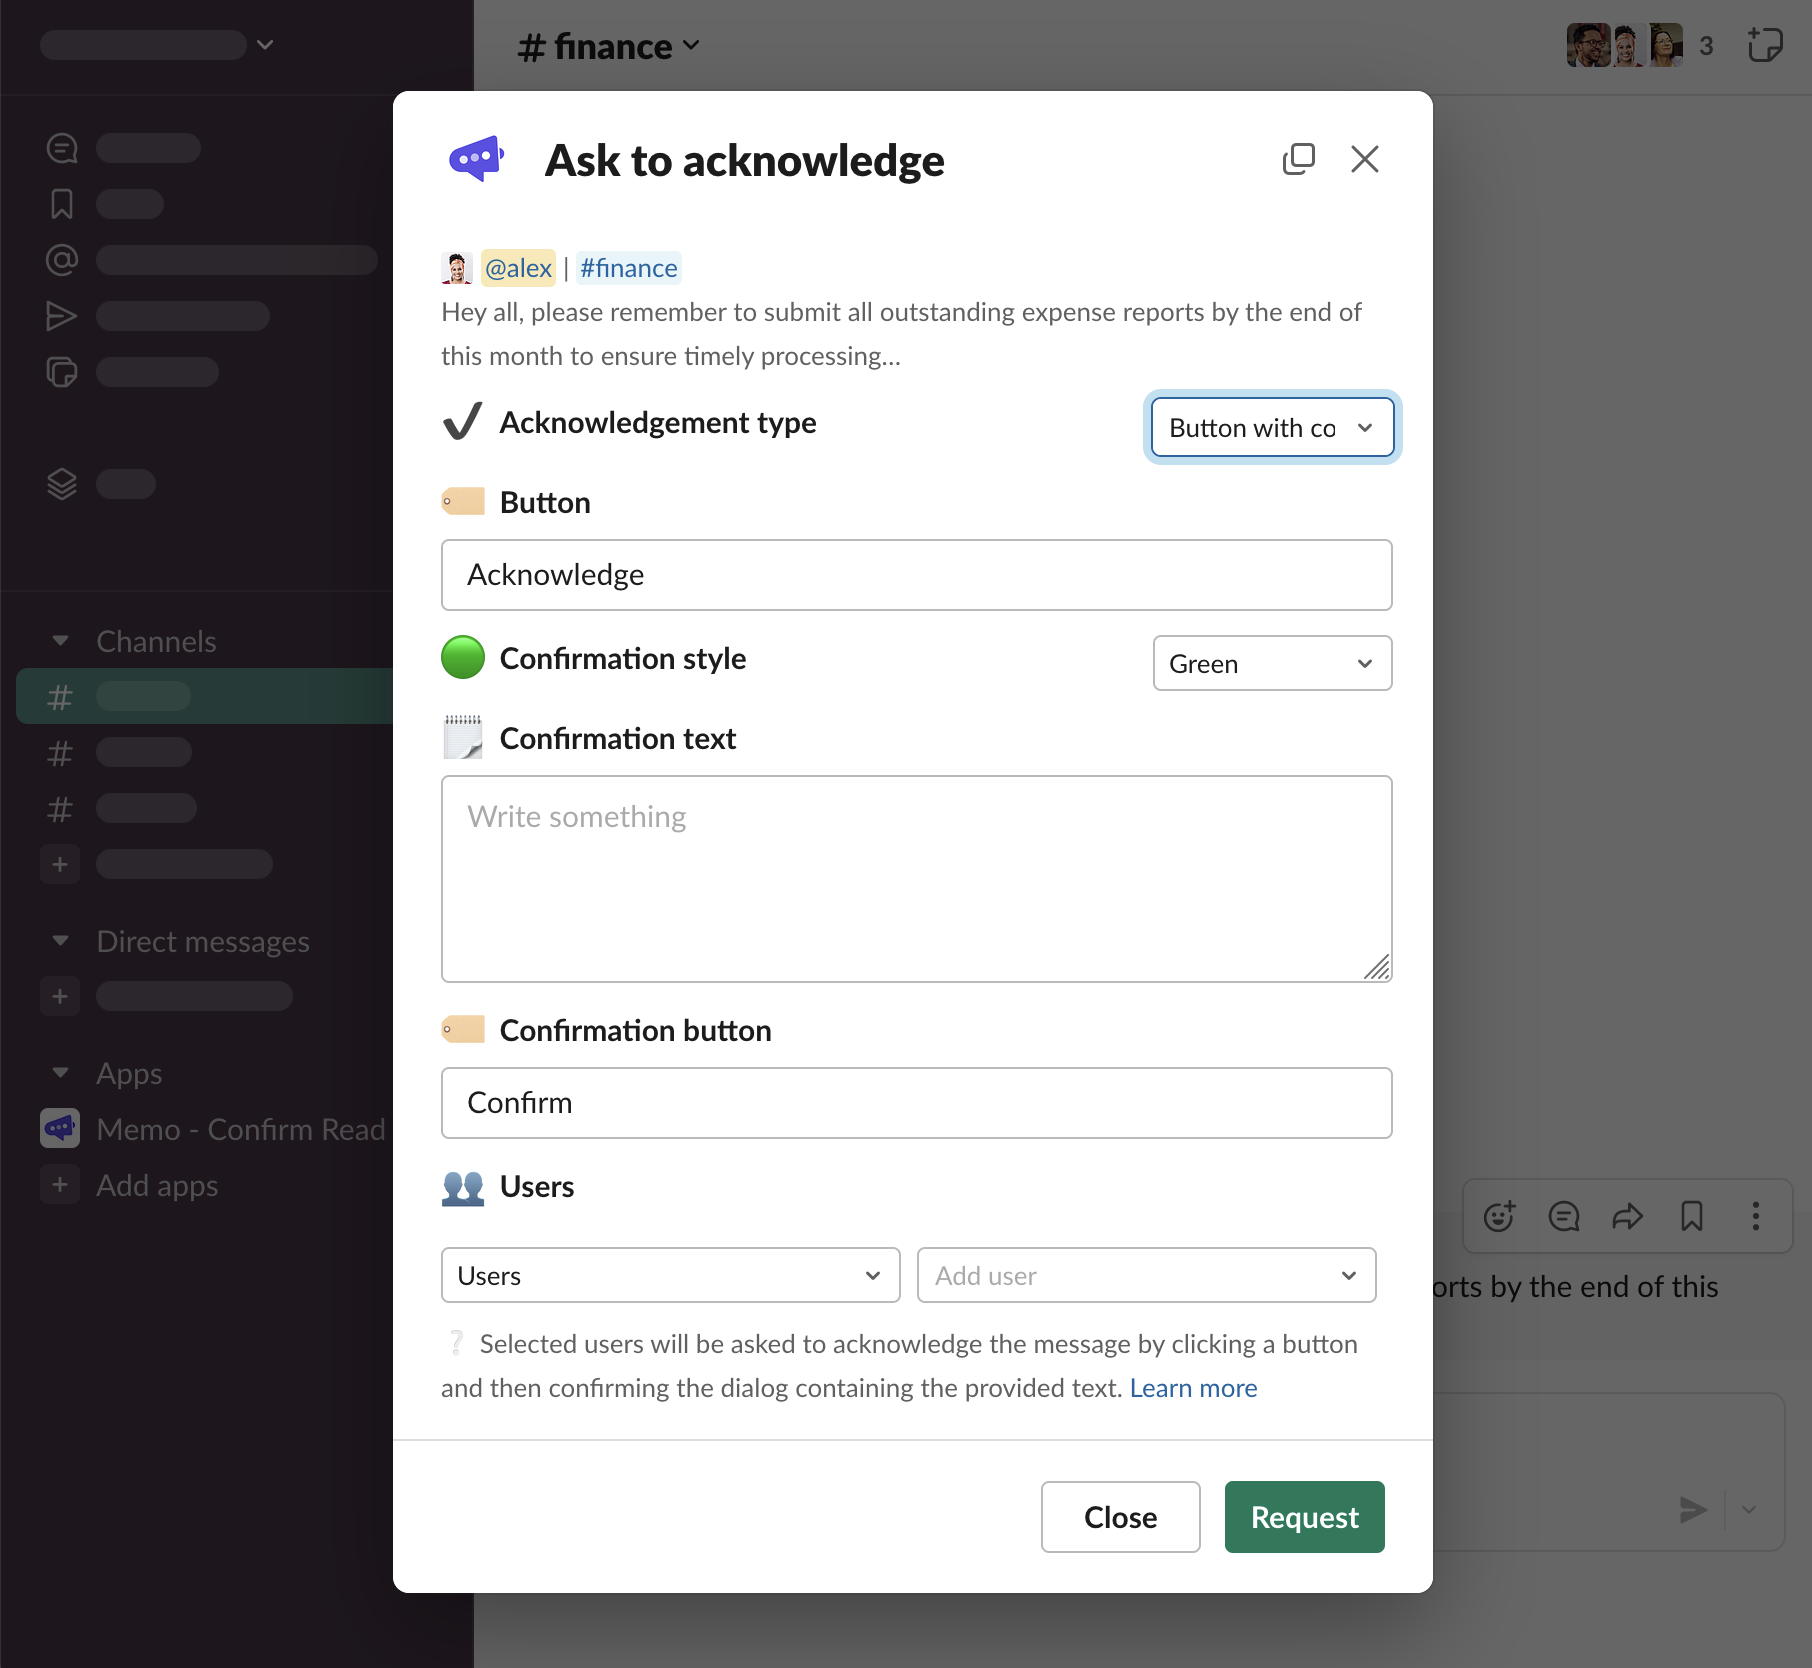
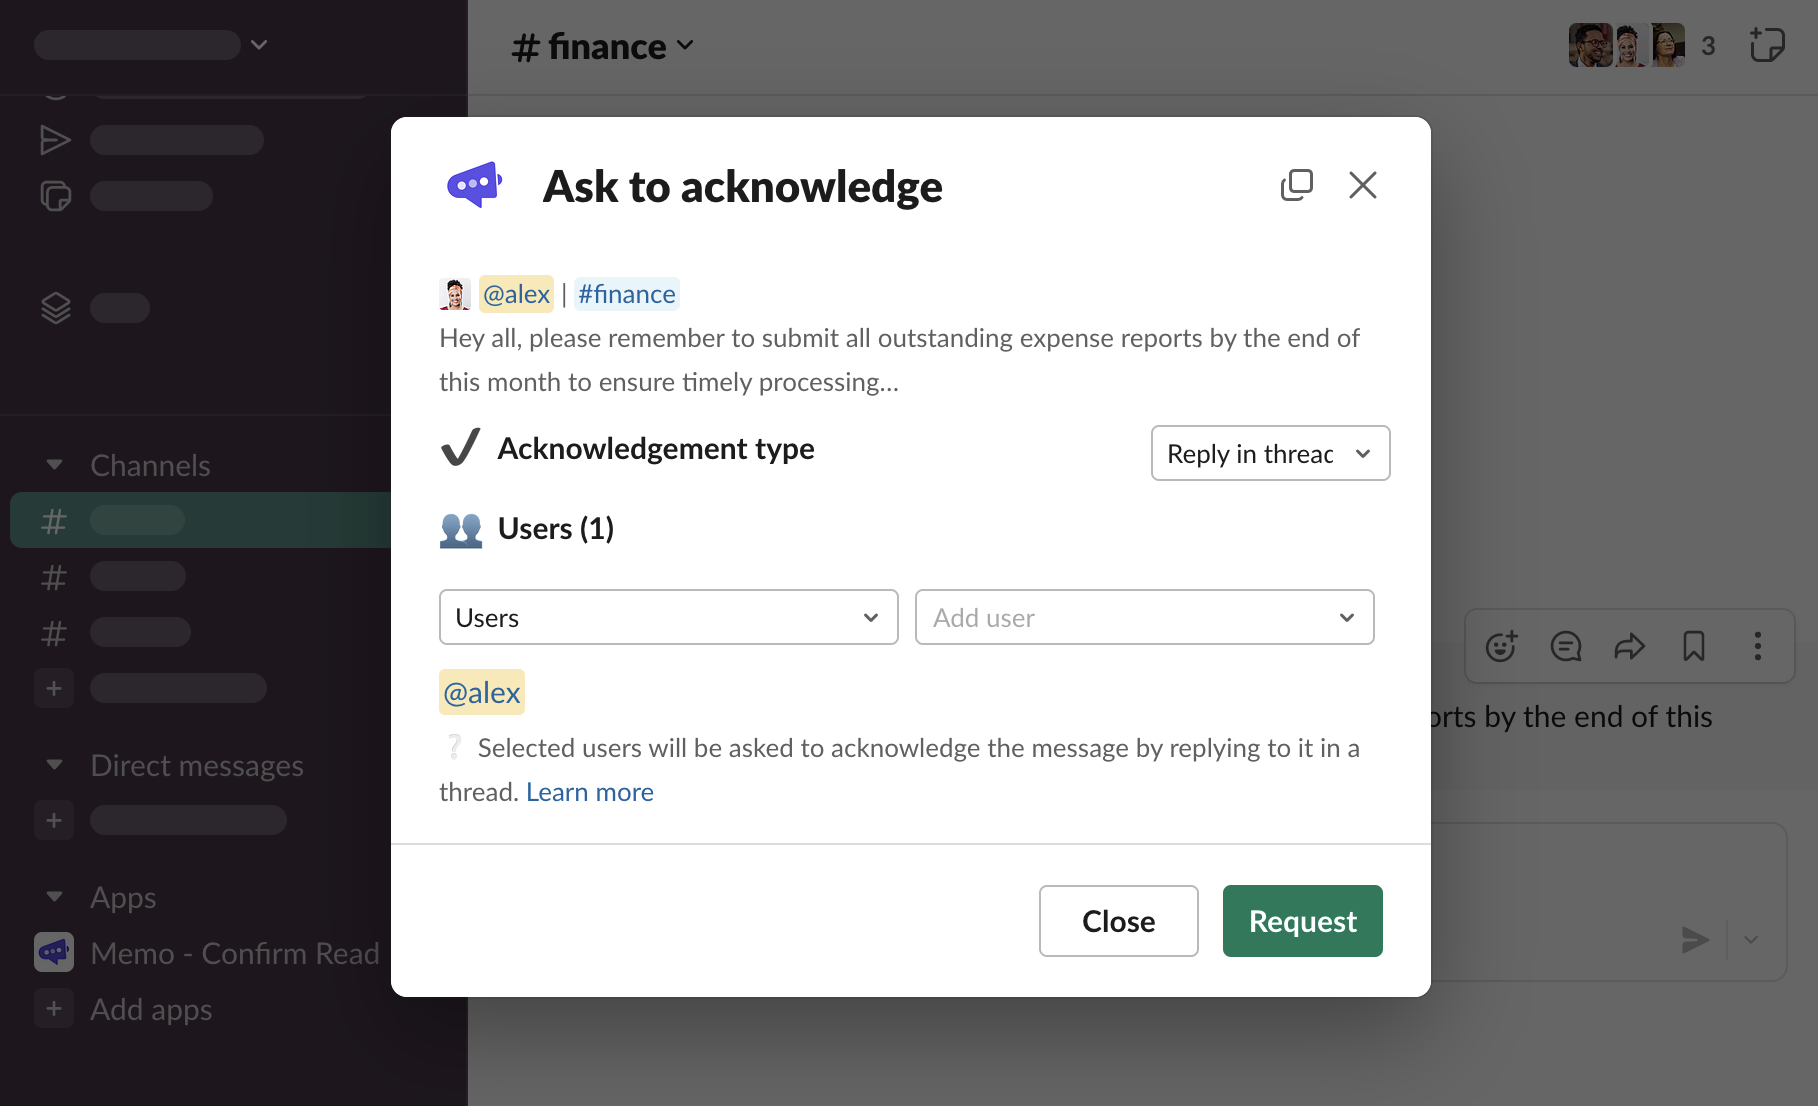
A form modal to configure the request will be opened
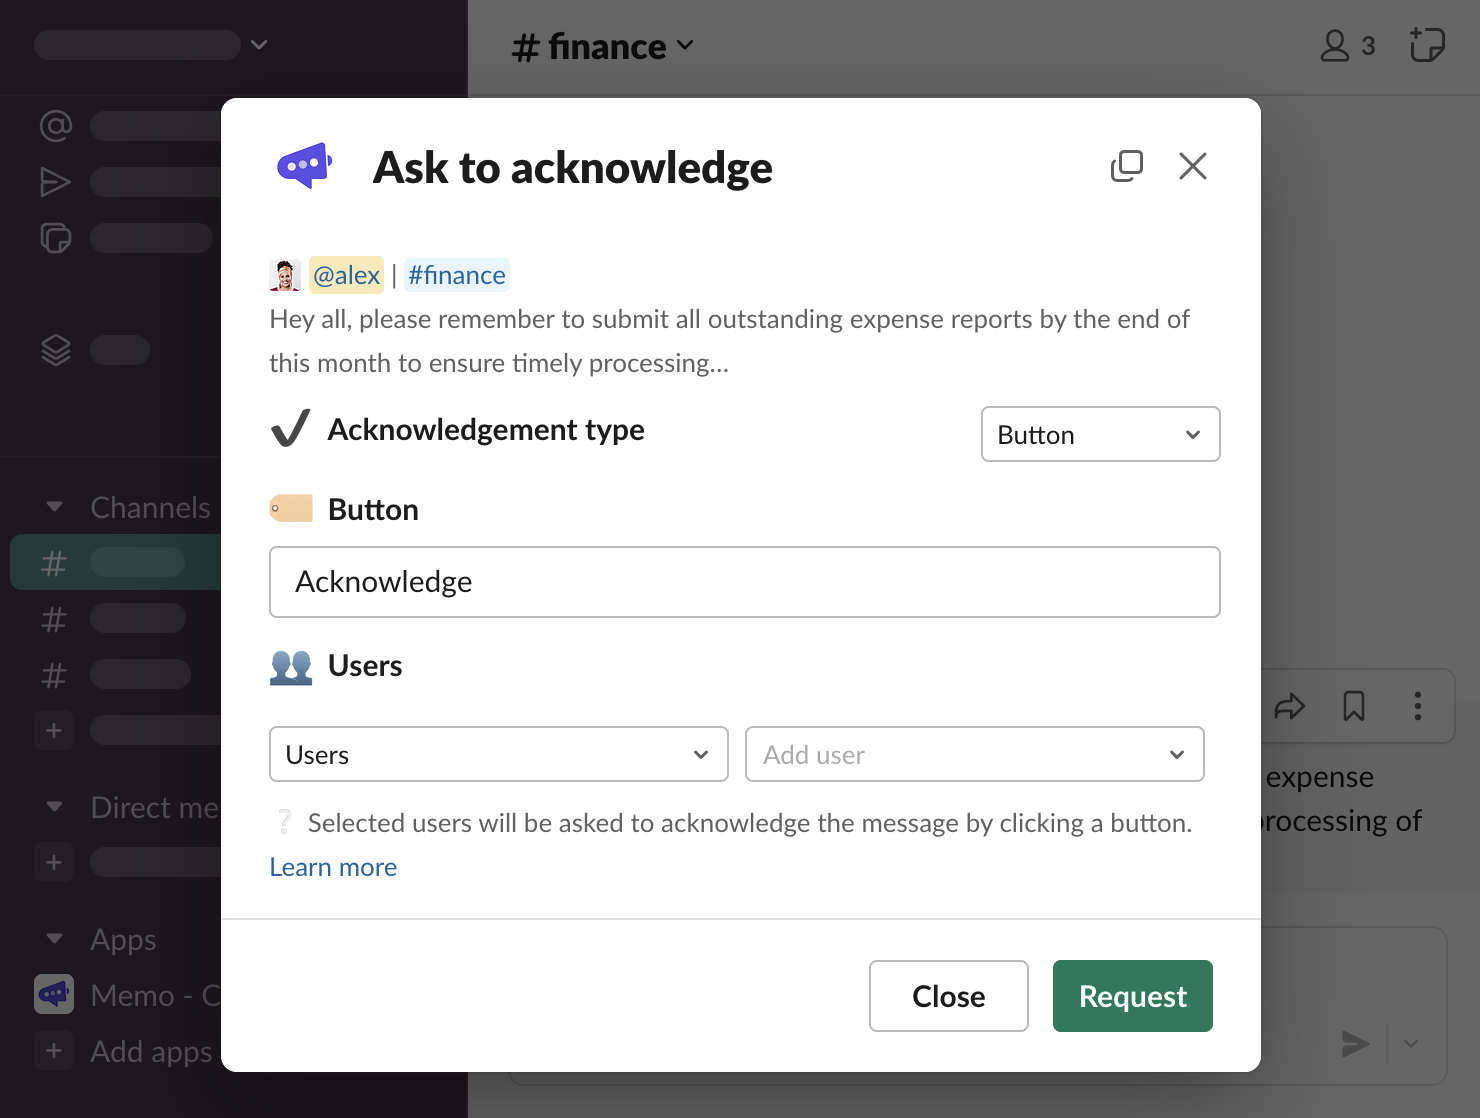
Add users who you want to be notified and asked to acknowledge the message
Click “Request”
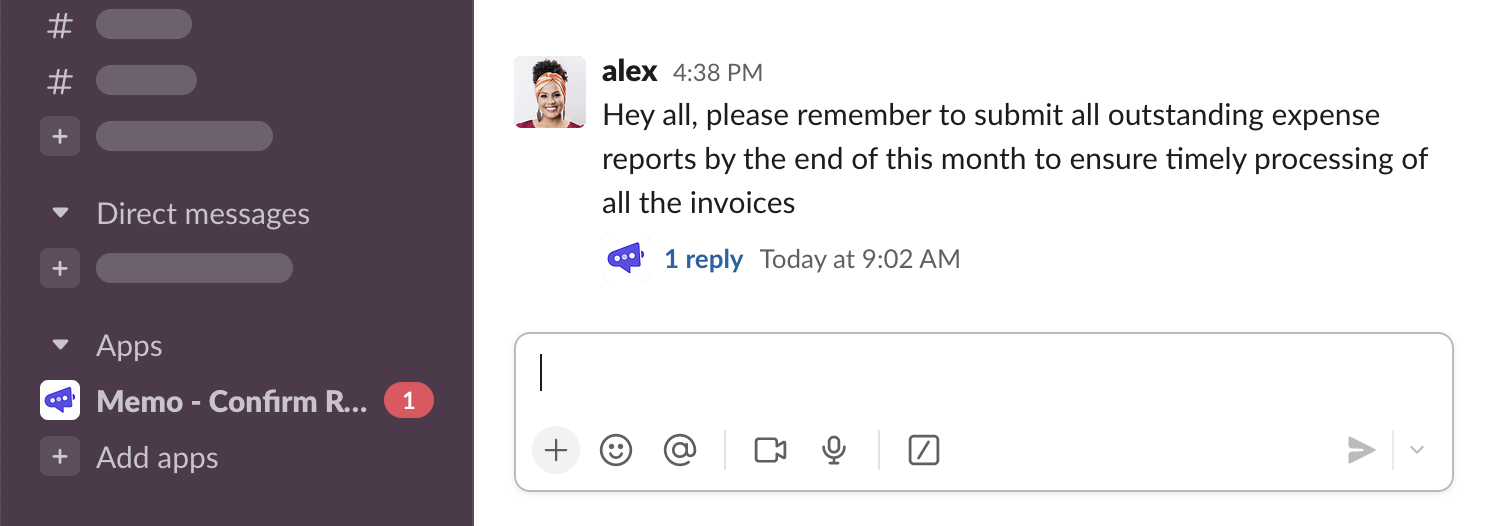
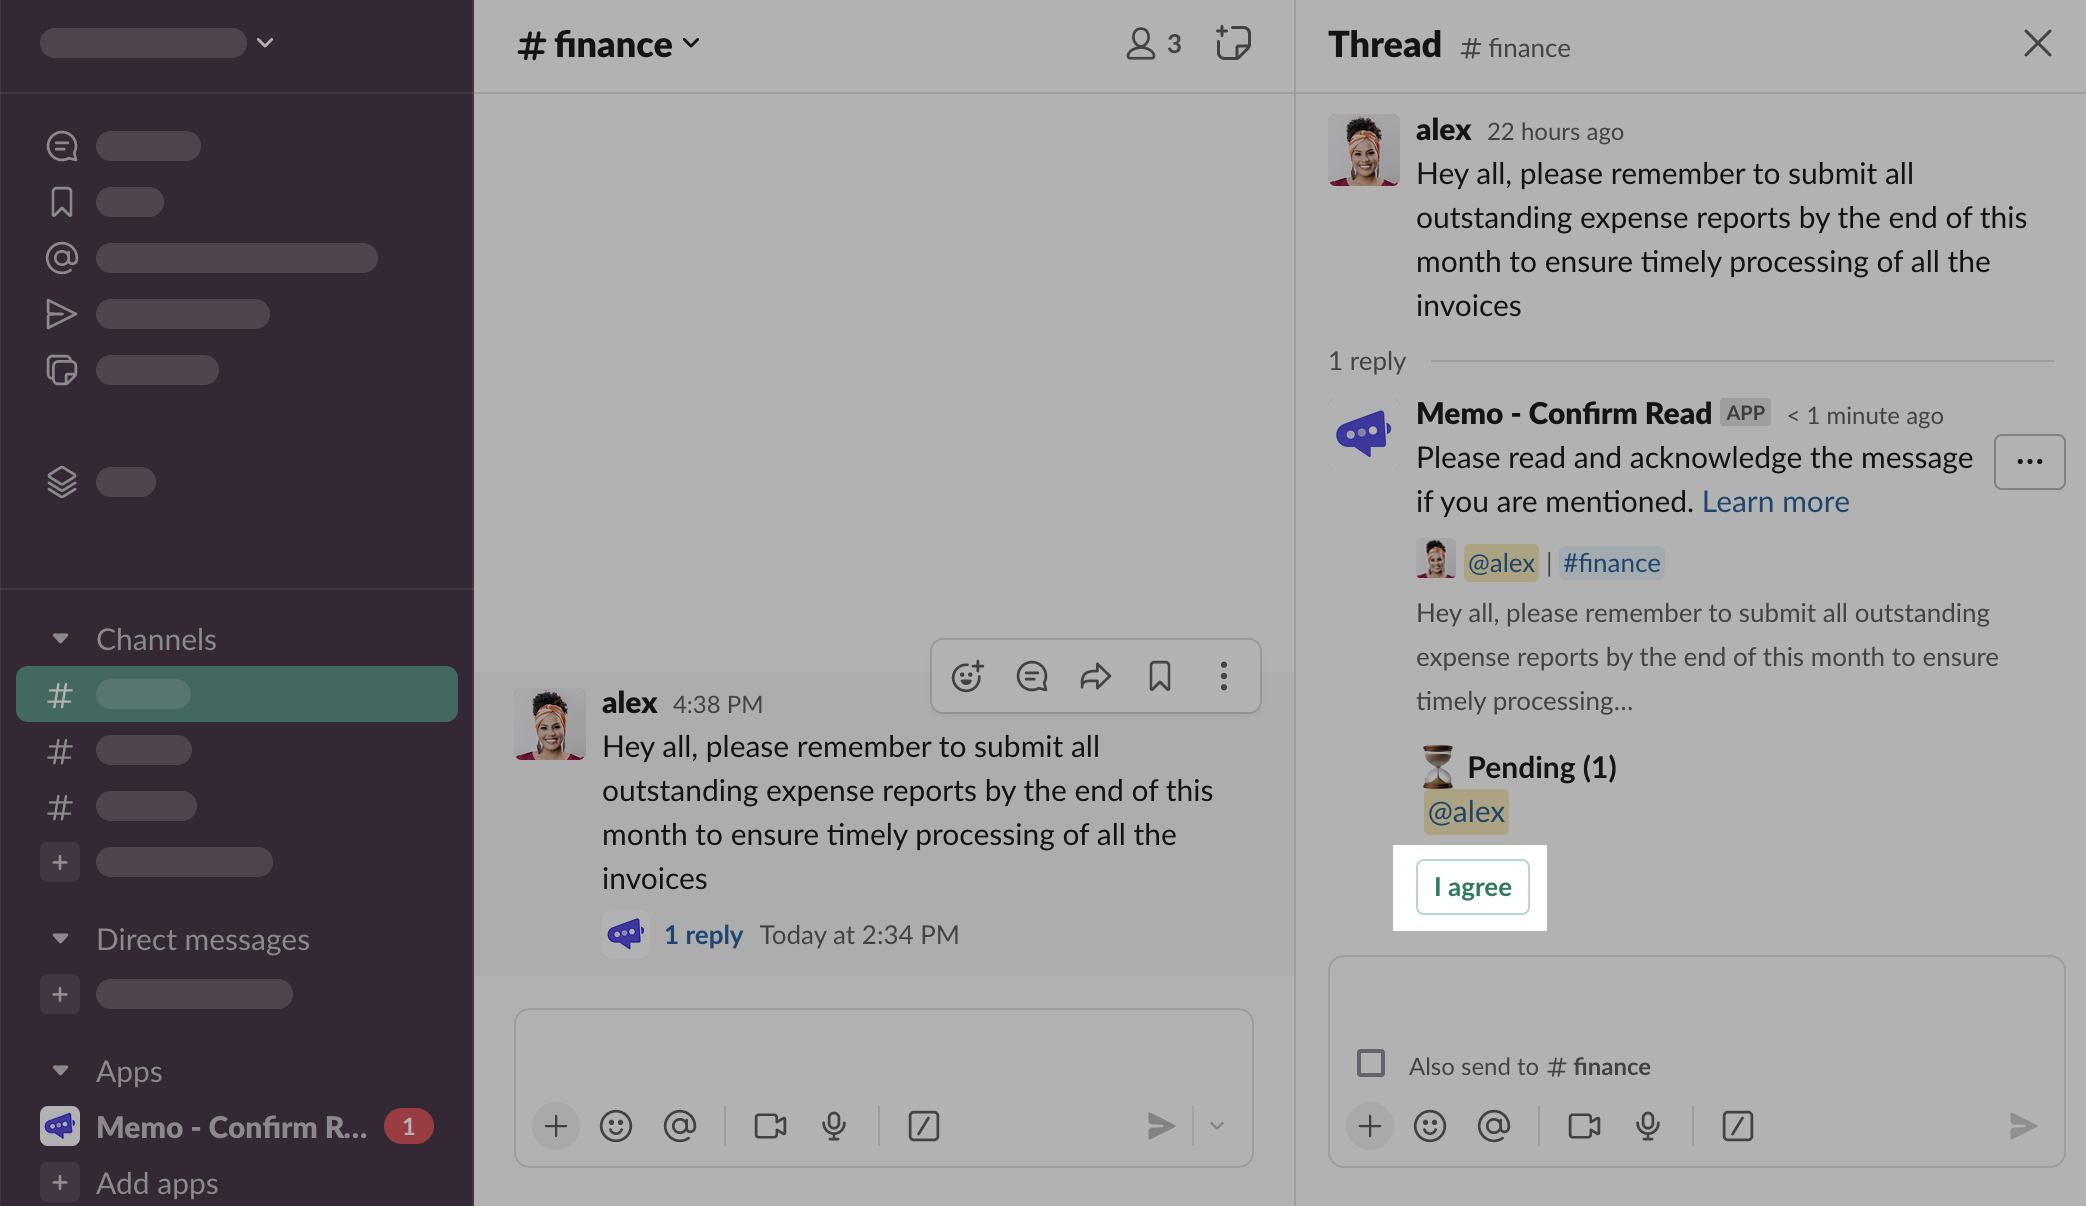
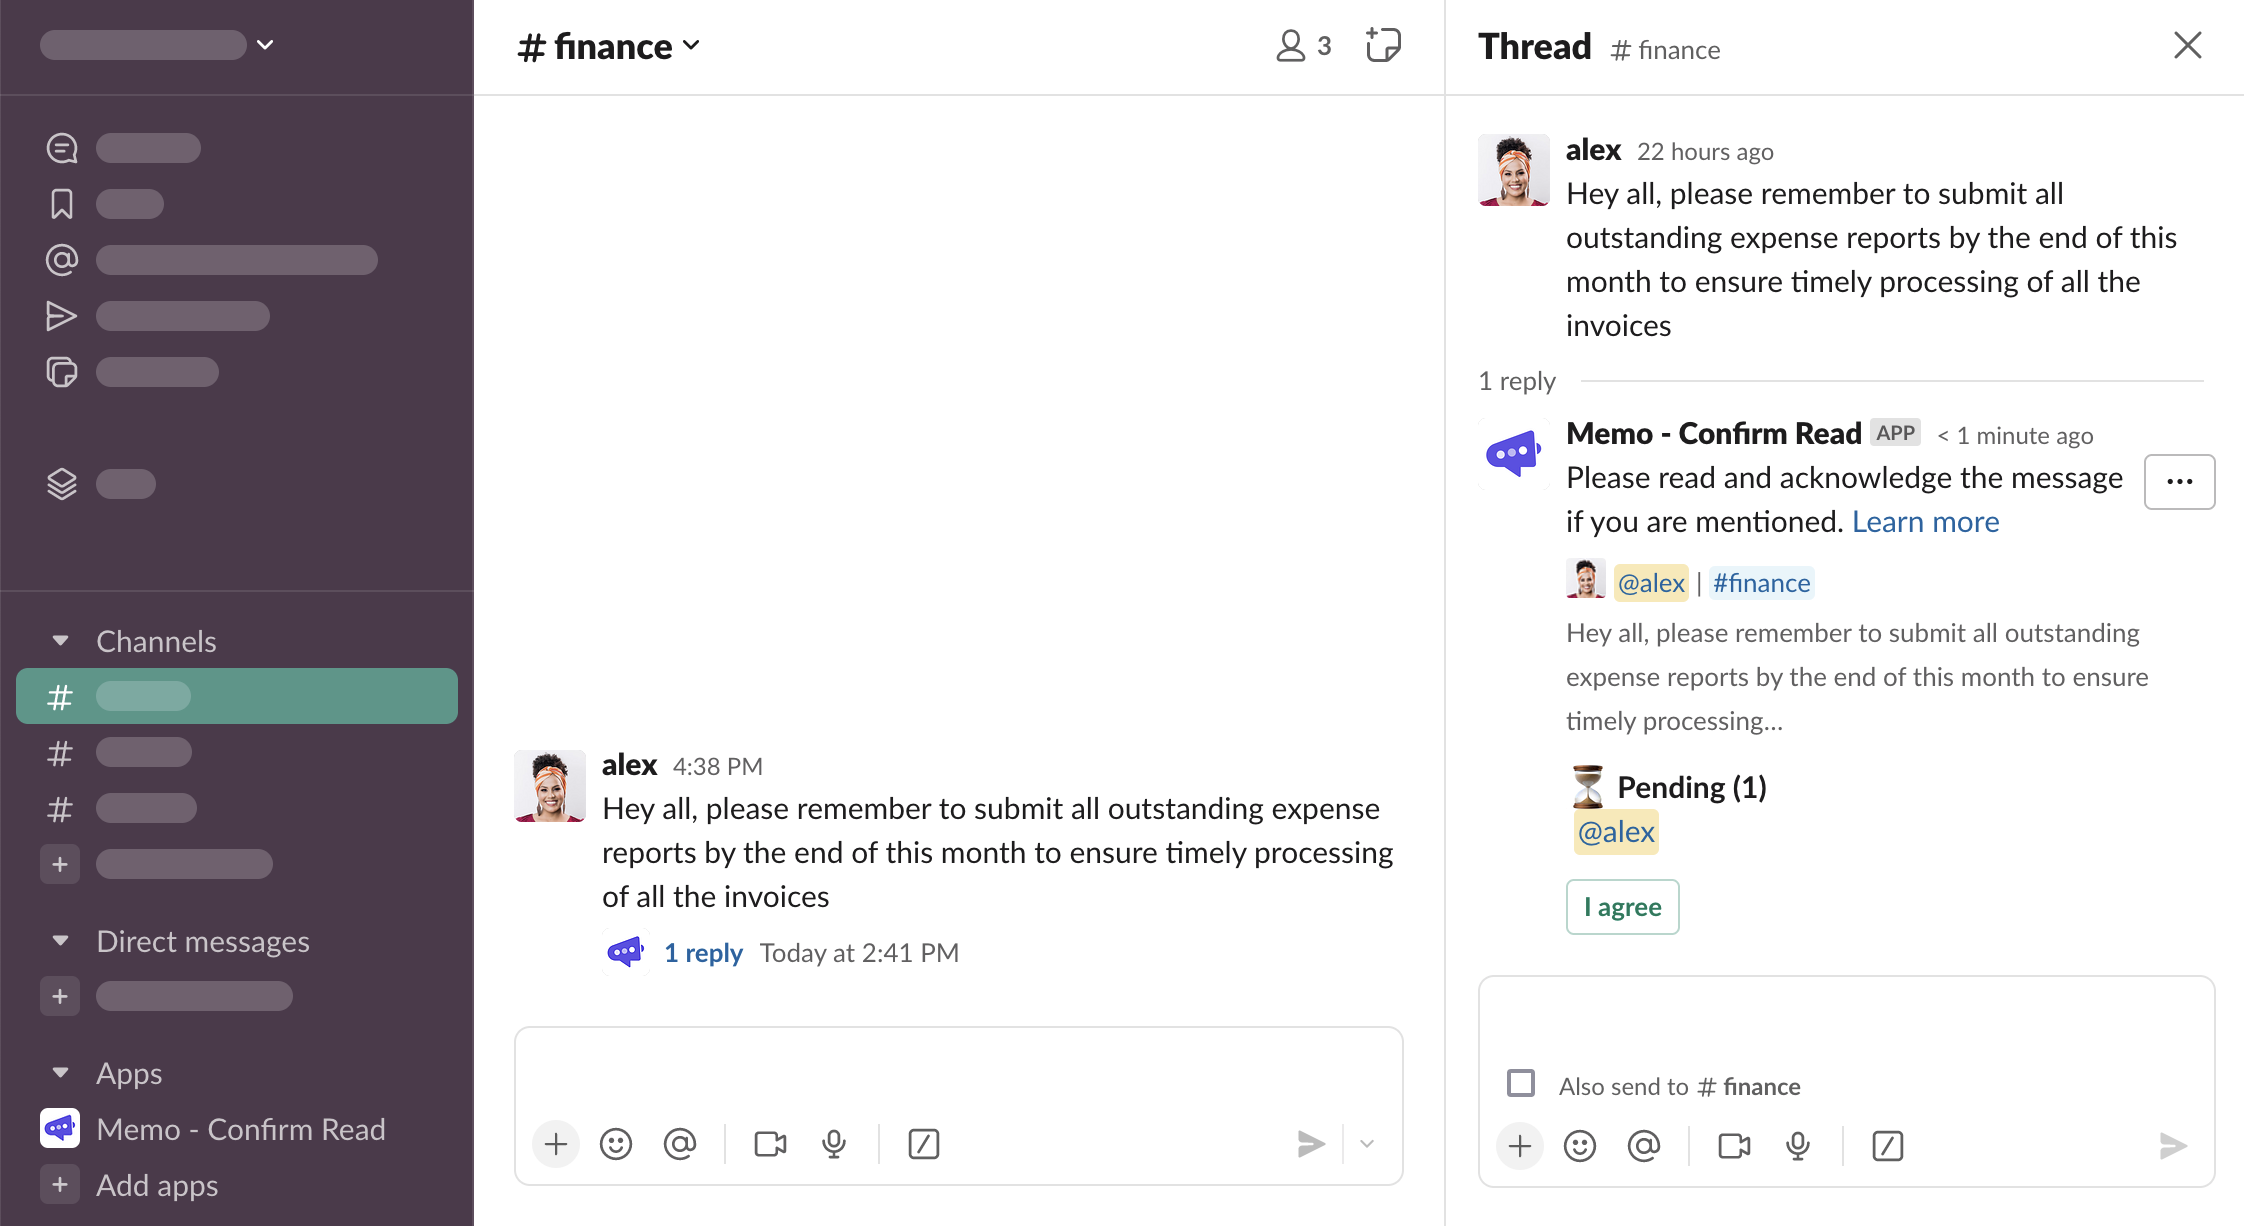
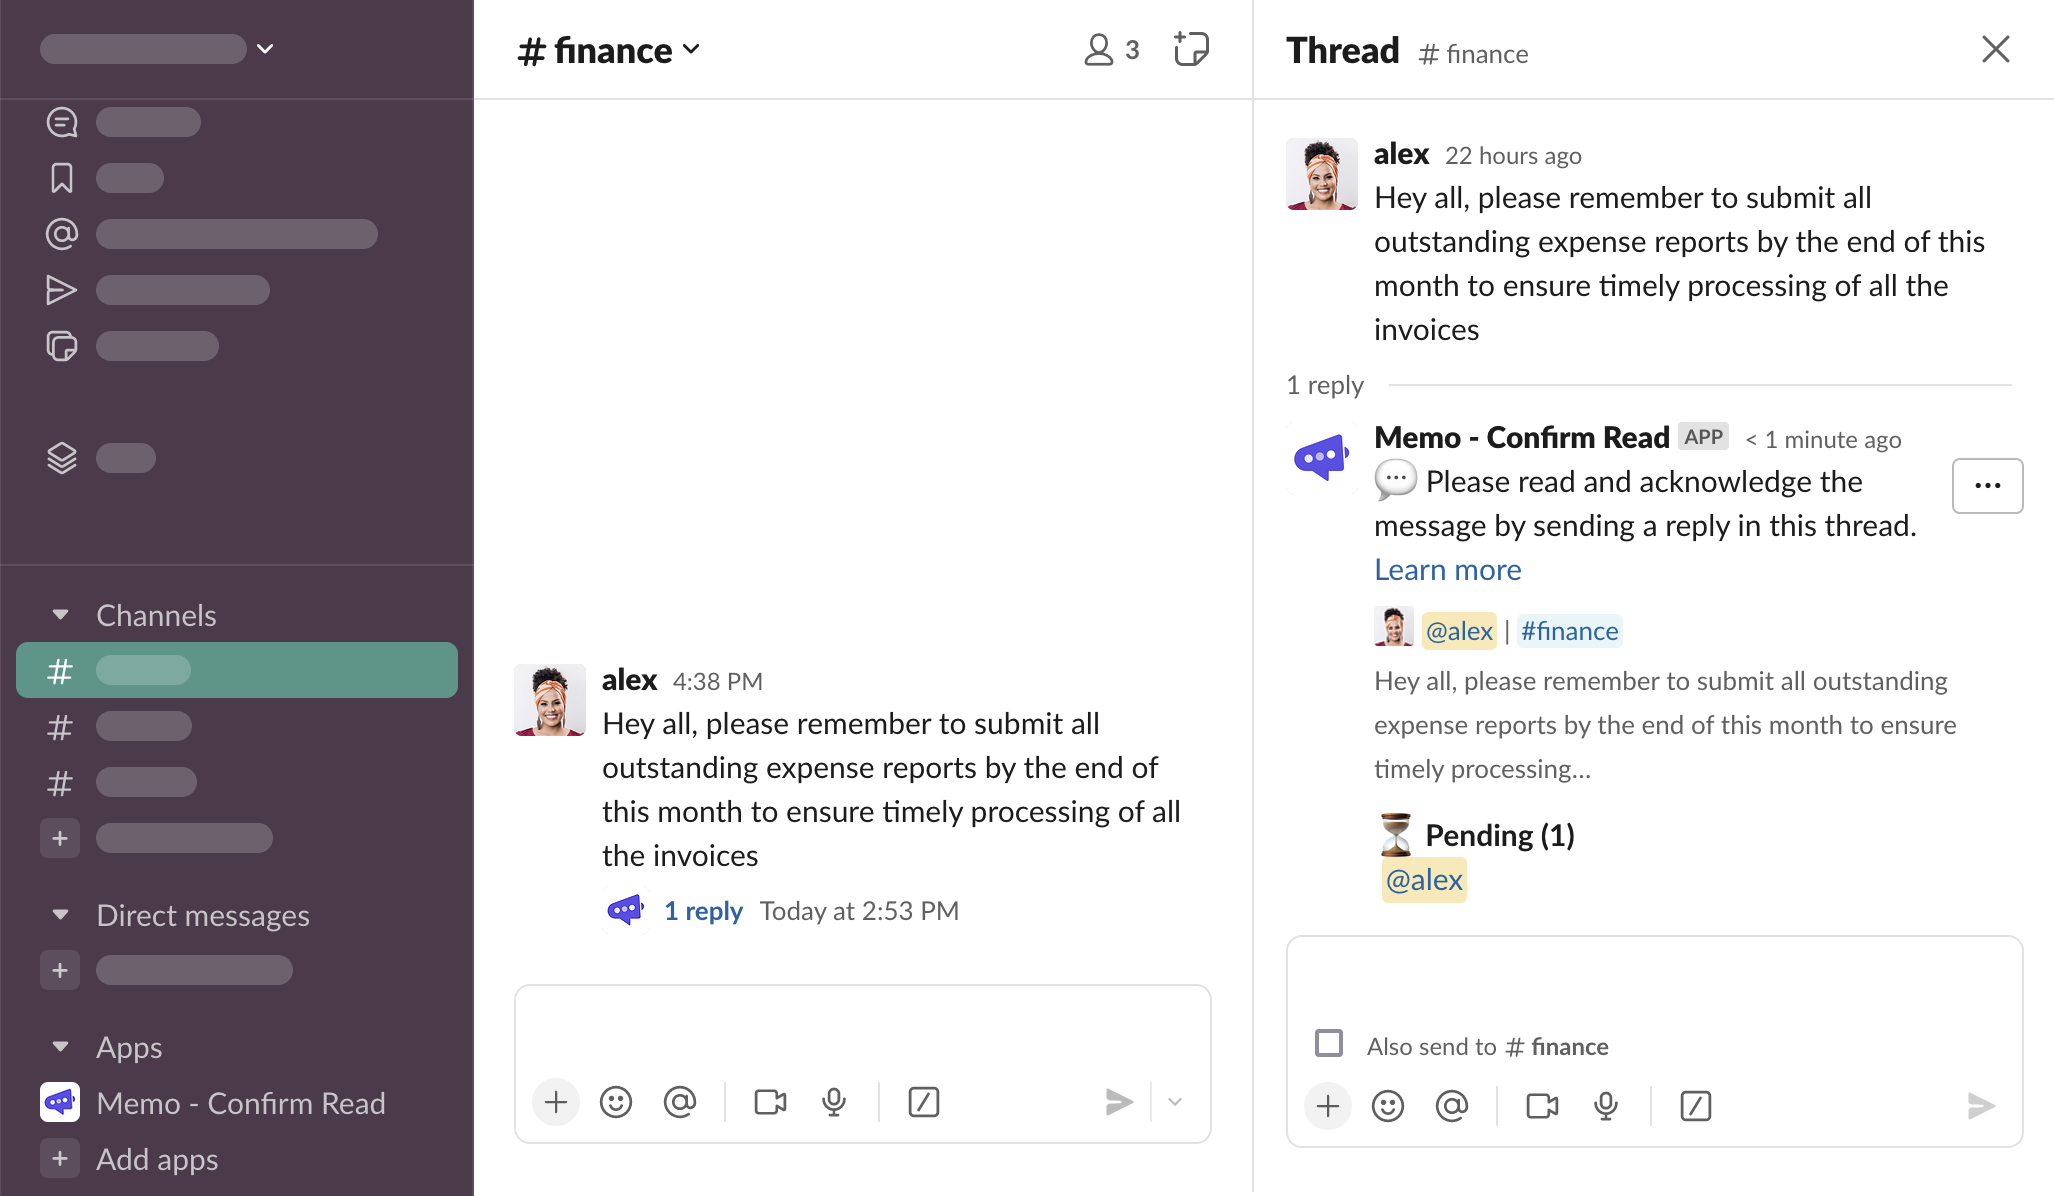
Two things will have happened. 1️⃣ Memo have sent an overview message in the thread under the message (”1 reply” under the message), and 2️⃣ all the users selected in the form have received a notification (”1” badge in the sidebar)
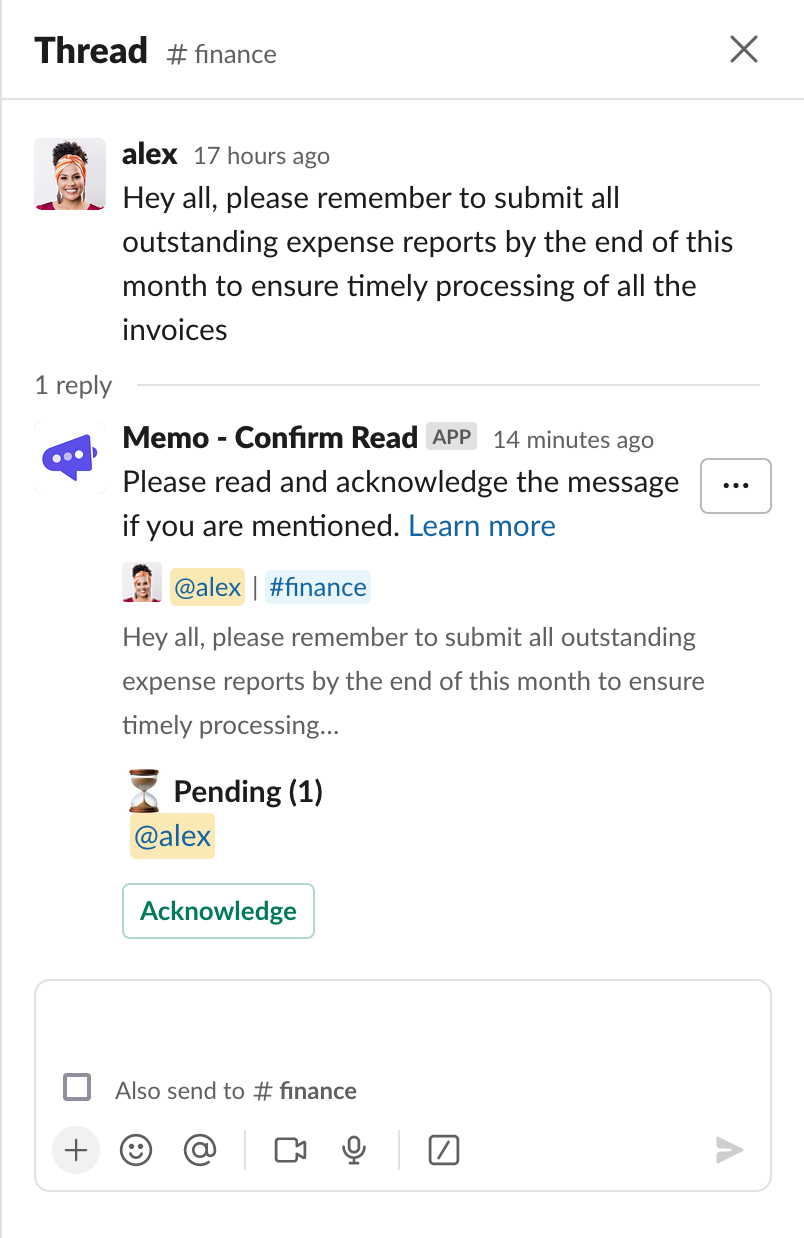
The overview thread message lists all the users who were asked to acknowledged and showcases an action needed to save the acknowledgement - in this case the “Acknowledge” button
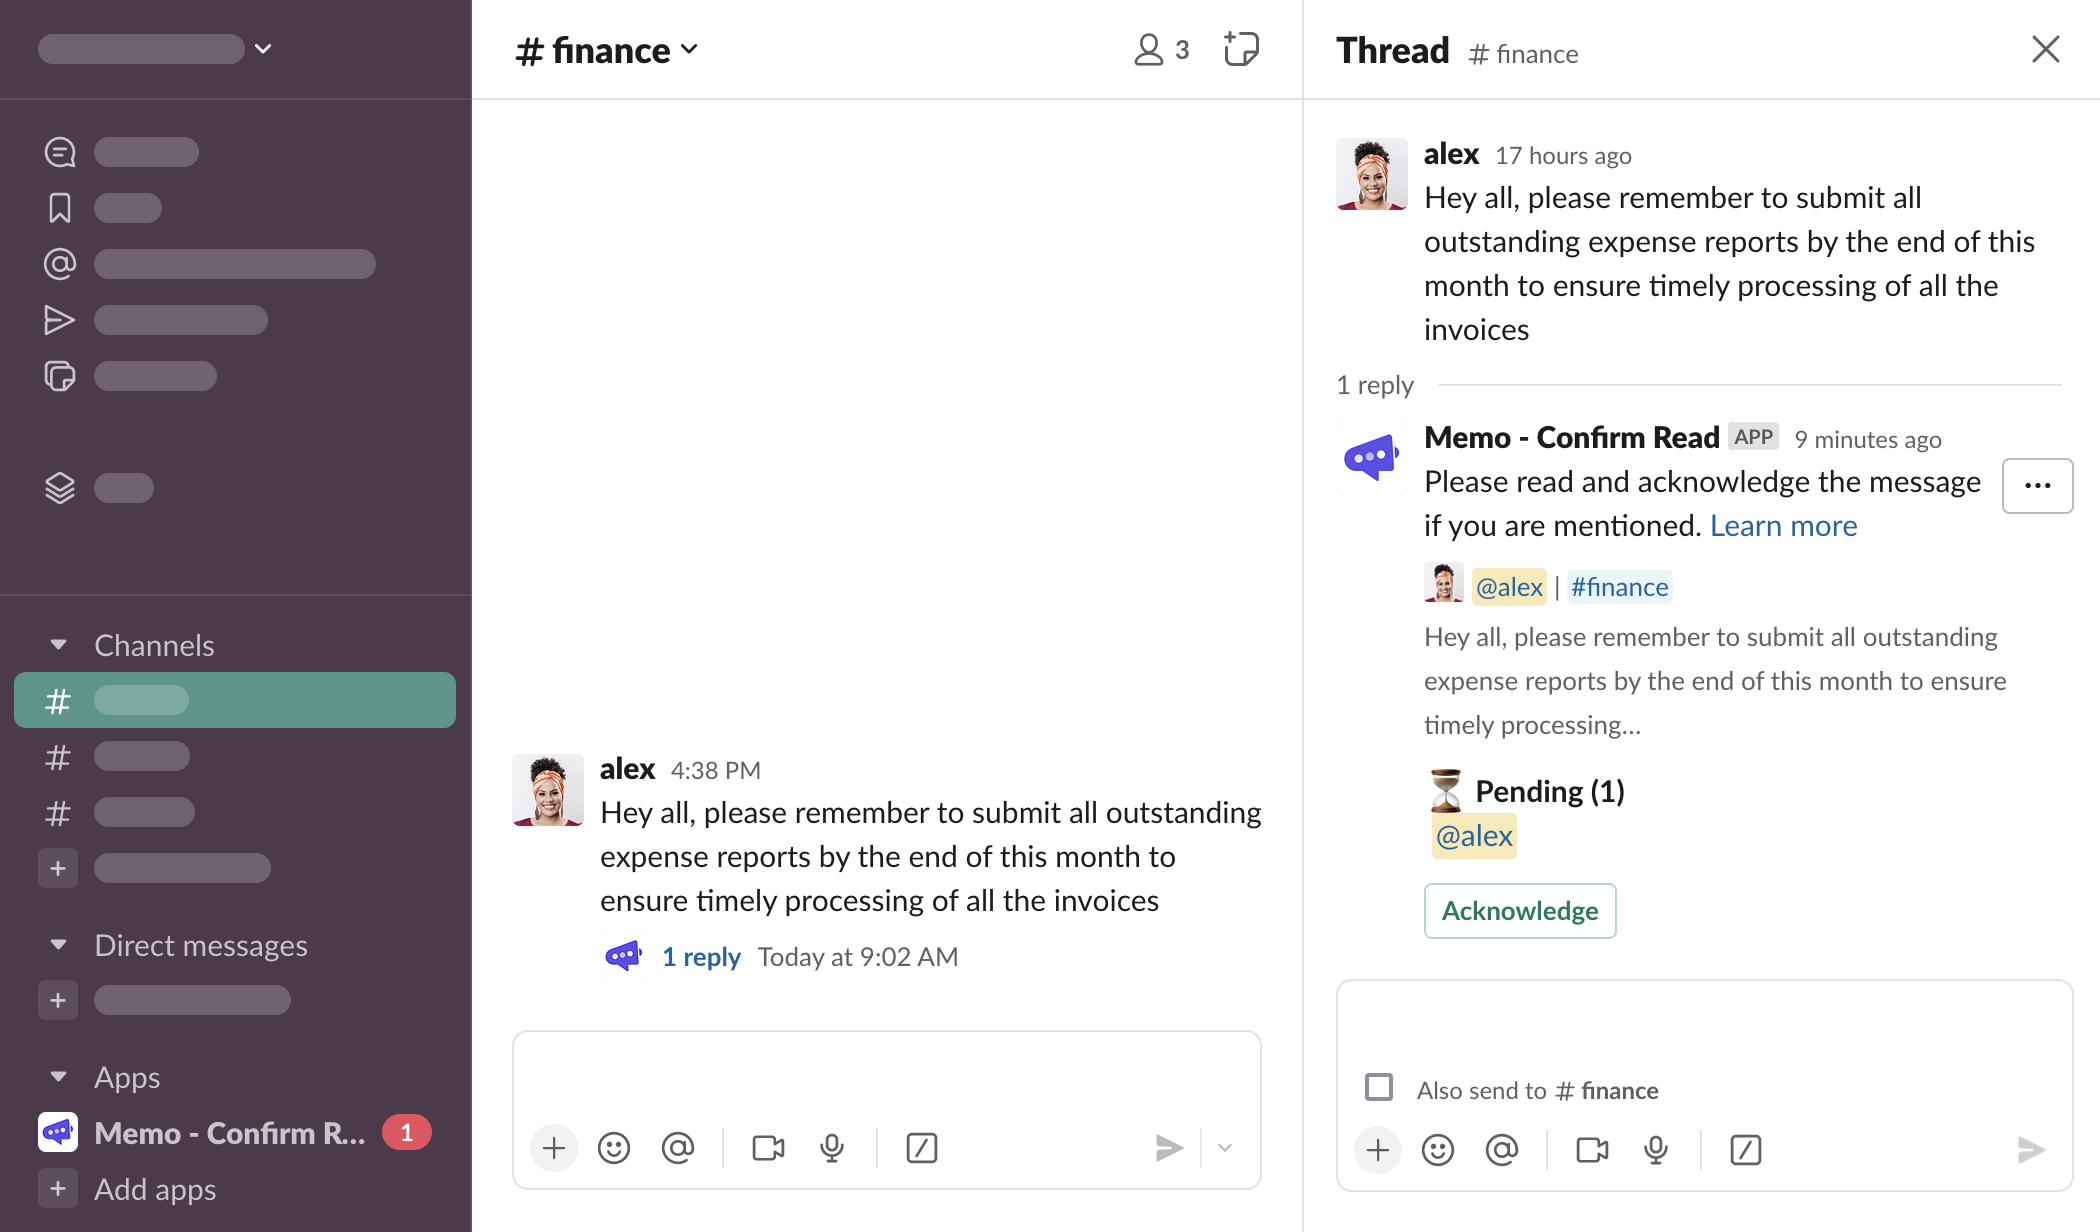
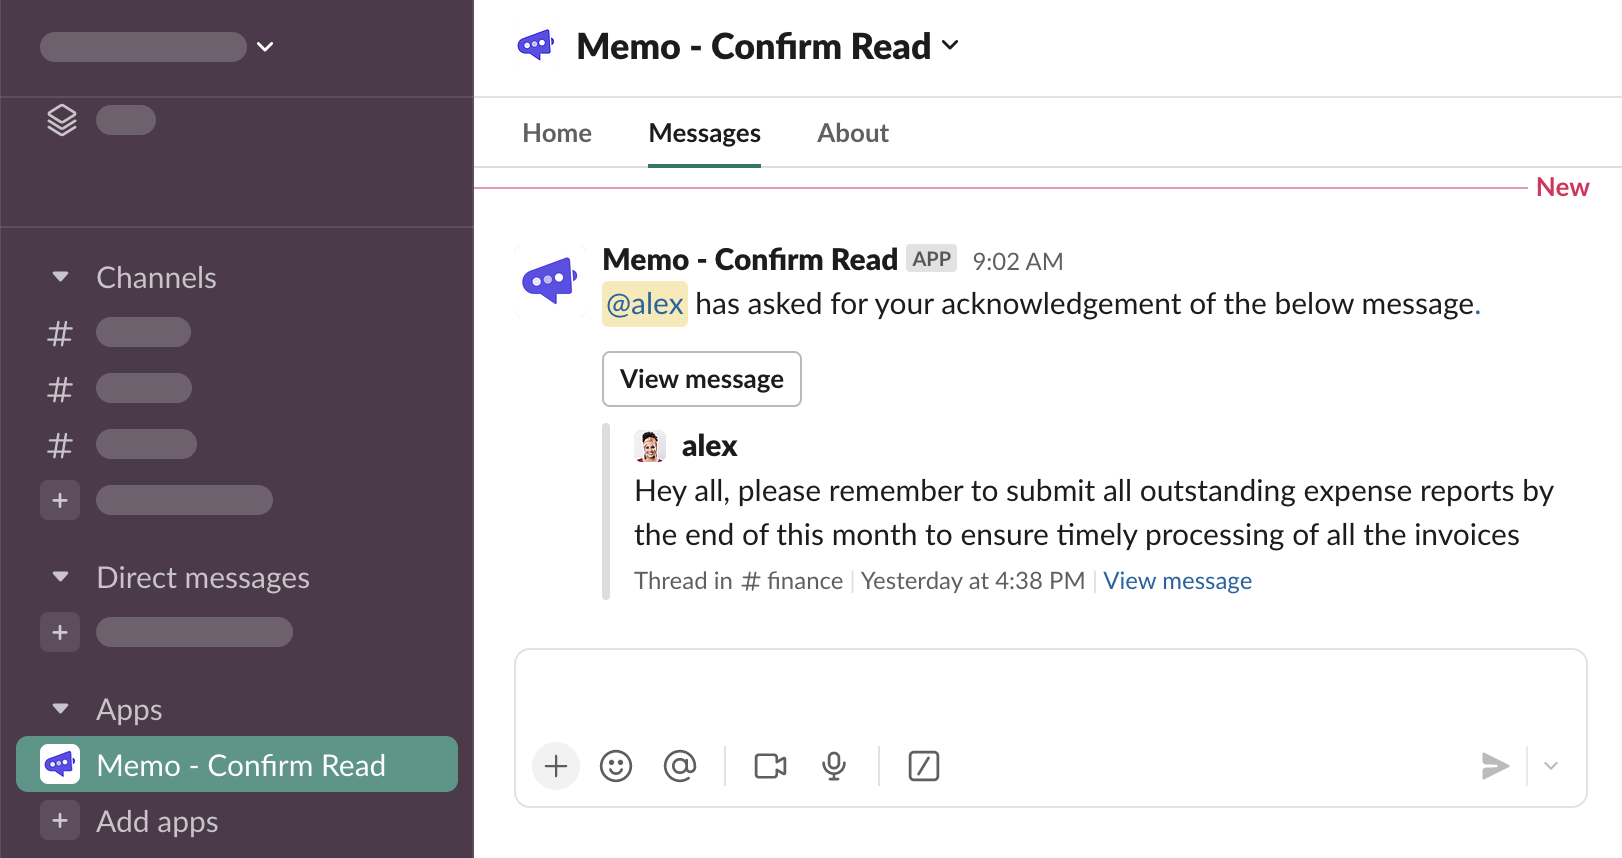
The DM notification informs about the request and has a button to take the user to the thread
Click the “Acknowledge” button in the overview thread message
Note that
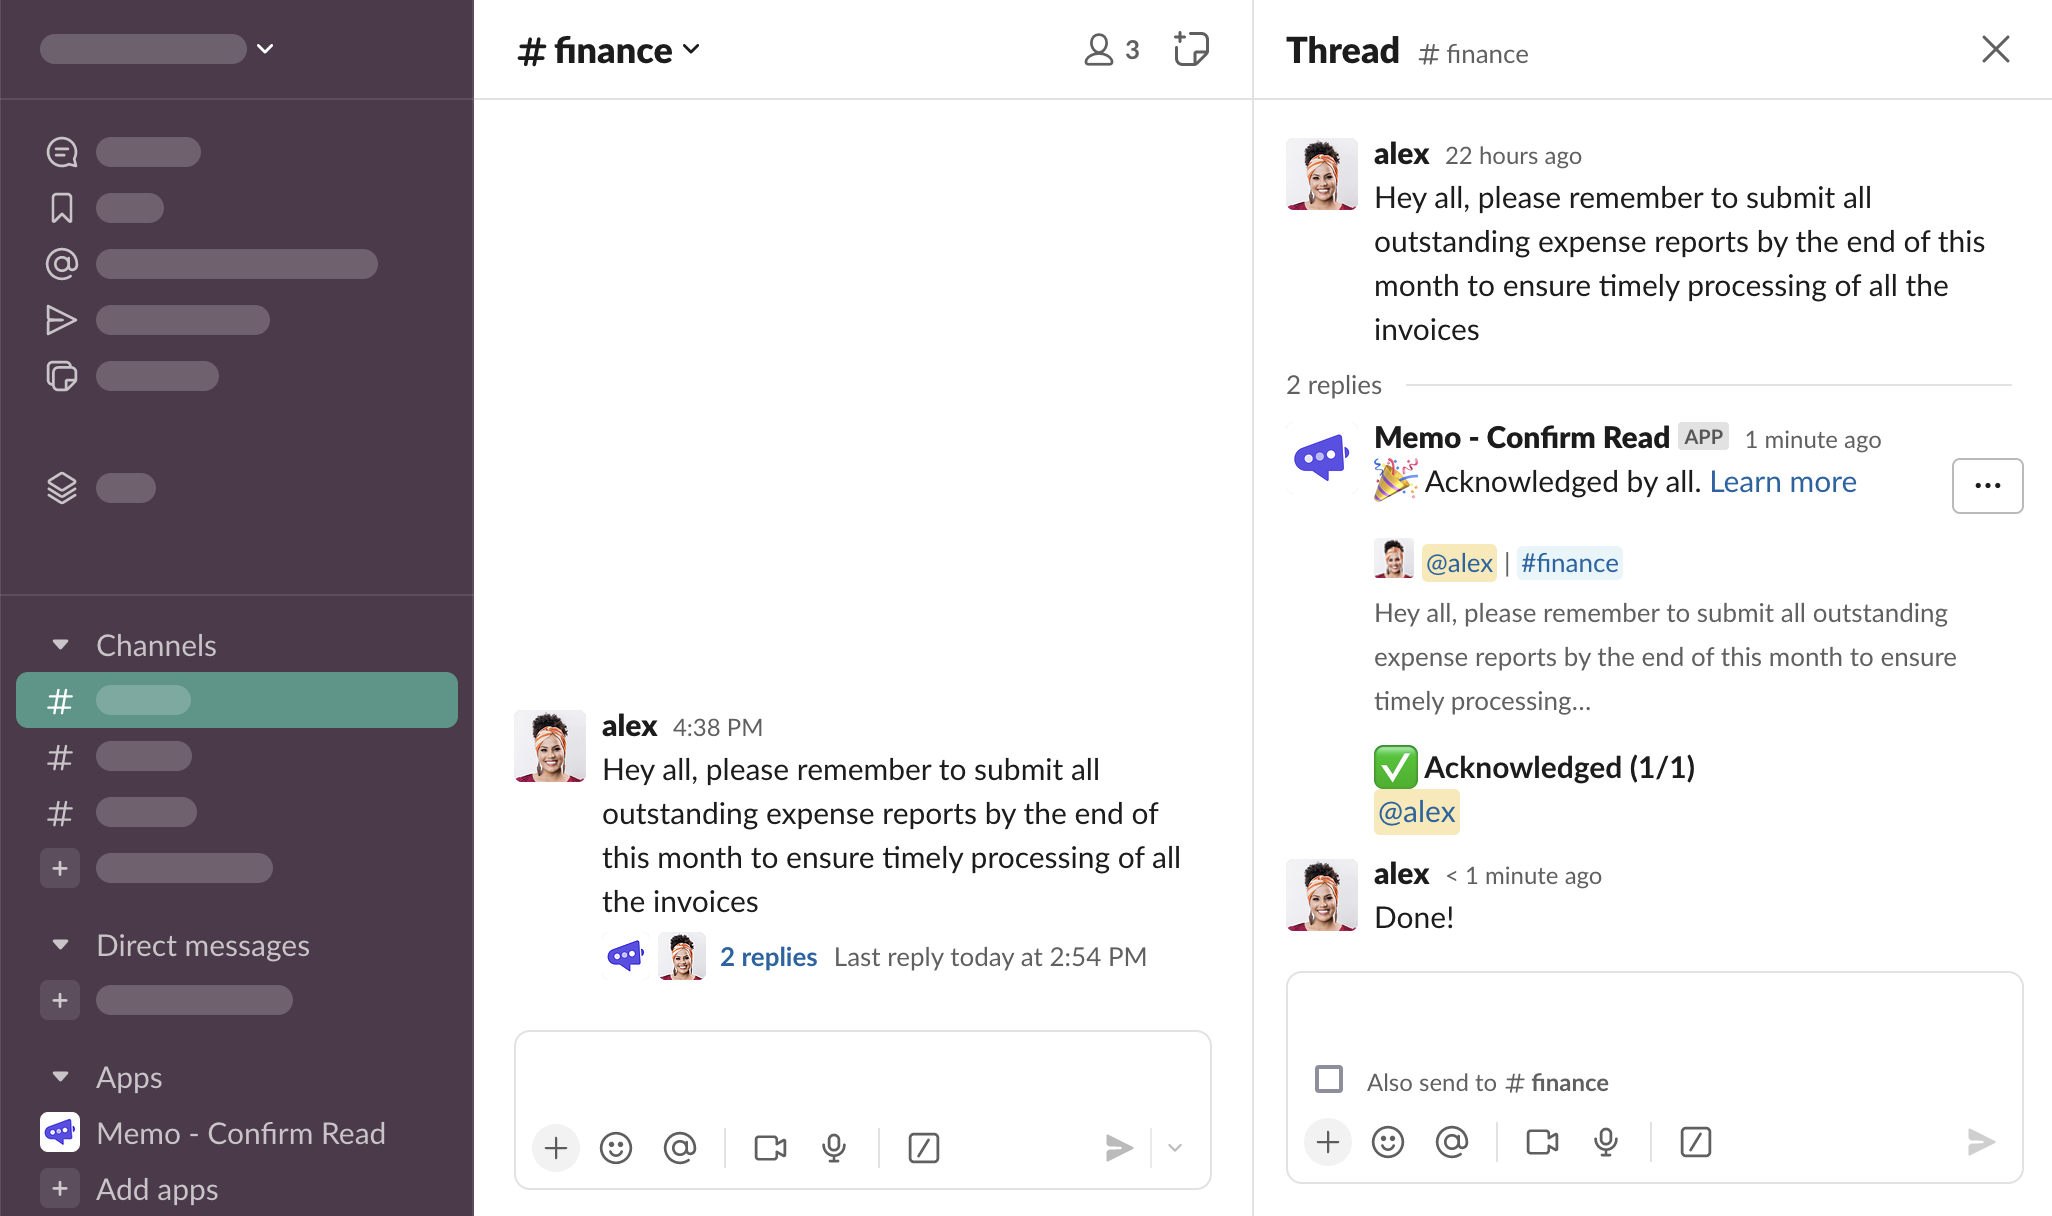
@alex's name is now under “✅ Acknowledged” section, the “⏳ Pending” section disappeared, as did the “Acknowledge” button - as all the users have successfully acknowledged the message.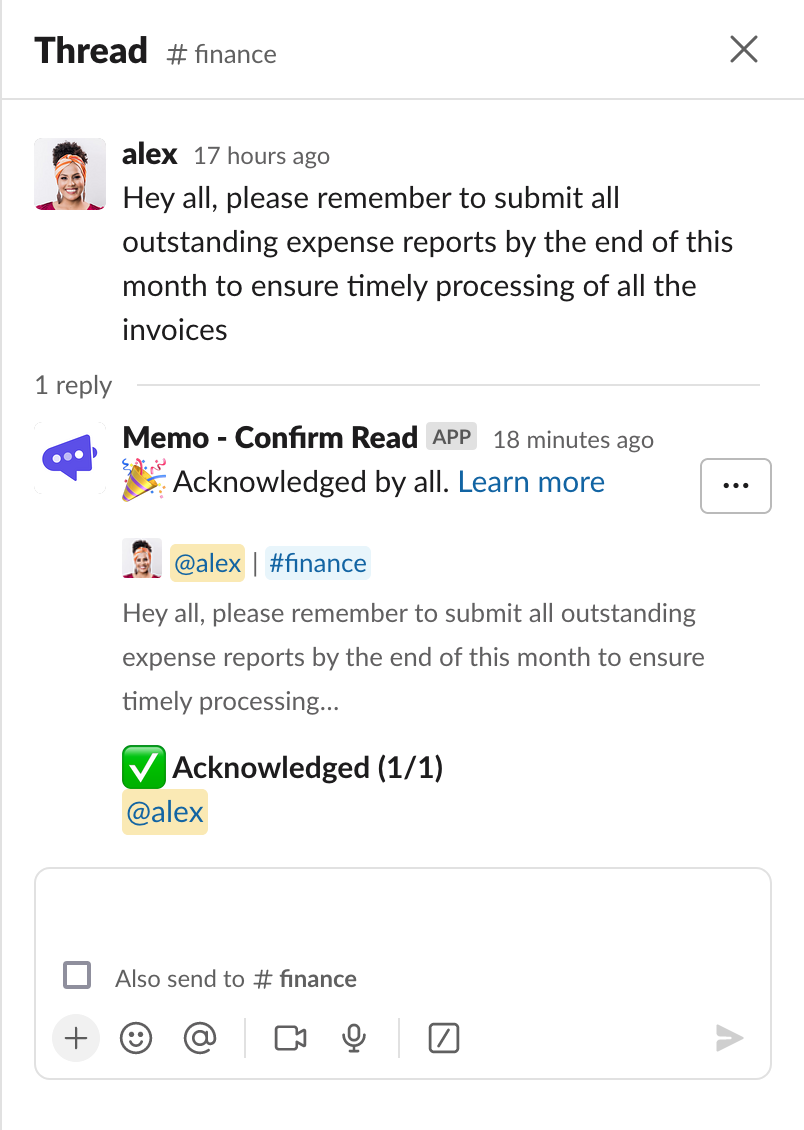
Acknowledgement types
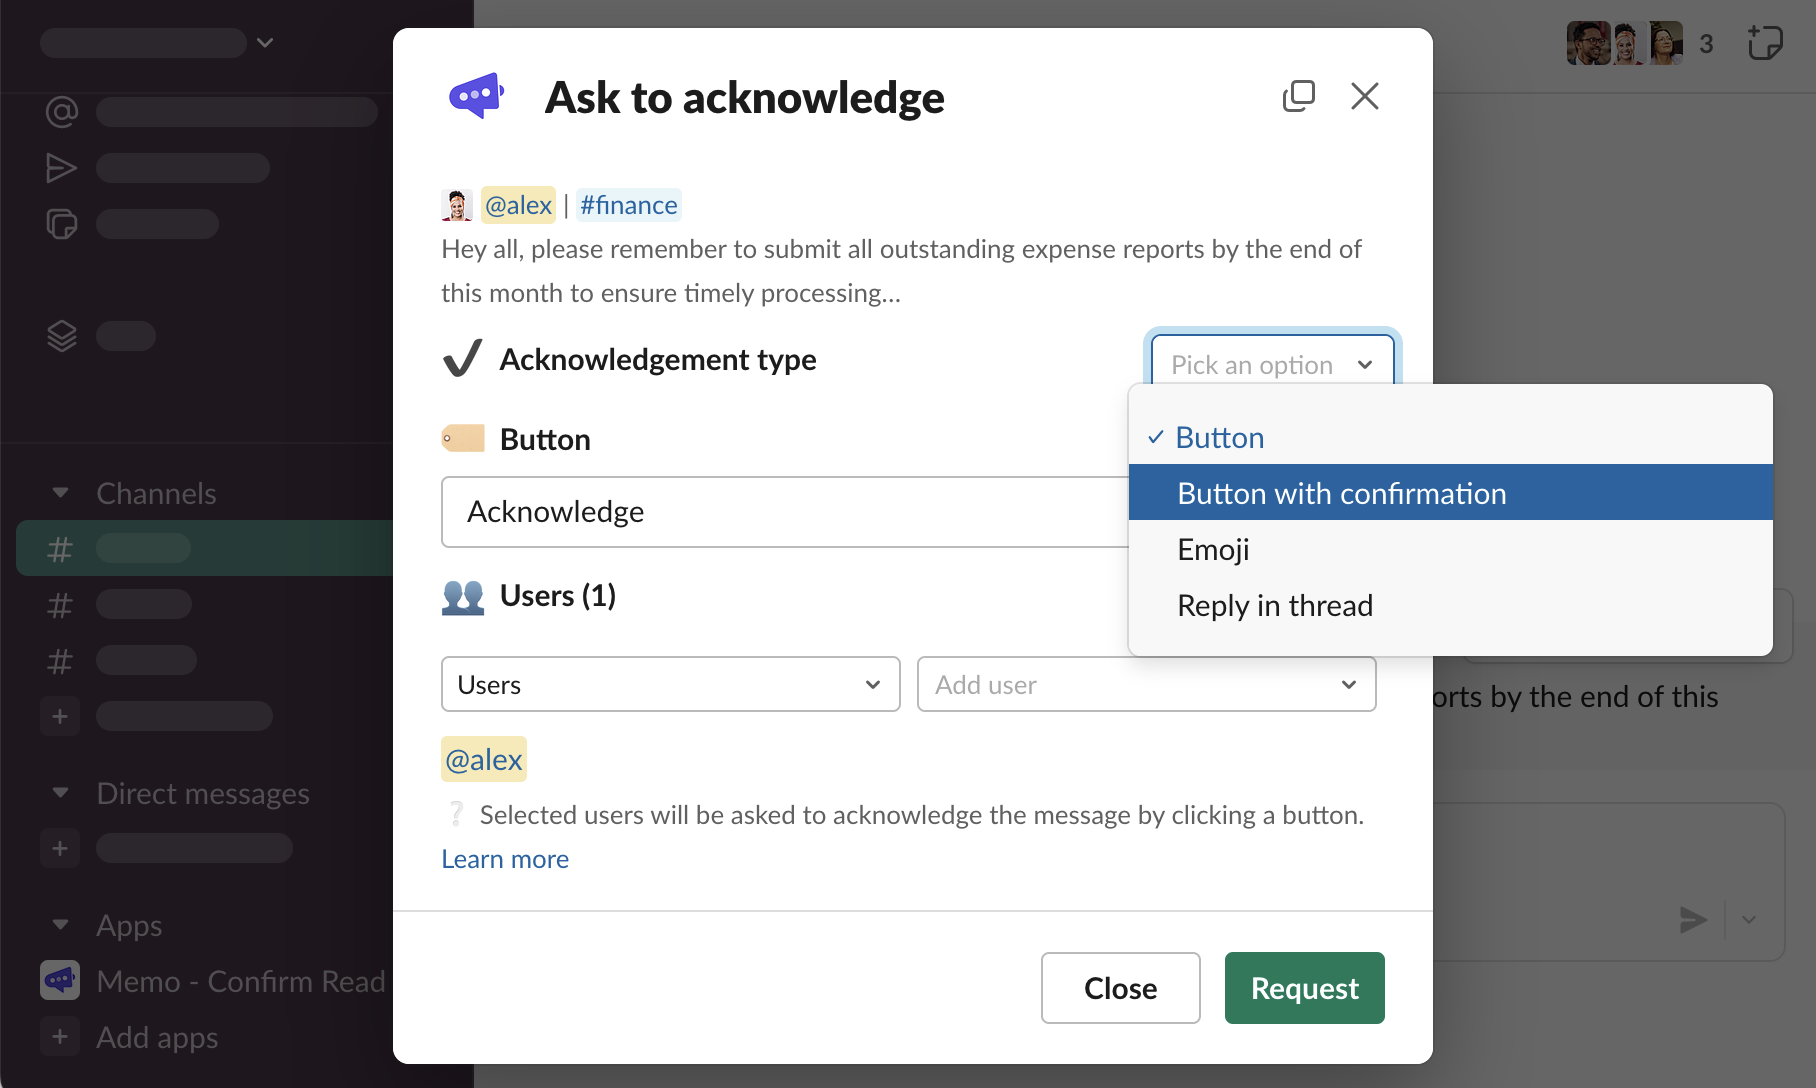
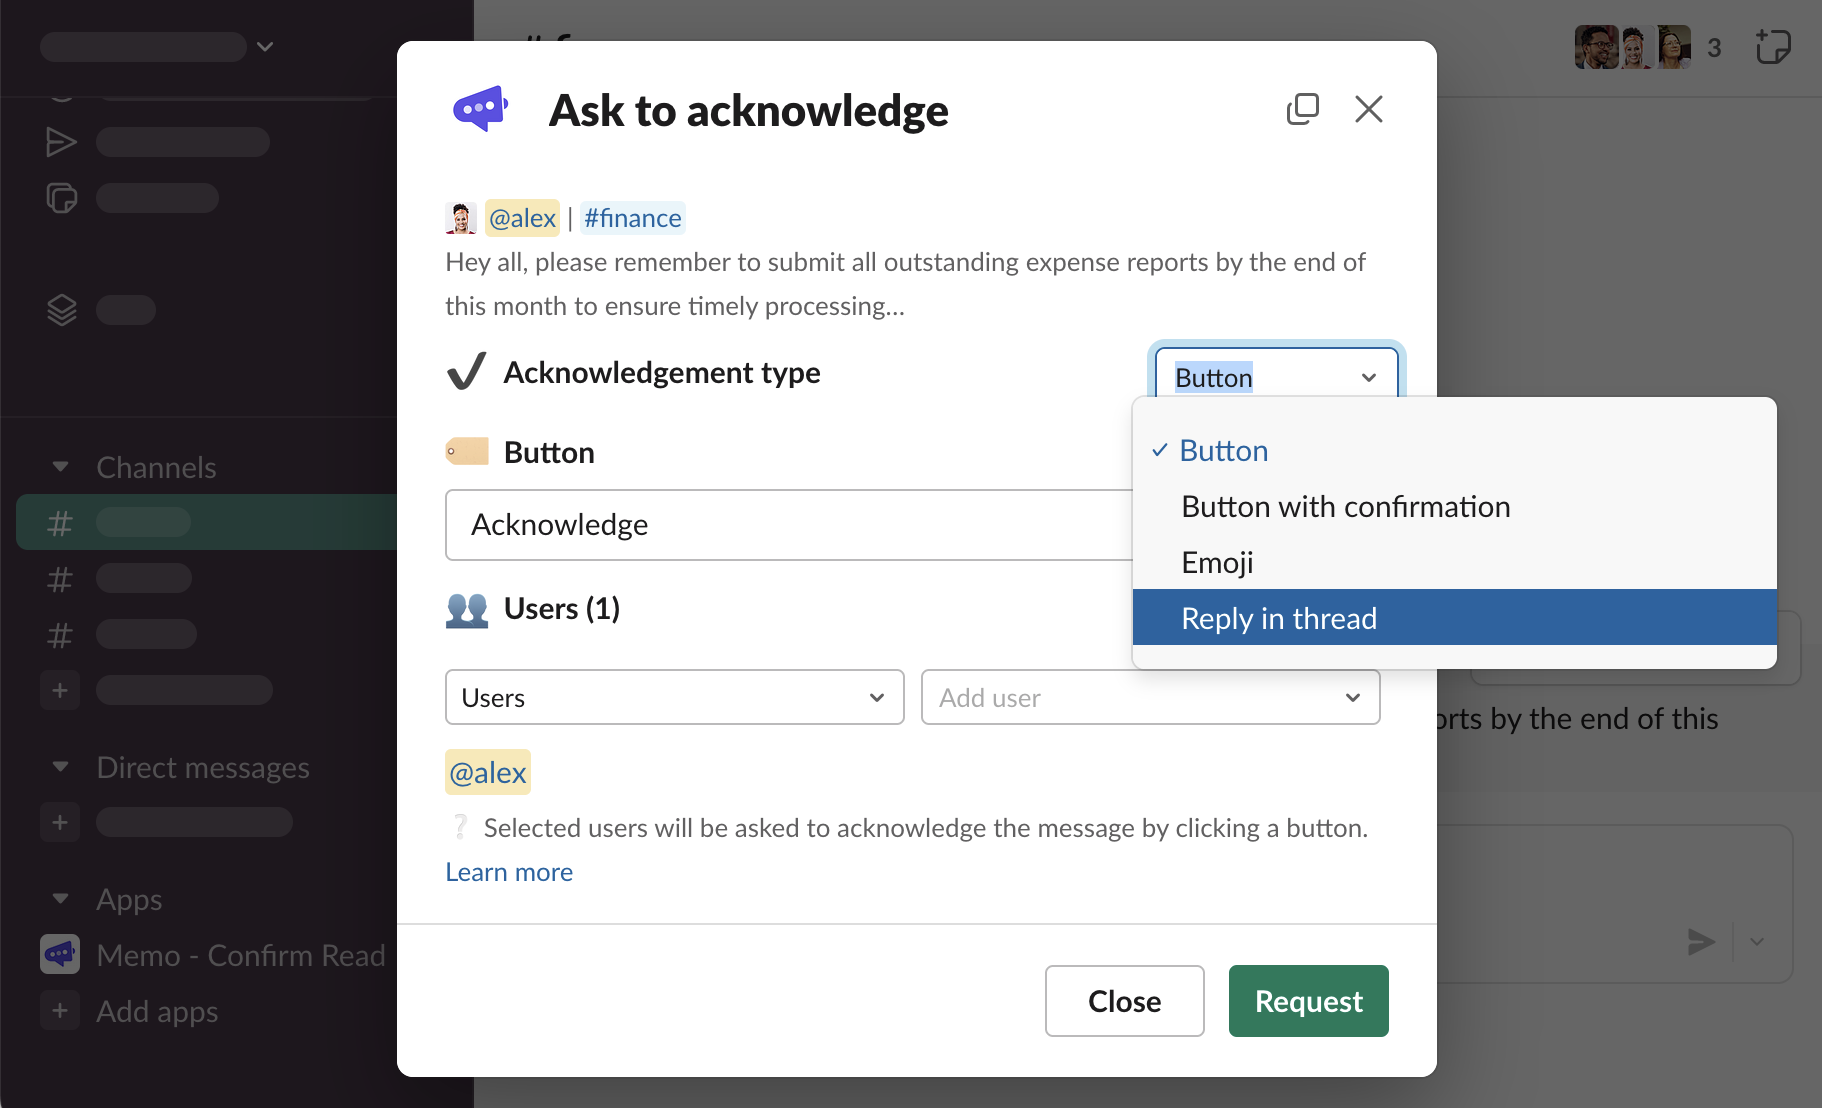
When configuring the request, one of the four acknowledgement types can be configured. All these types have different flow the requestees must follow to save the acknowledgement.
Button
Button is the default type and the easiest one to explain and to follow
Button label can be configured, change the text under “🏷️ Button” label to something else and click “Request”
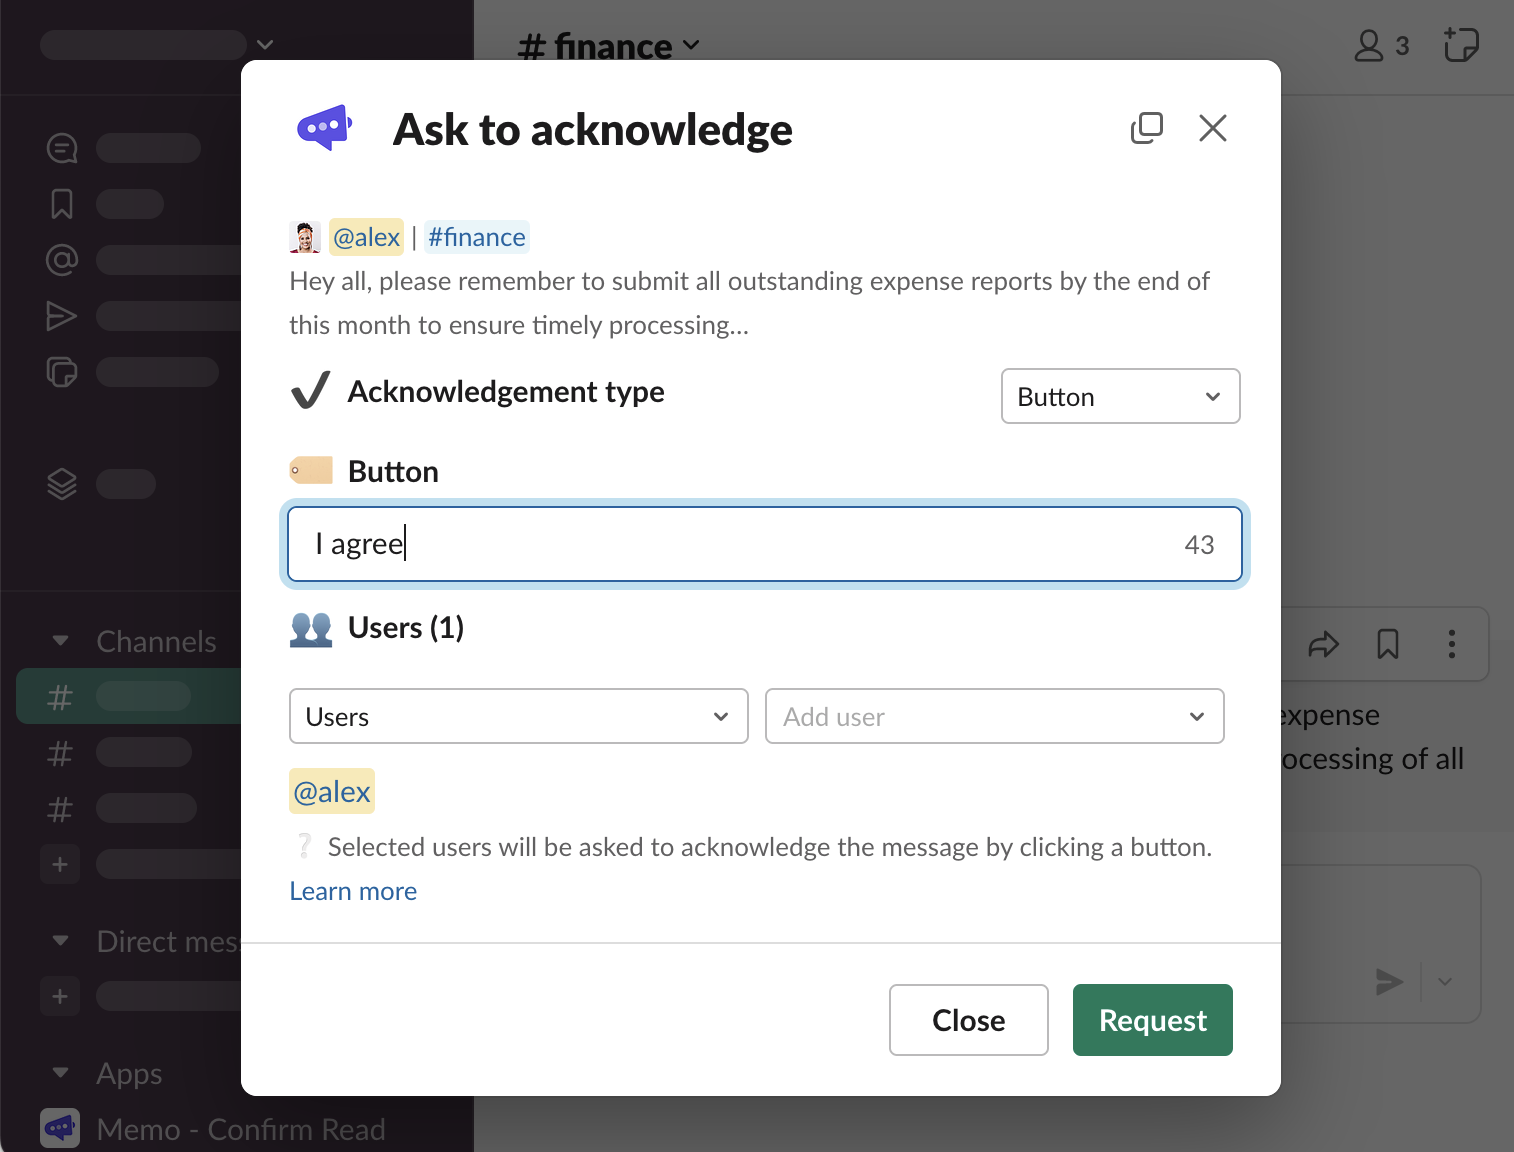
You can see that the button now says “I agree”, instead of the default “Acknowledge”. Once clicked, it will save the acknowledgement.
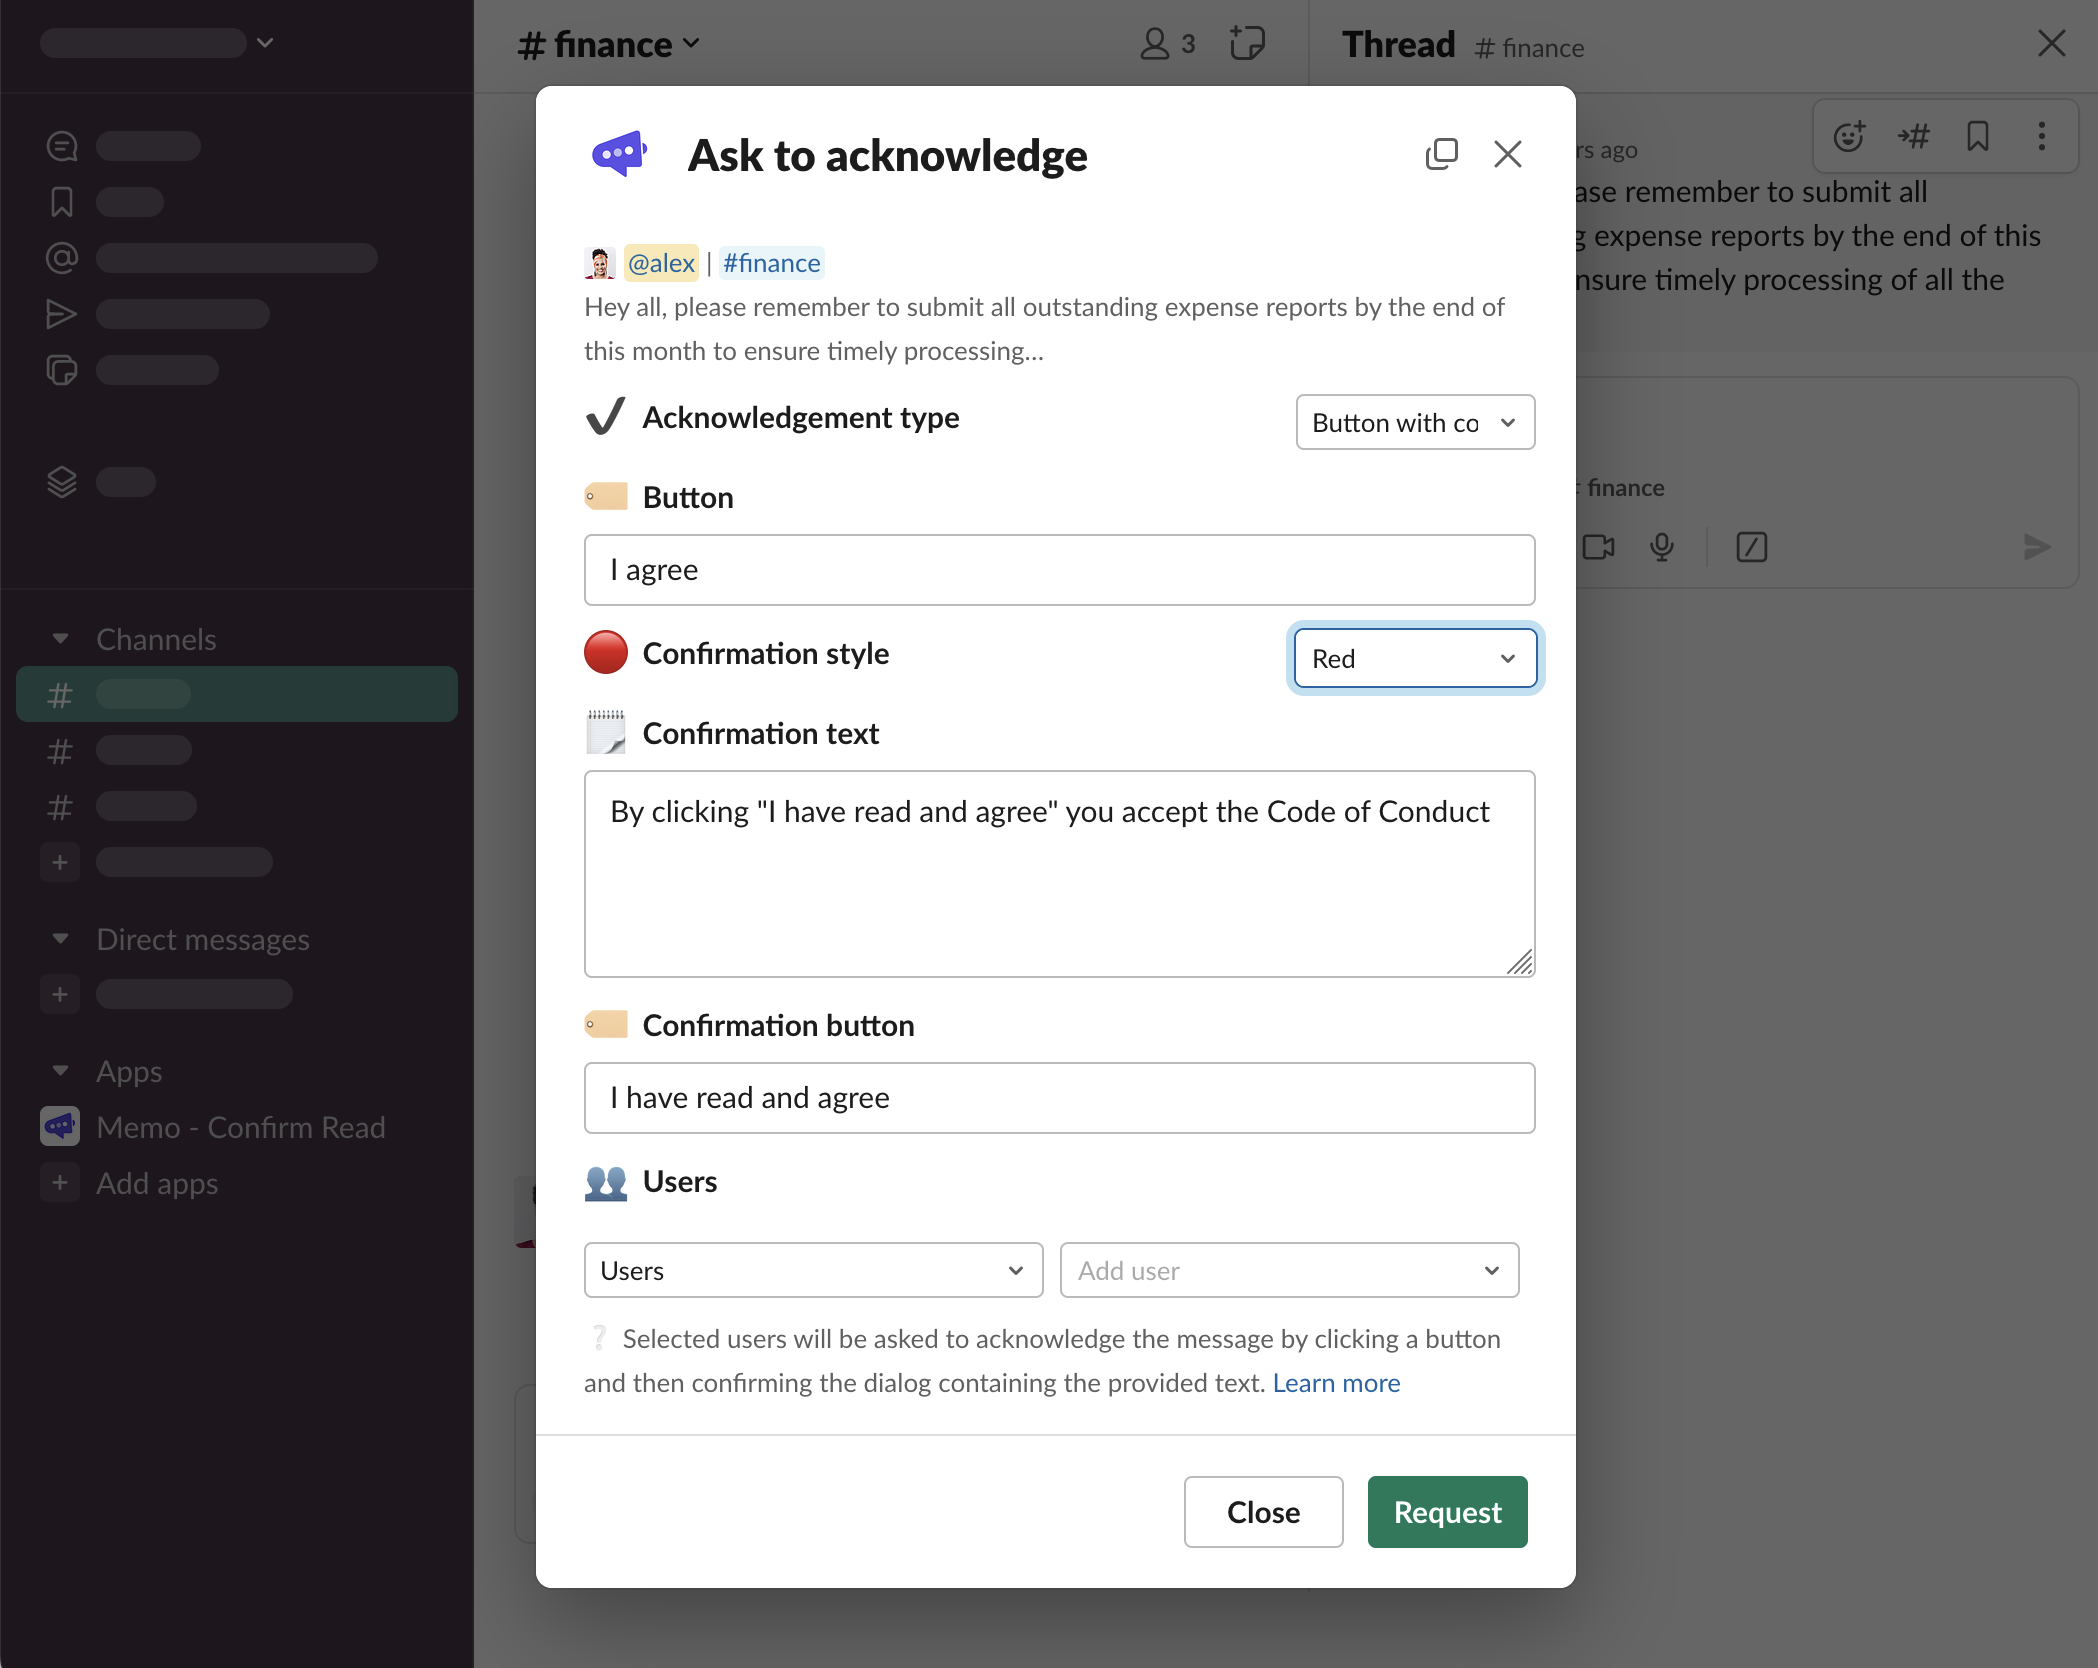
Button with confirmation
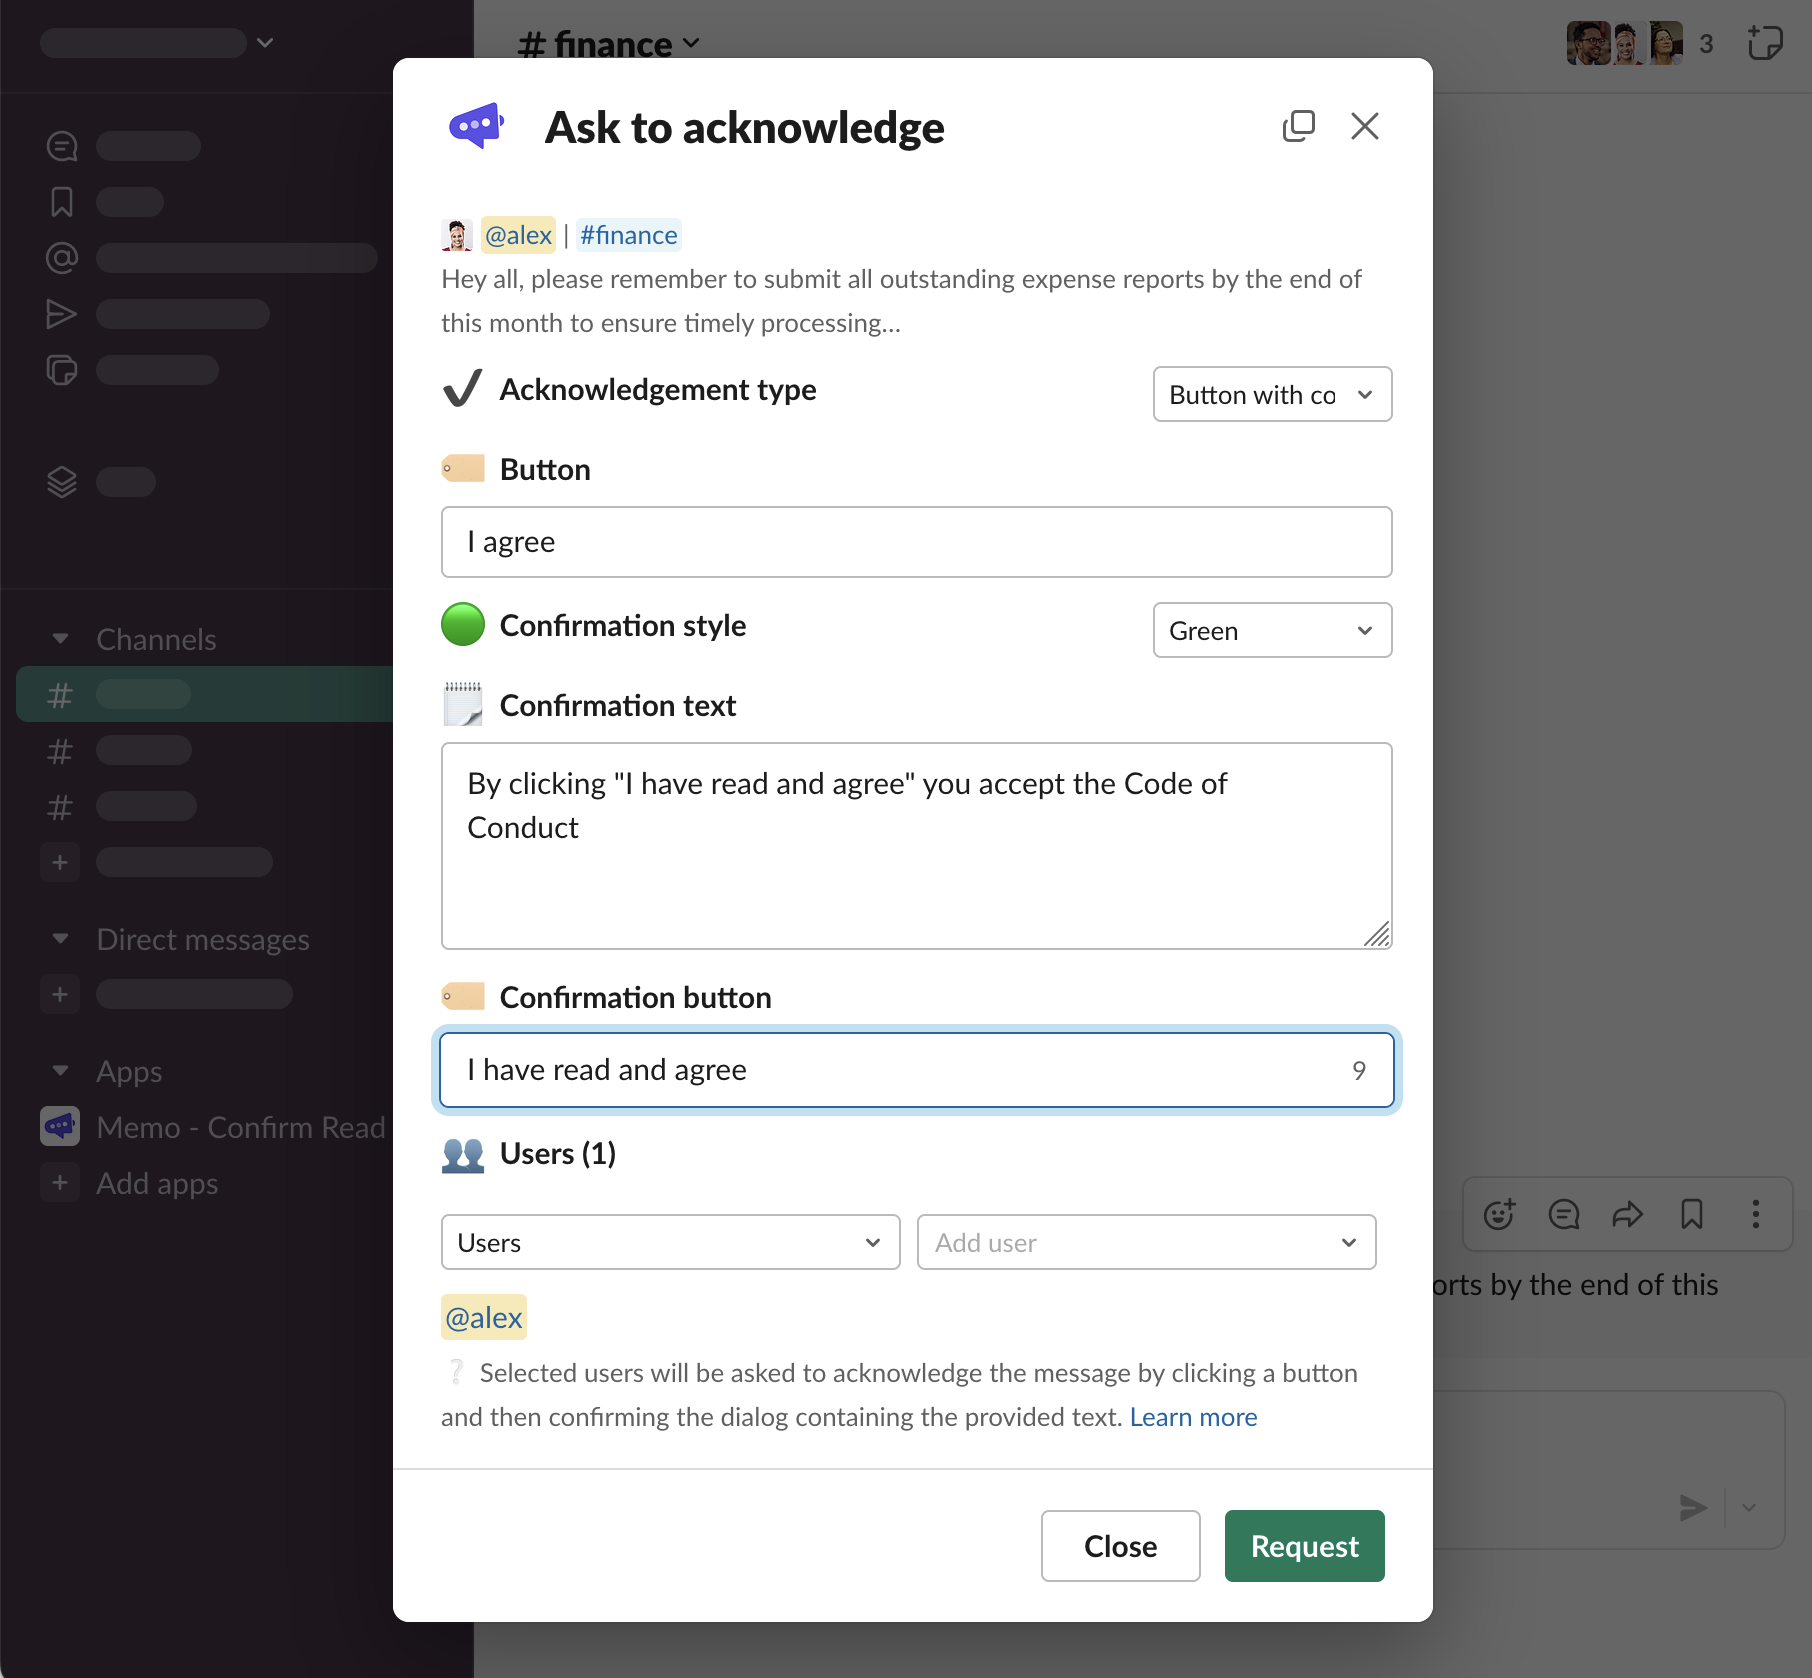
Select “Button with confirmation” acknowledgement type
You will see additional fields that can be configured:
Confirmation style,
Confirmation text,
Confirmation button
Fill these in and click “Request”
The button in the overview thread message looks the same, as if it were a “Button” acknowledgement type
Click “I agree” and see the additional confirmation dialog. Unless the “I have read and agree” button is clicked, the acknowledgement will not be saved.
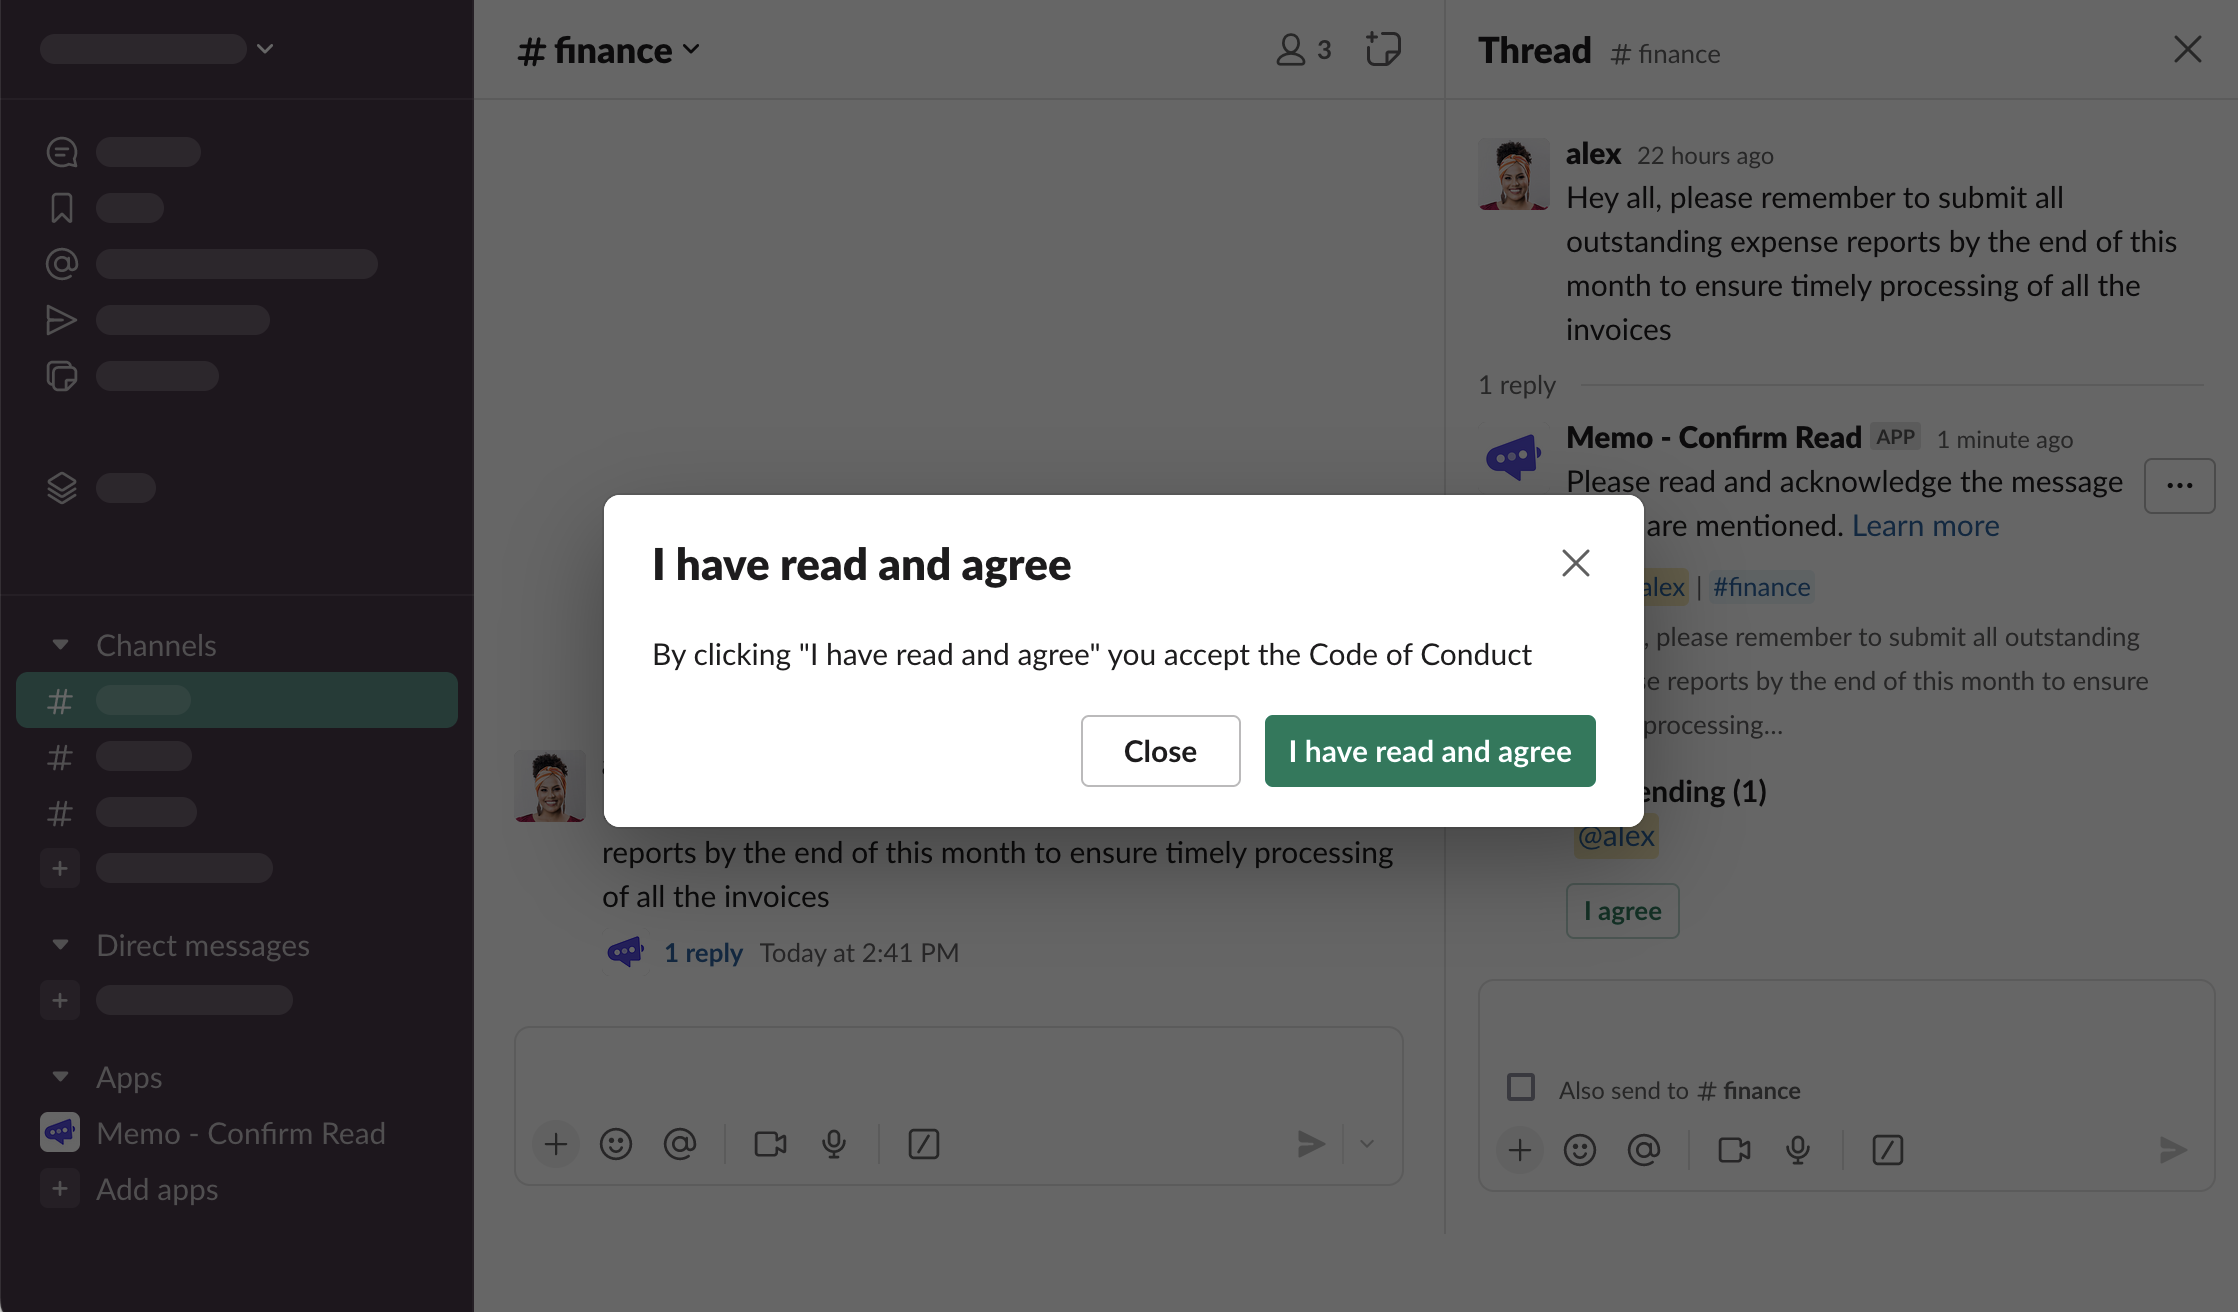
“Confirmation style Red” will show the same dialog, but with the red button, instead of green.
.png)
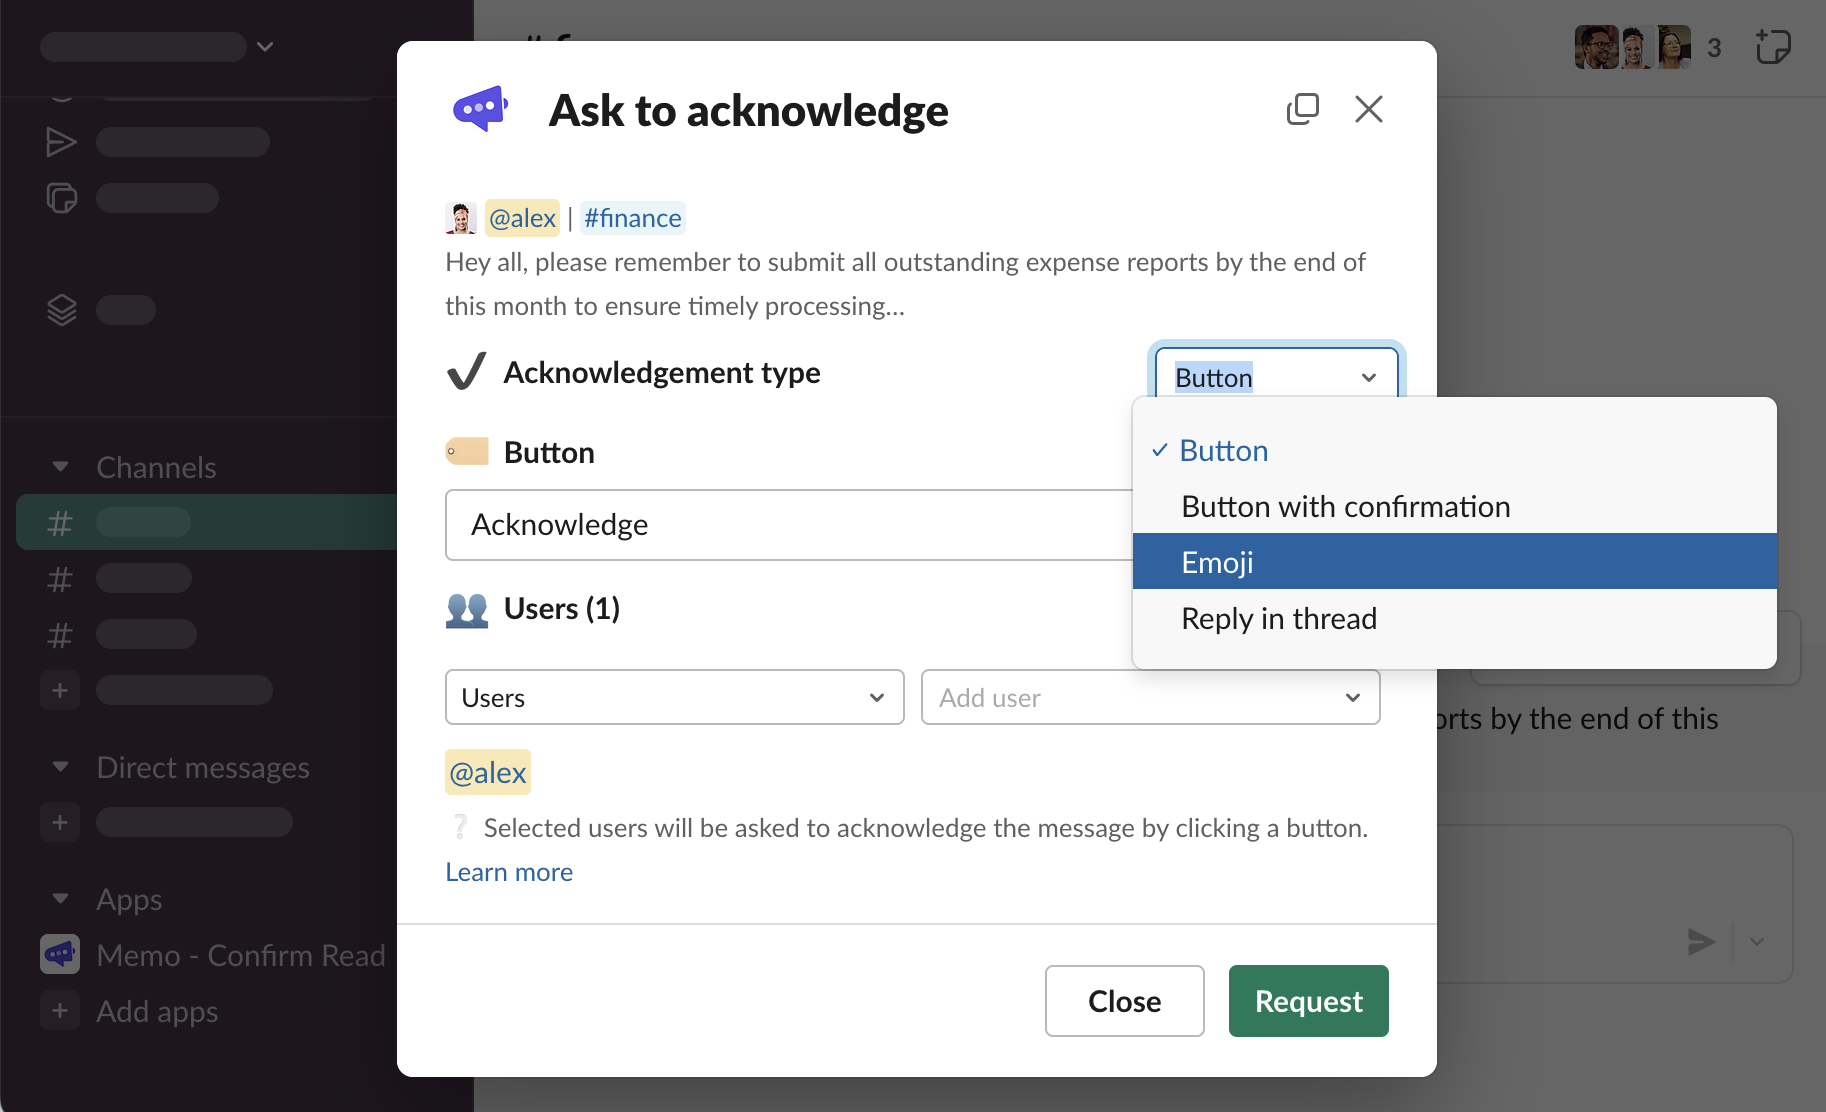
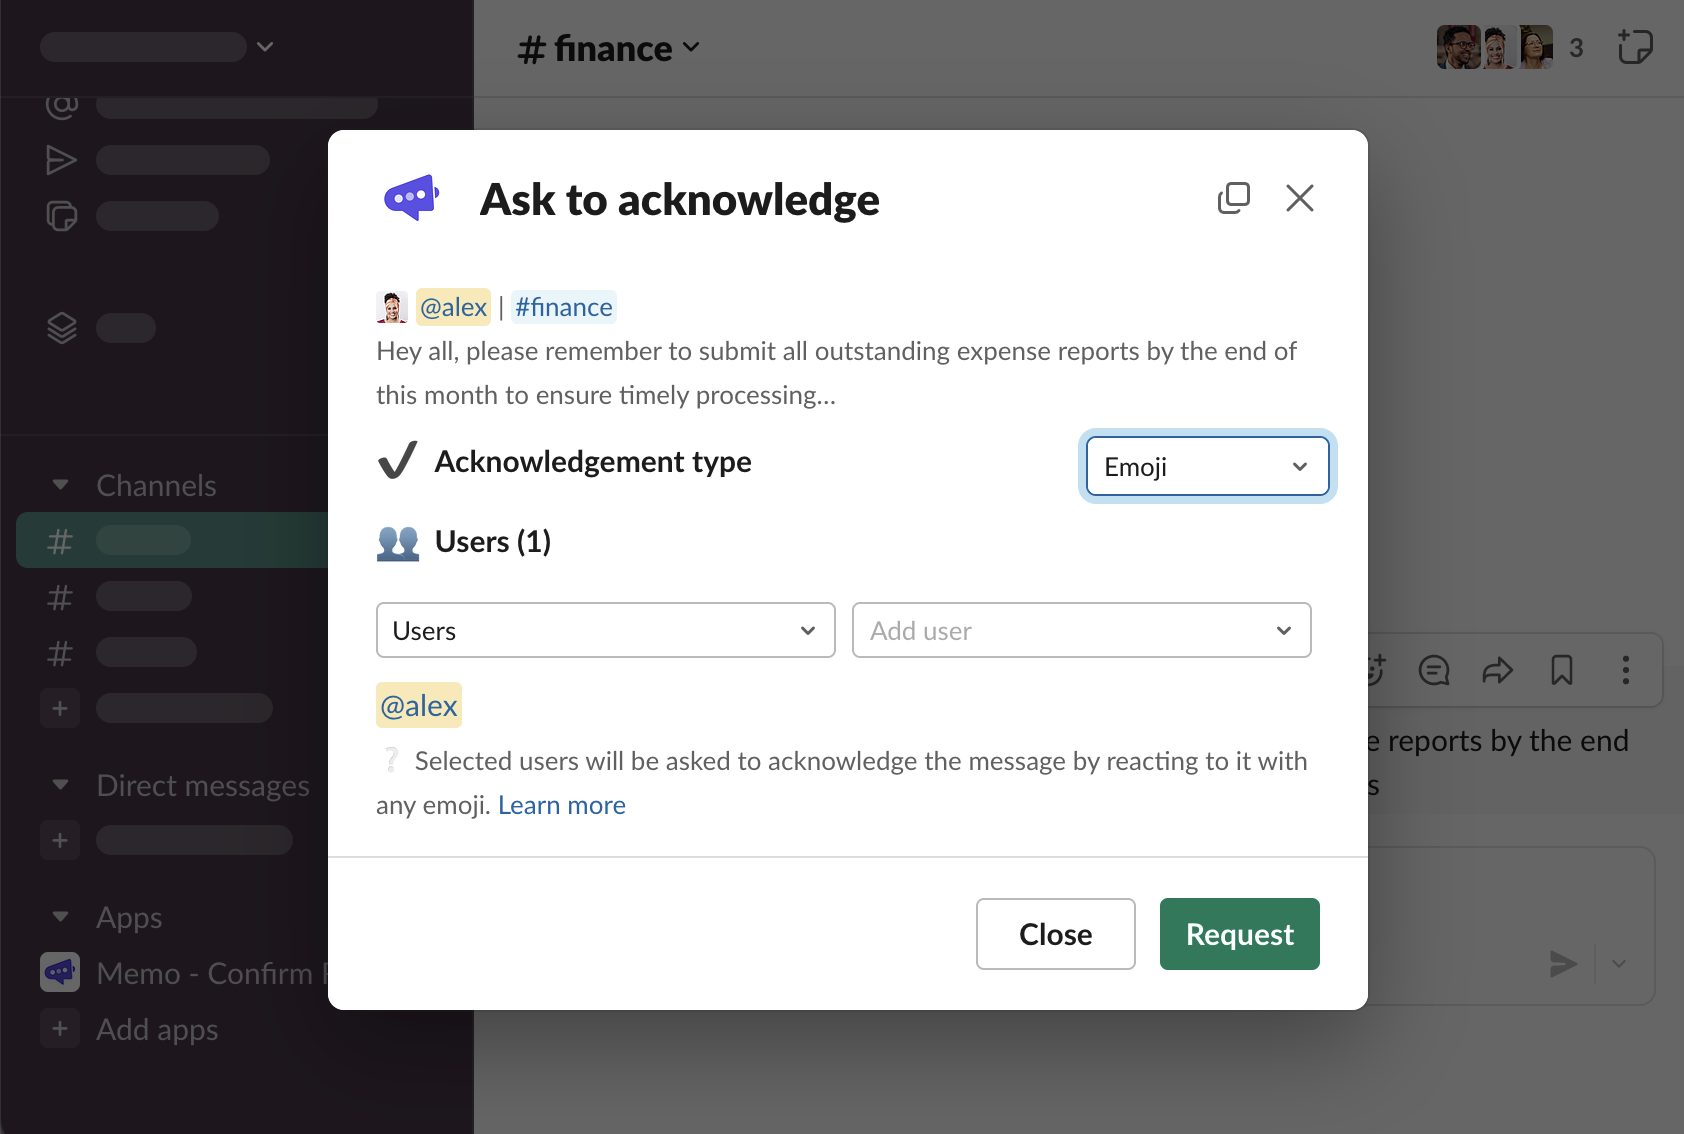
Emoji
Select “Emoji” acknowledgement type. No other configuration is required. Click “Request”
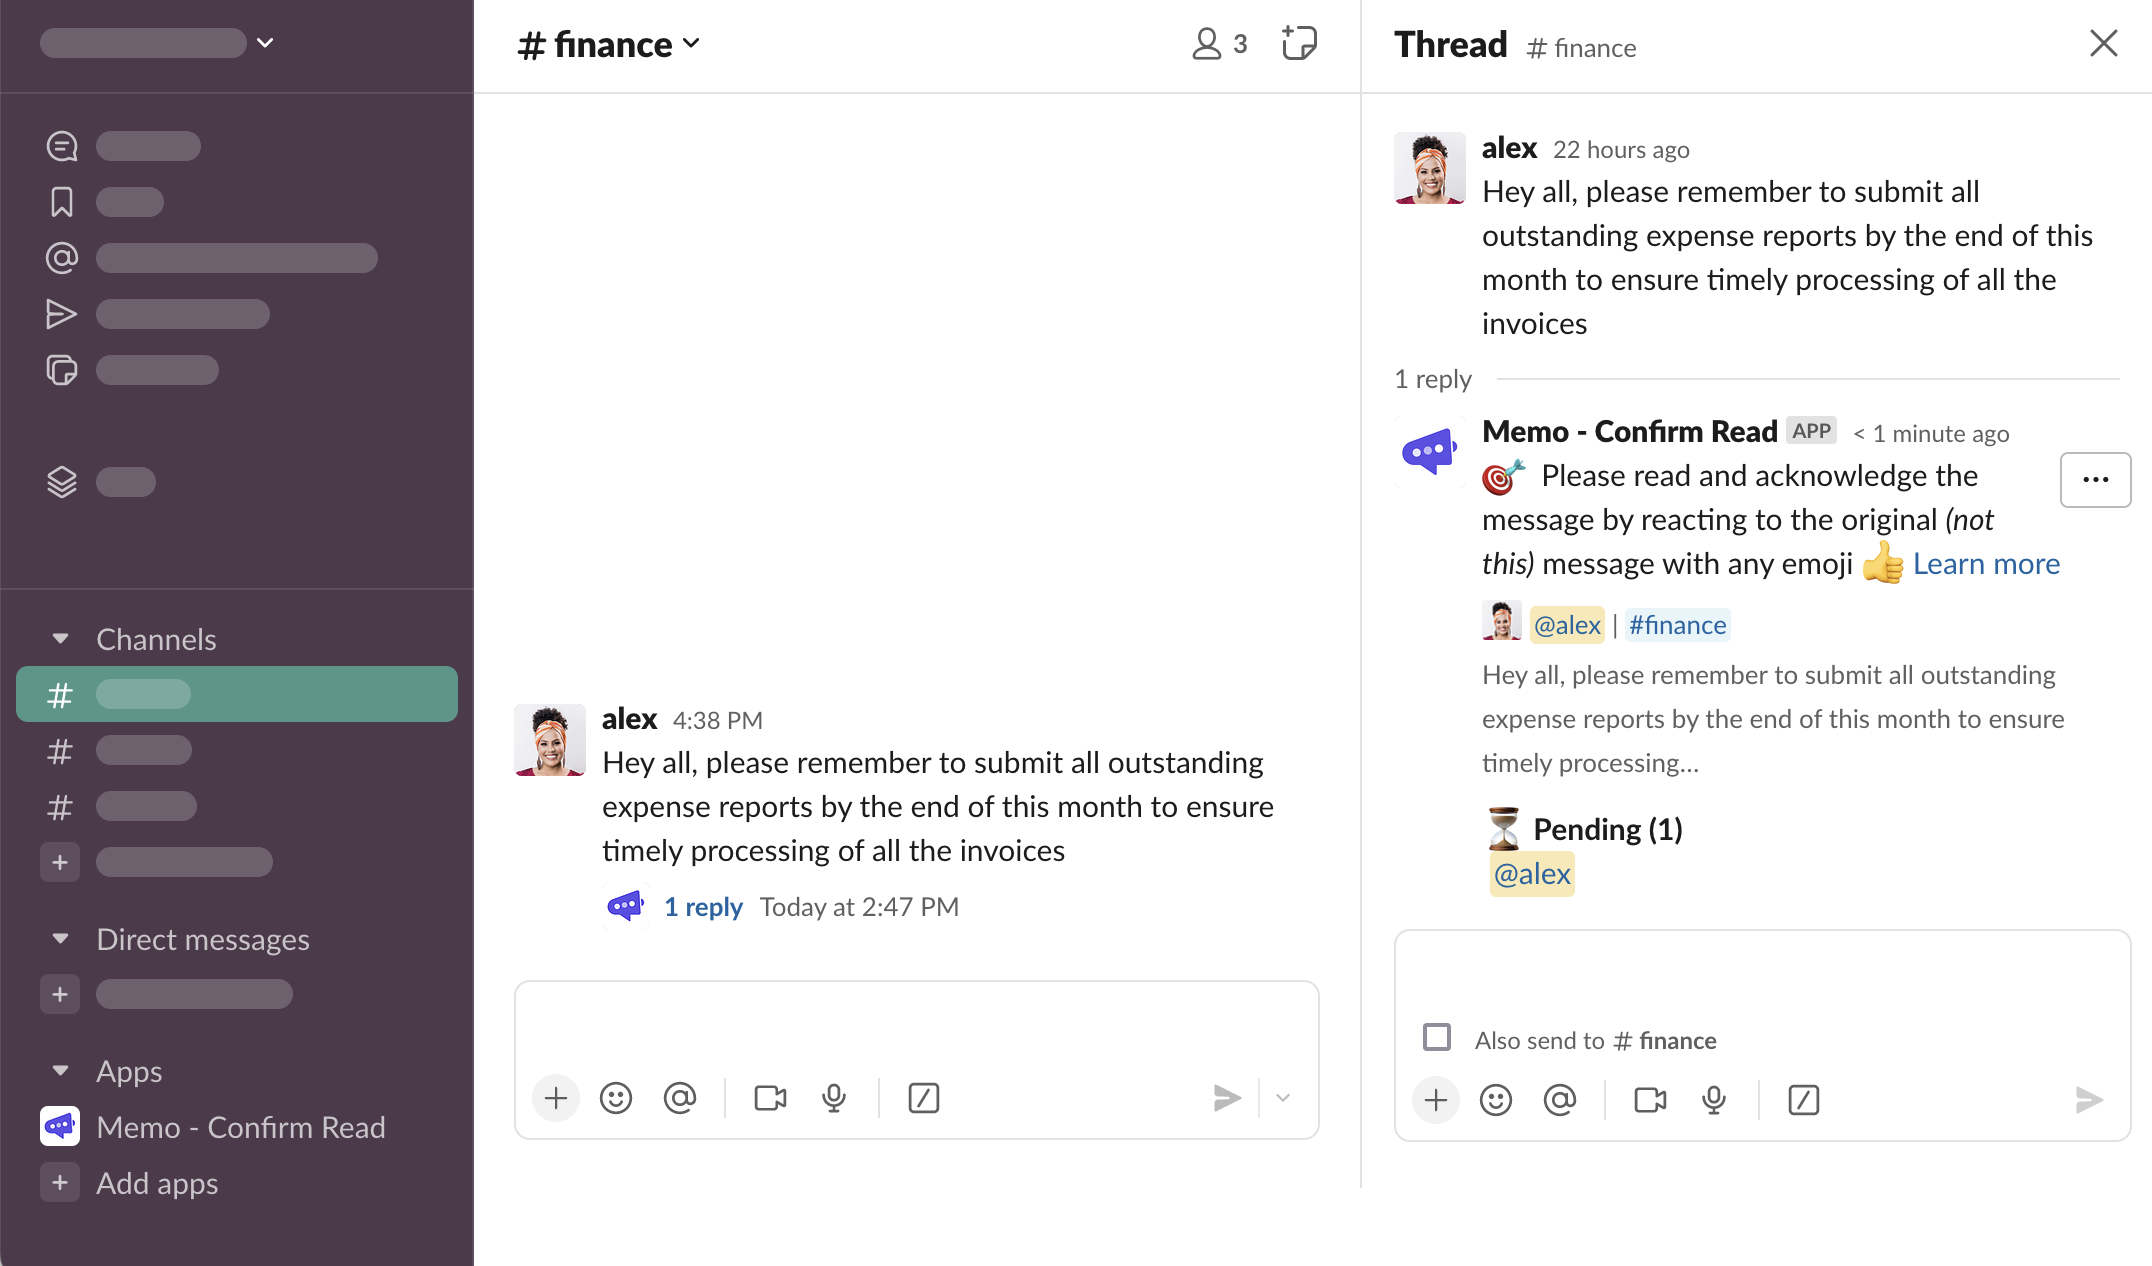
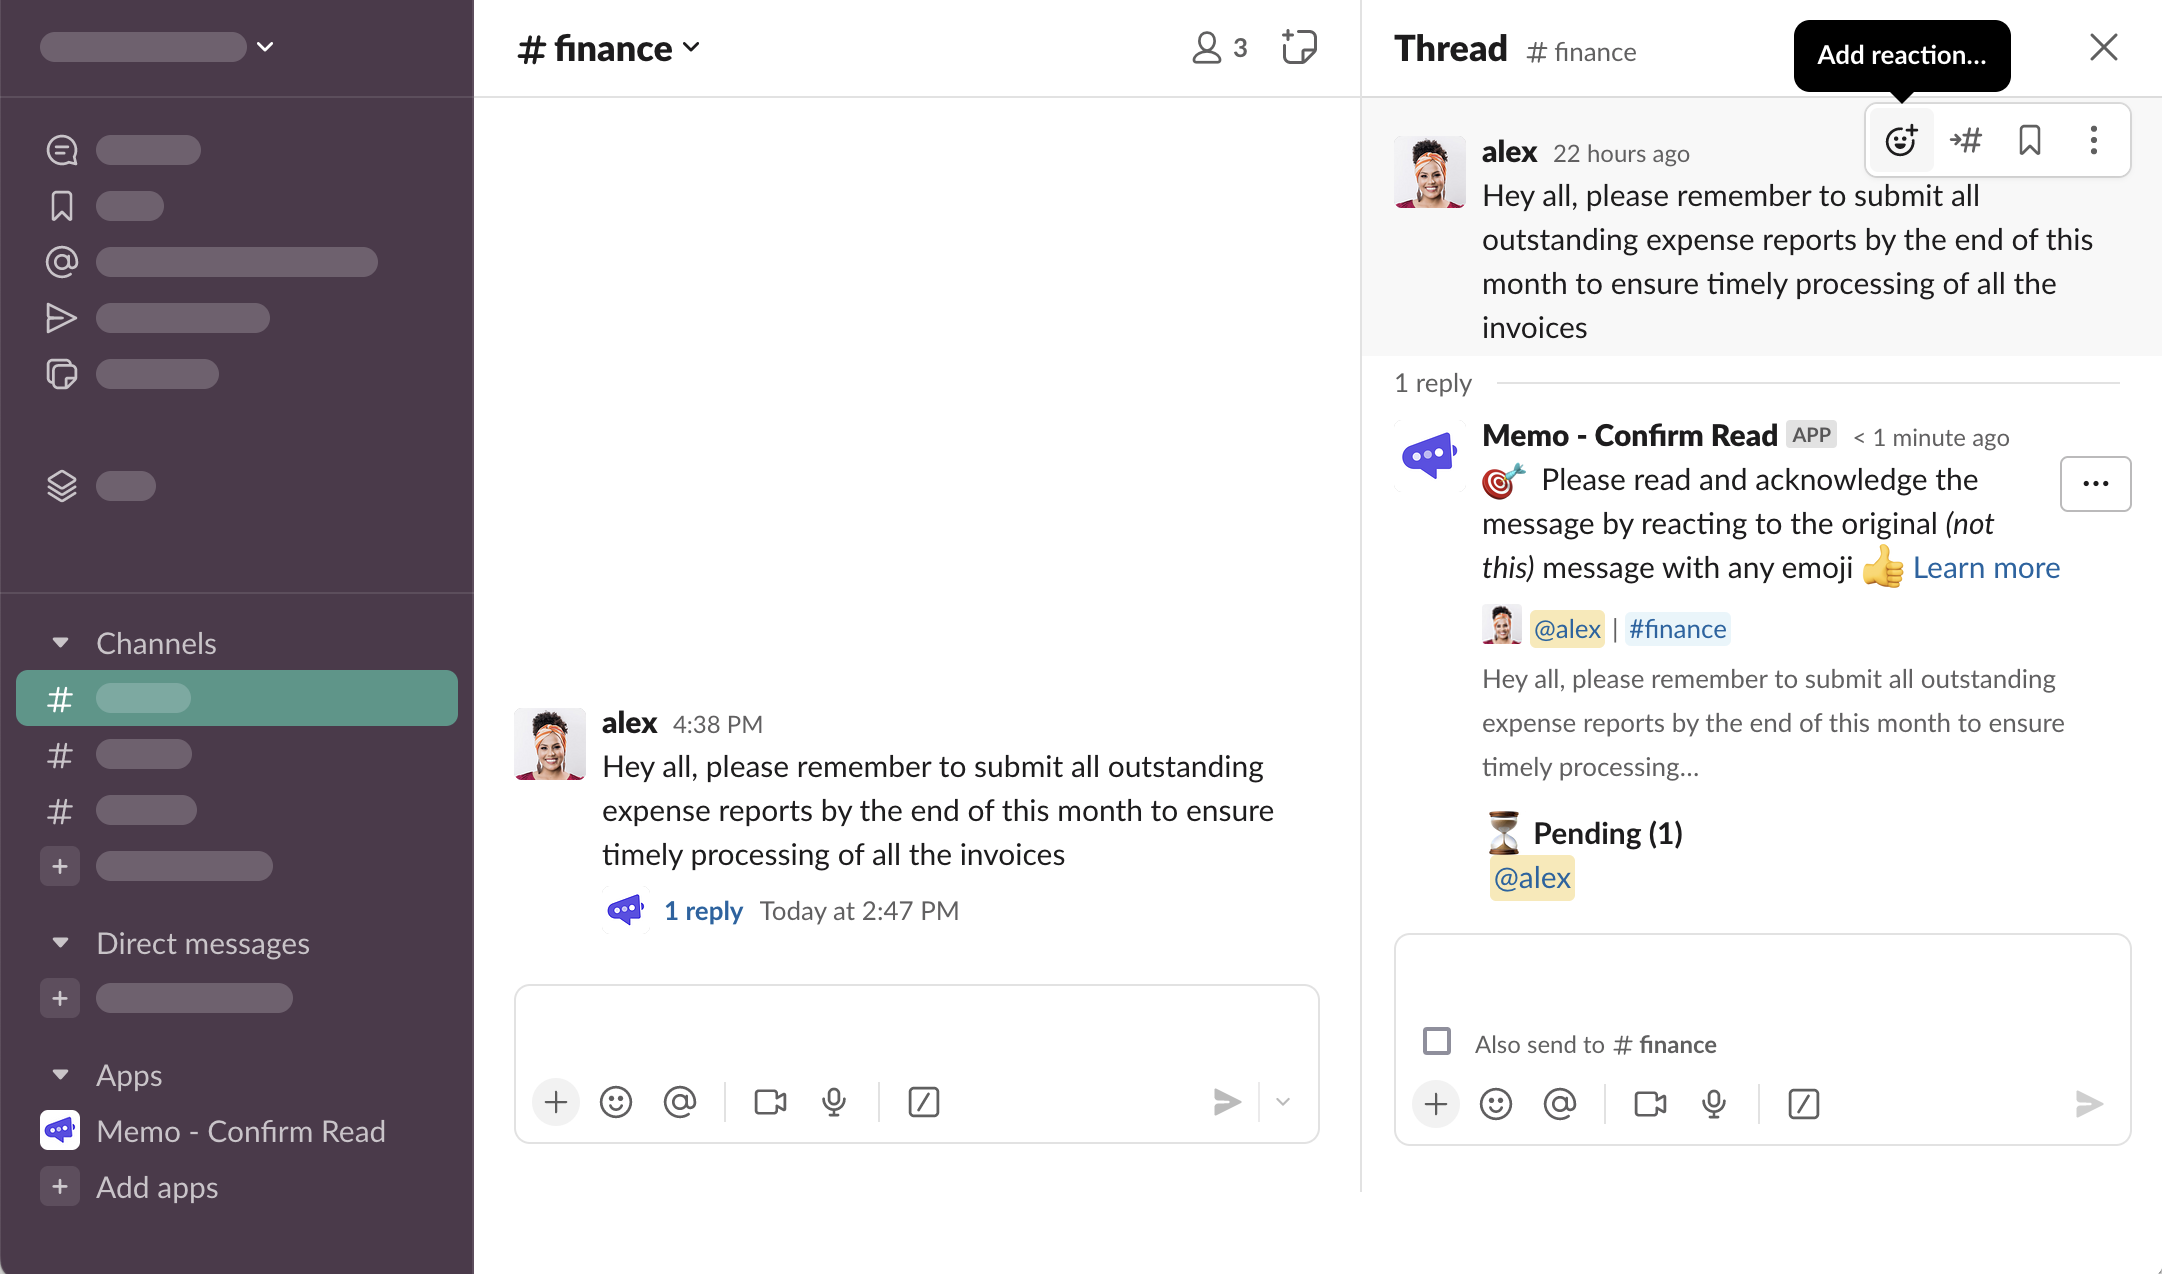
The overview thread message is sent with no button, but with an explanation how to acknowledge the message
Hover over the original message, click “Add reaction…”
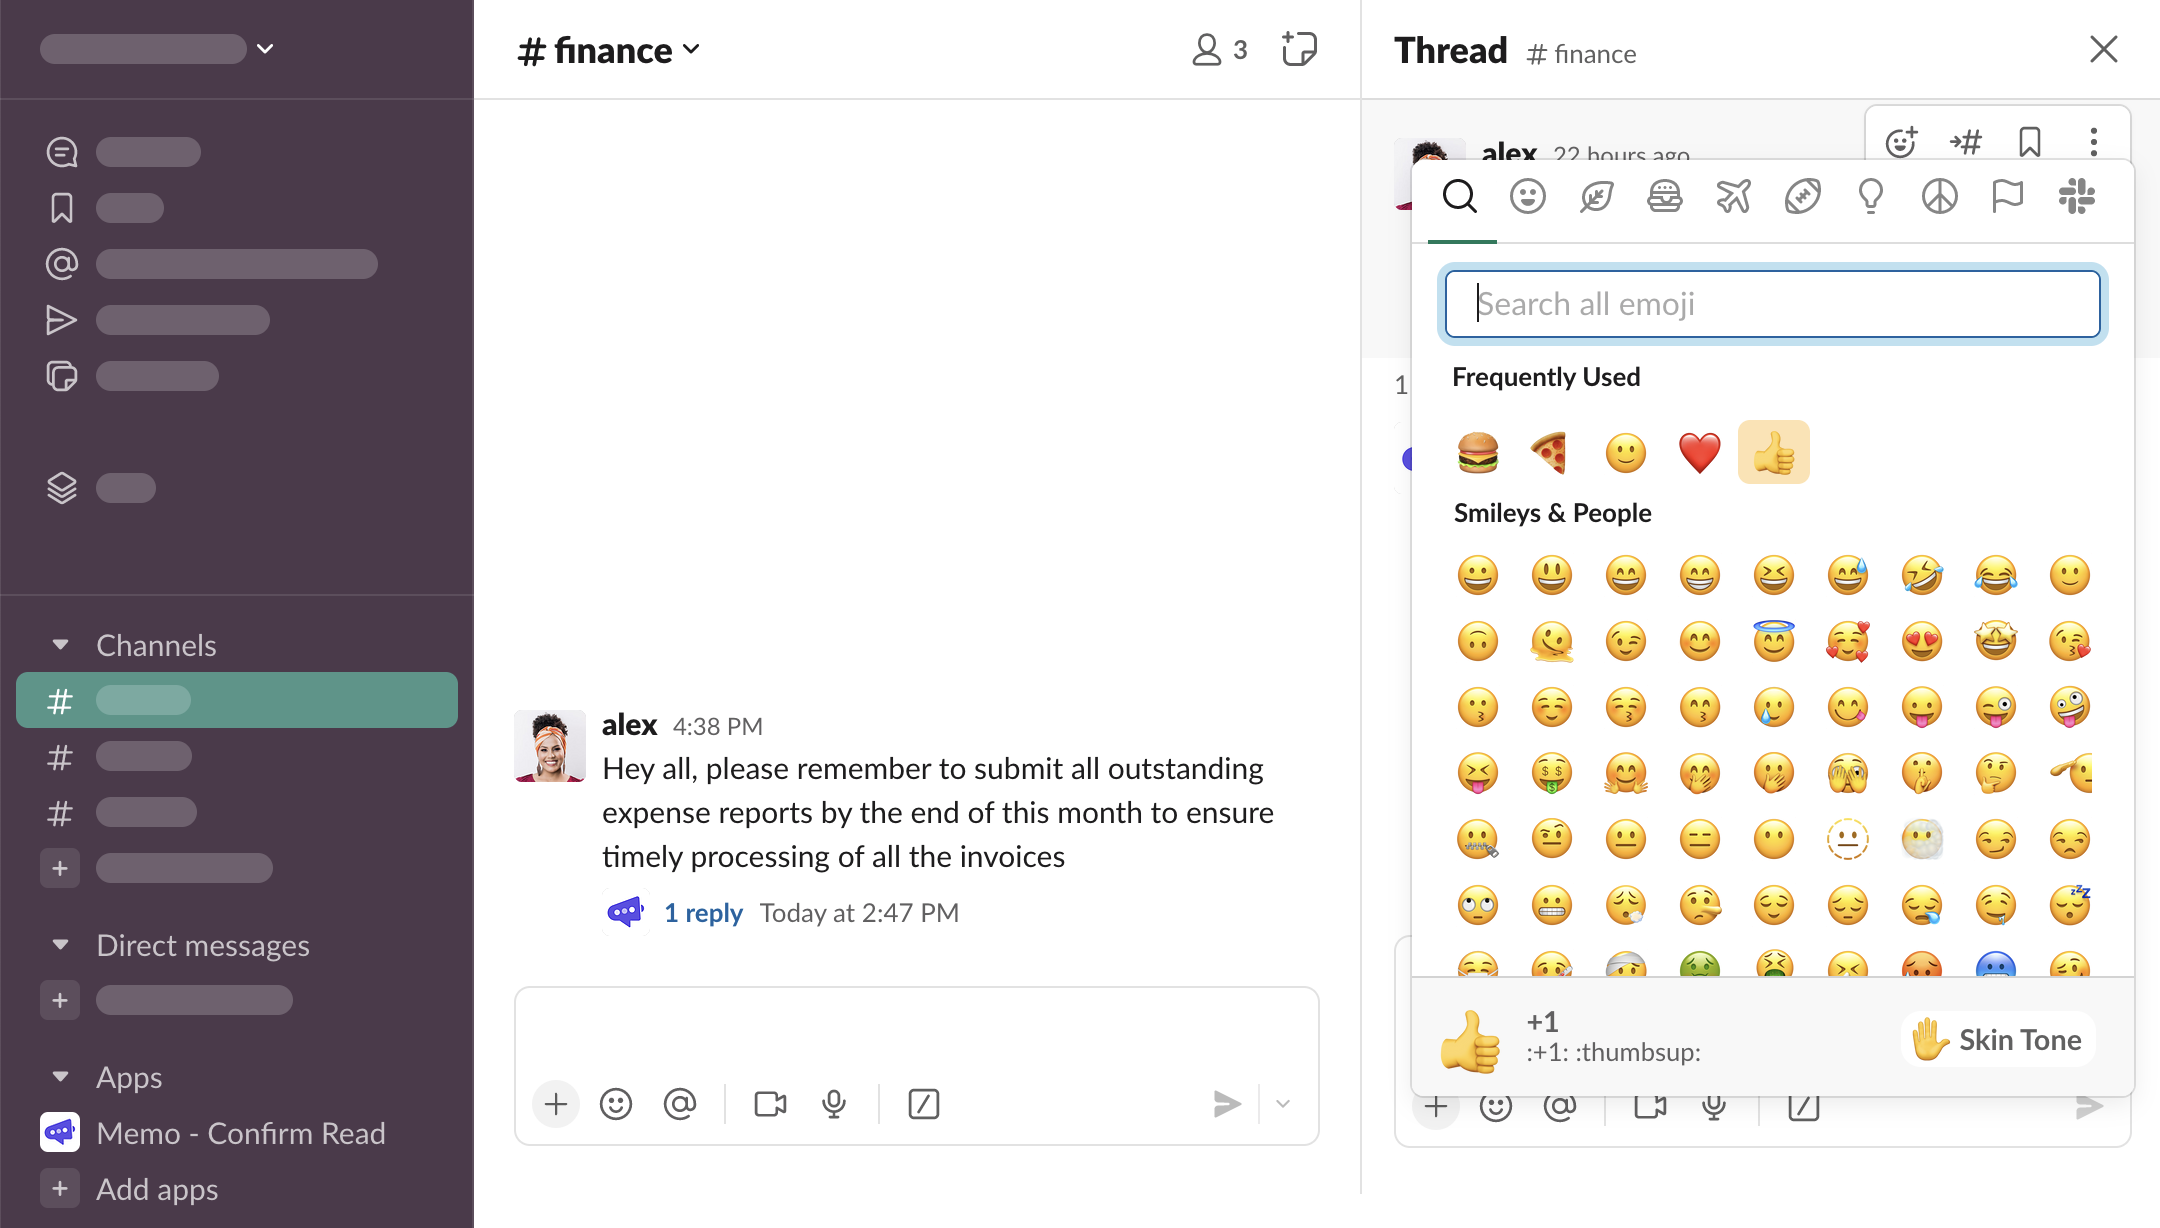
Select any emoji to react
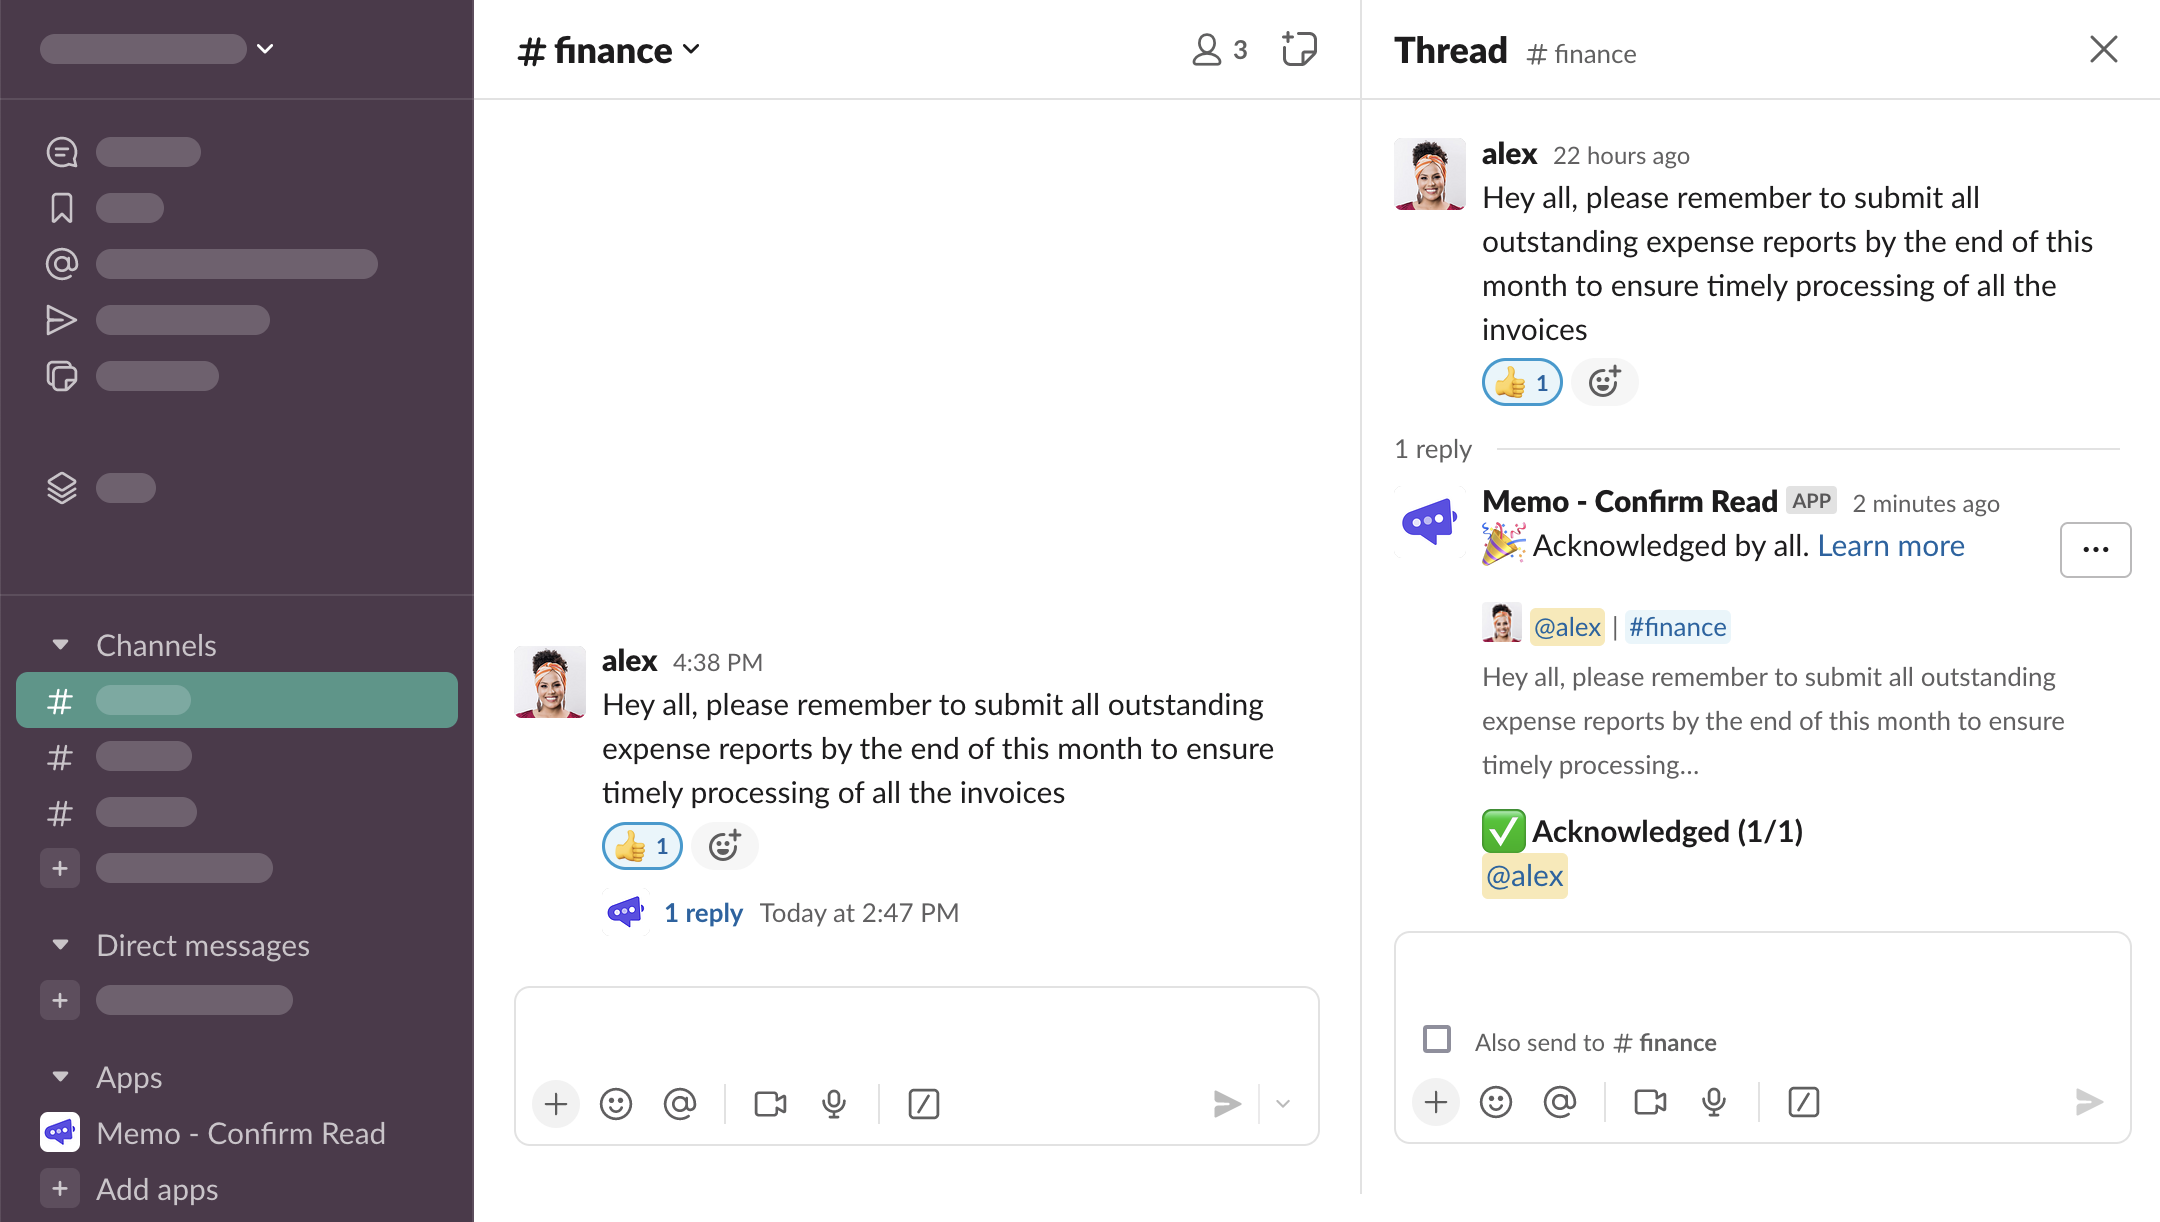
The acknowledgement has been saved and the overview thread message updated.
Reply in thread
Select “Reply in thread” acknowledgement type. No other configuration is required. Click “Request”
The overview thread message is sent with no button, but with an explanation how to acknowledge the message
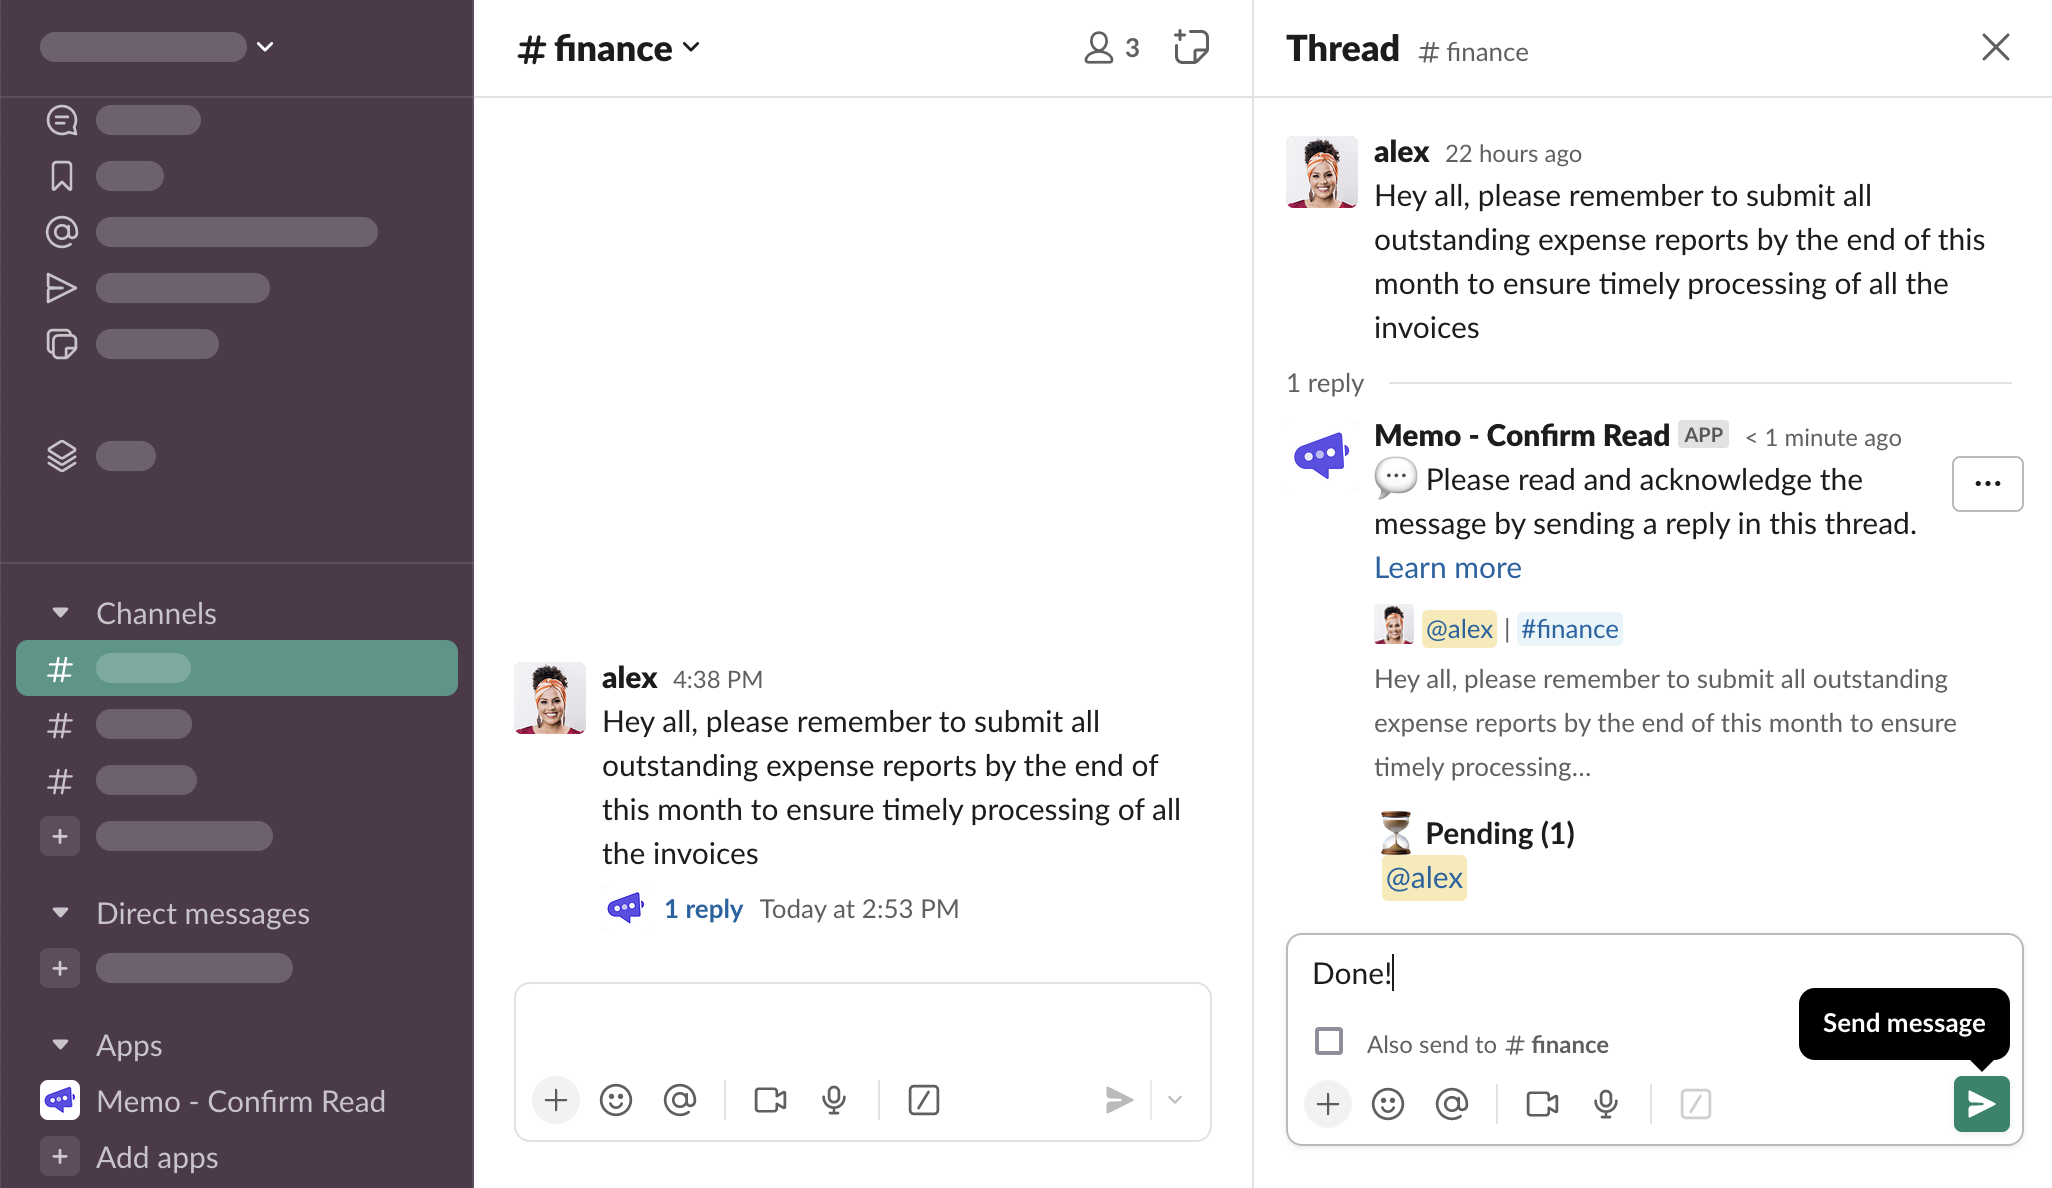
Type and send a message in the thread
The acknowledgement has been saved and the overview thread message updated.
Users
When configuring the request, you must select users who will be notified and asked to acknowledge the message.
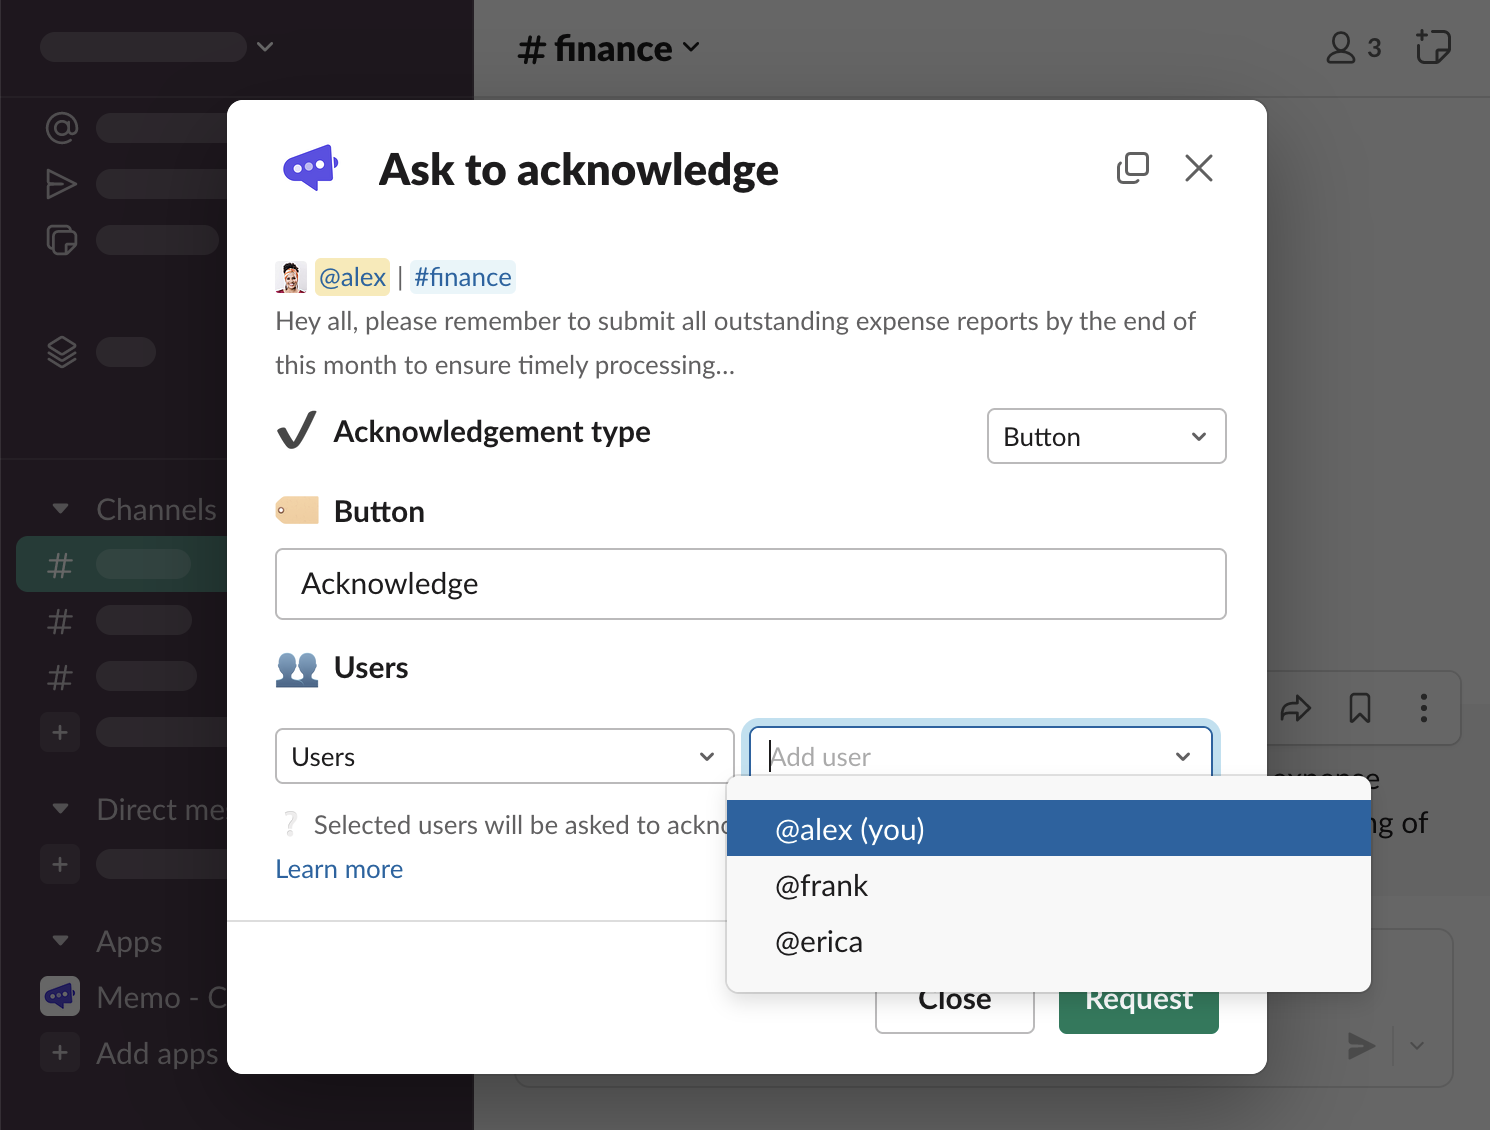
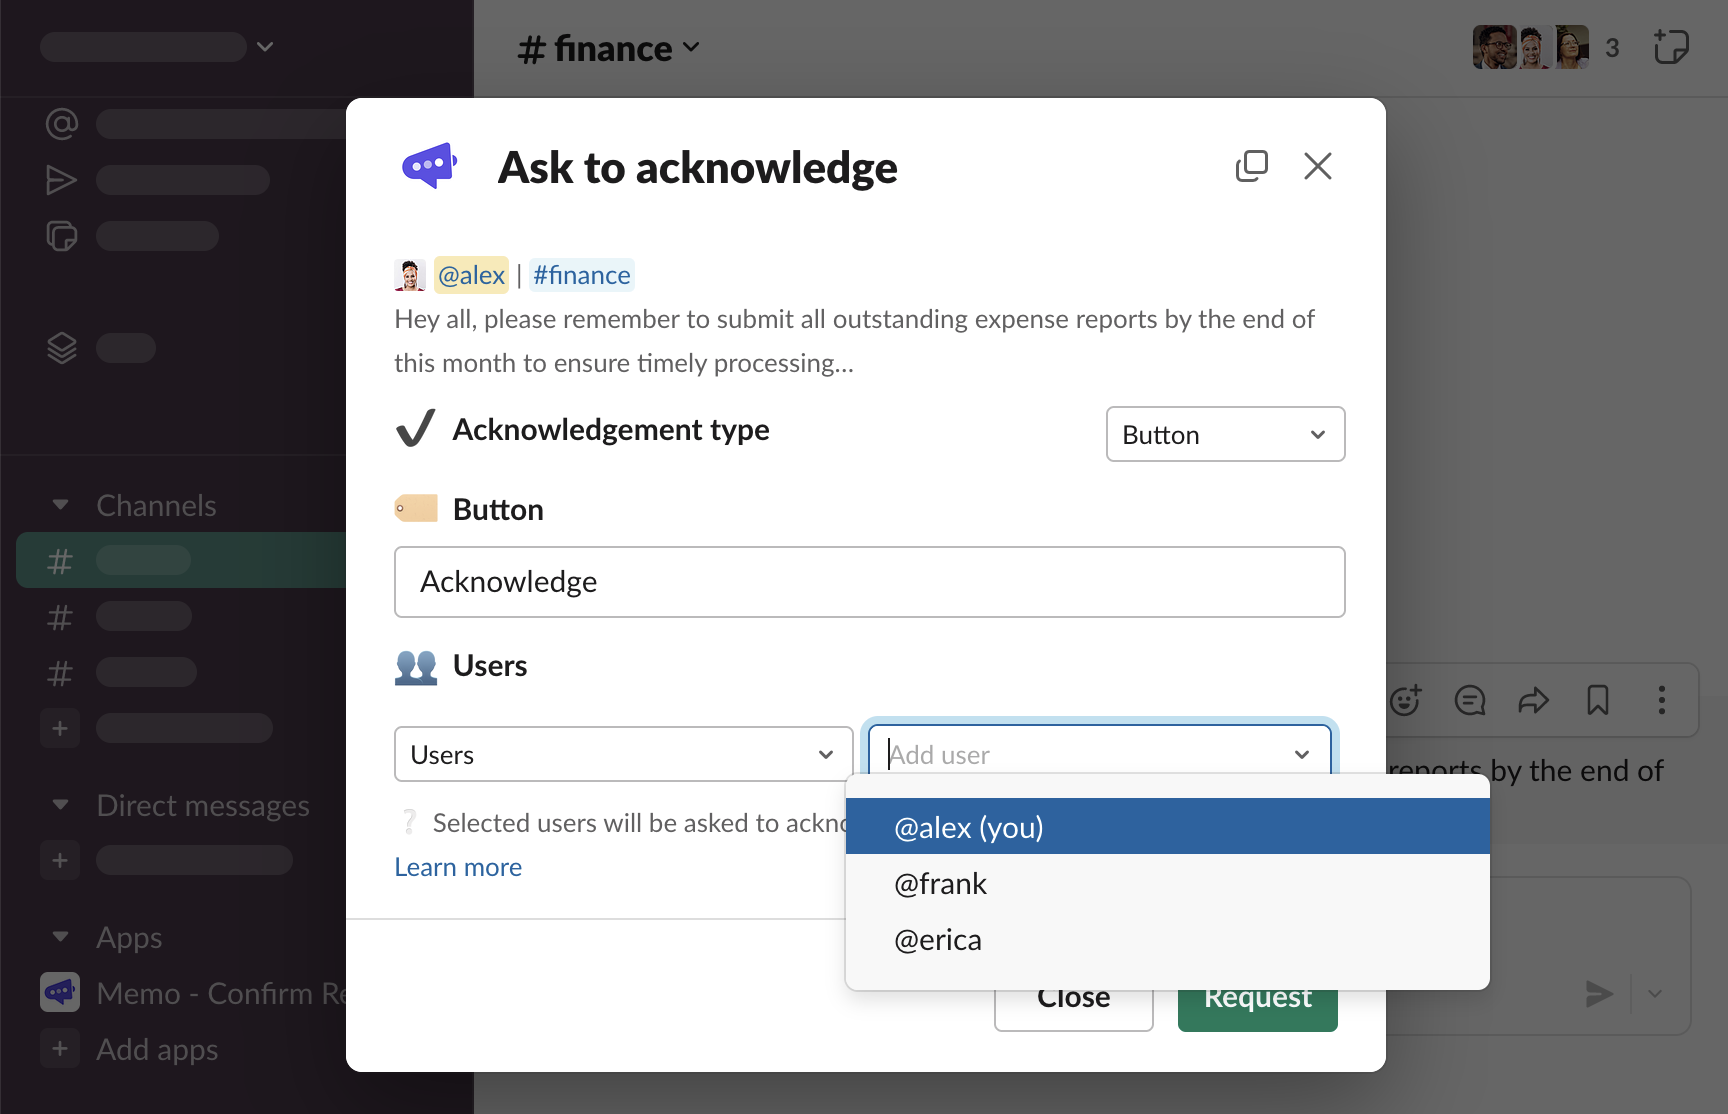
Add individual users
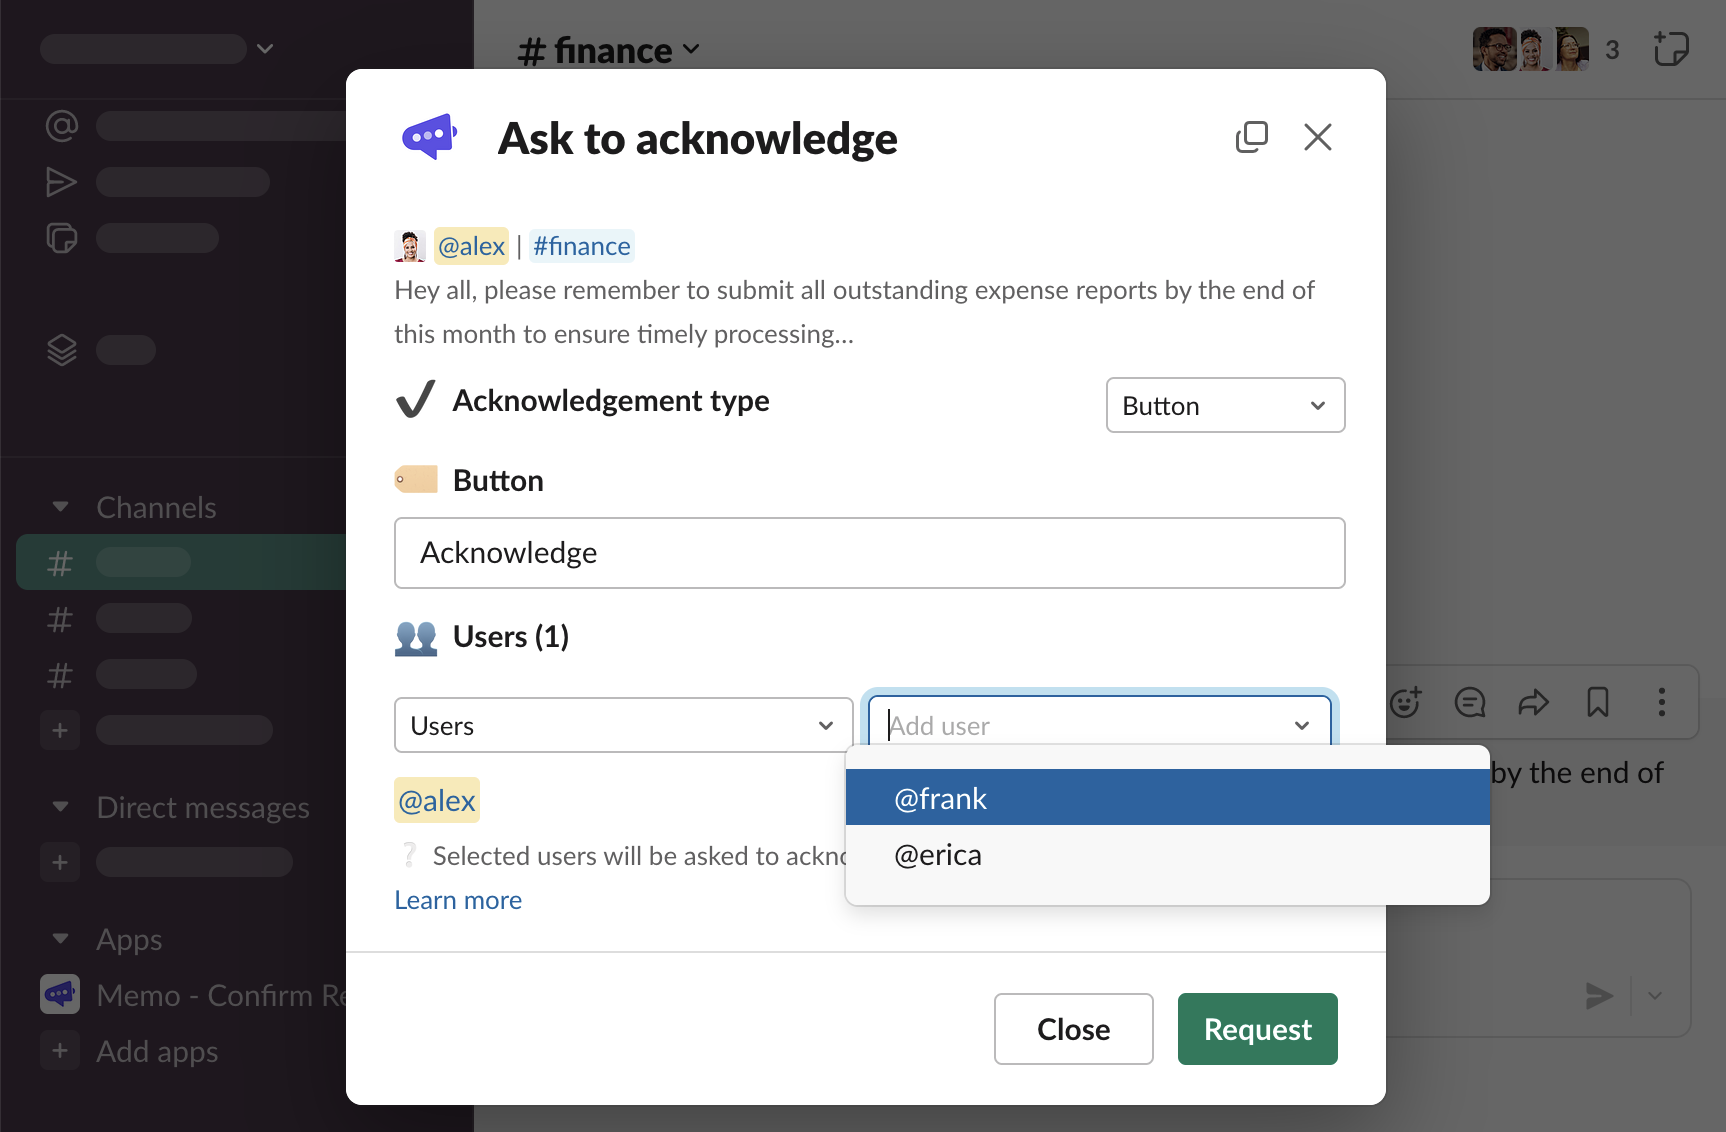
When the left-side select is set to “Users”, click the right-side select with “Add user” placeholder, and select the first user who will be asked for acknowledgement
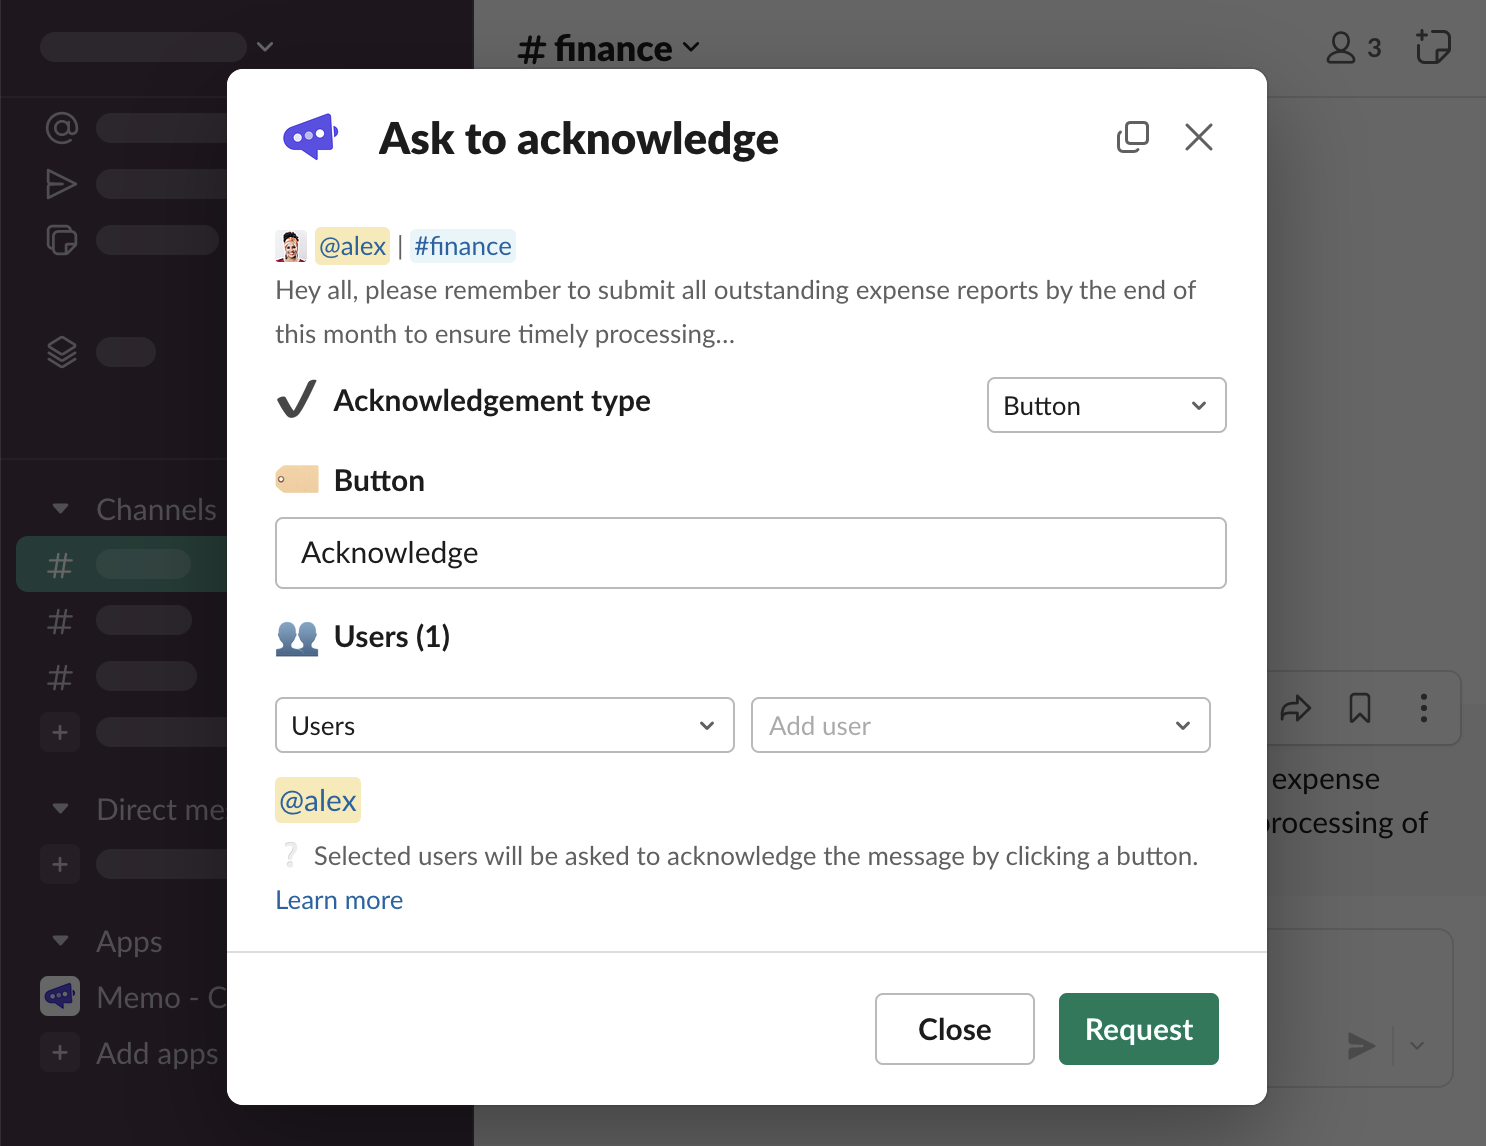
Repeat until you’ve selected all the users you had in mind.
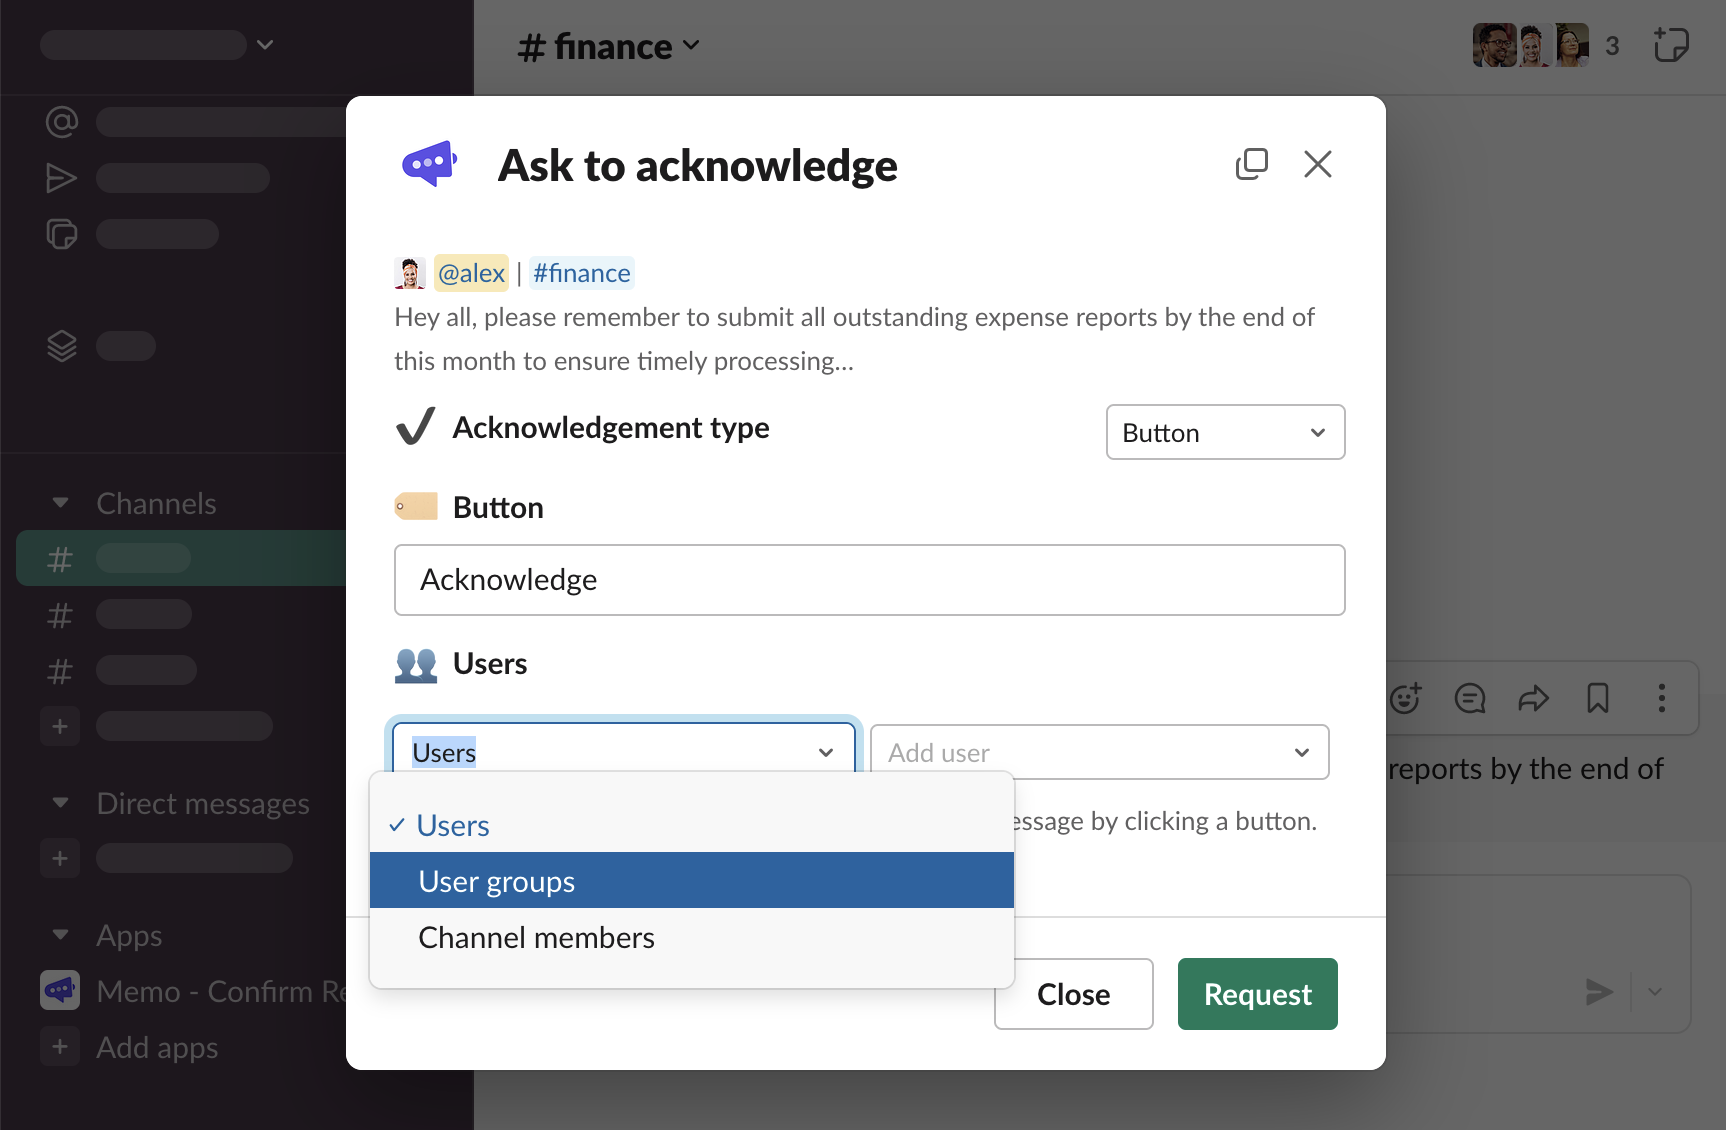
Add members of a user group
Adding users one-by-one, manually, is not the only option. You can easily choose all the members of a user group that must acknowledge the message.
Select “User groups” from the left-side select
Click the right-side select and choose a user group
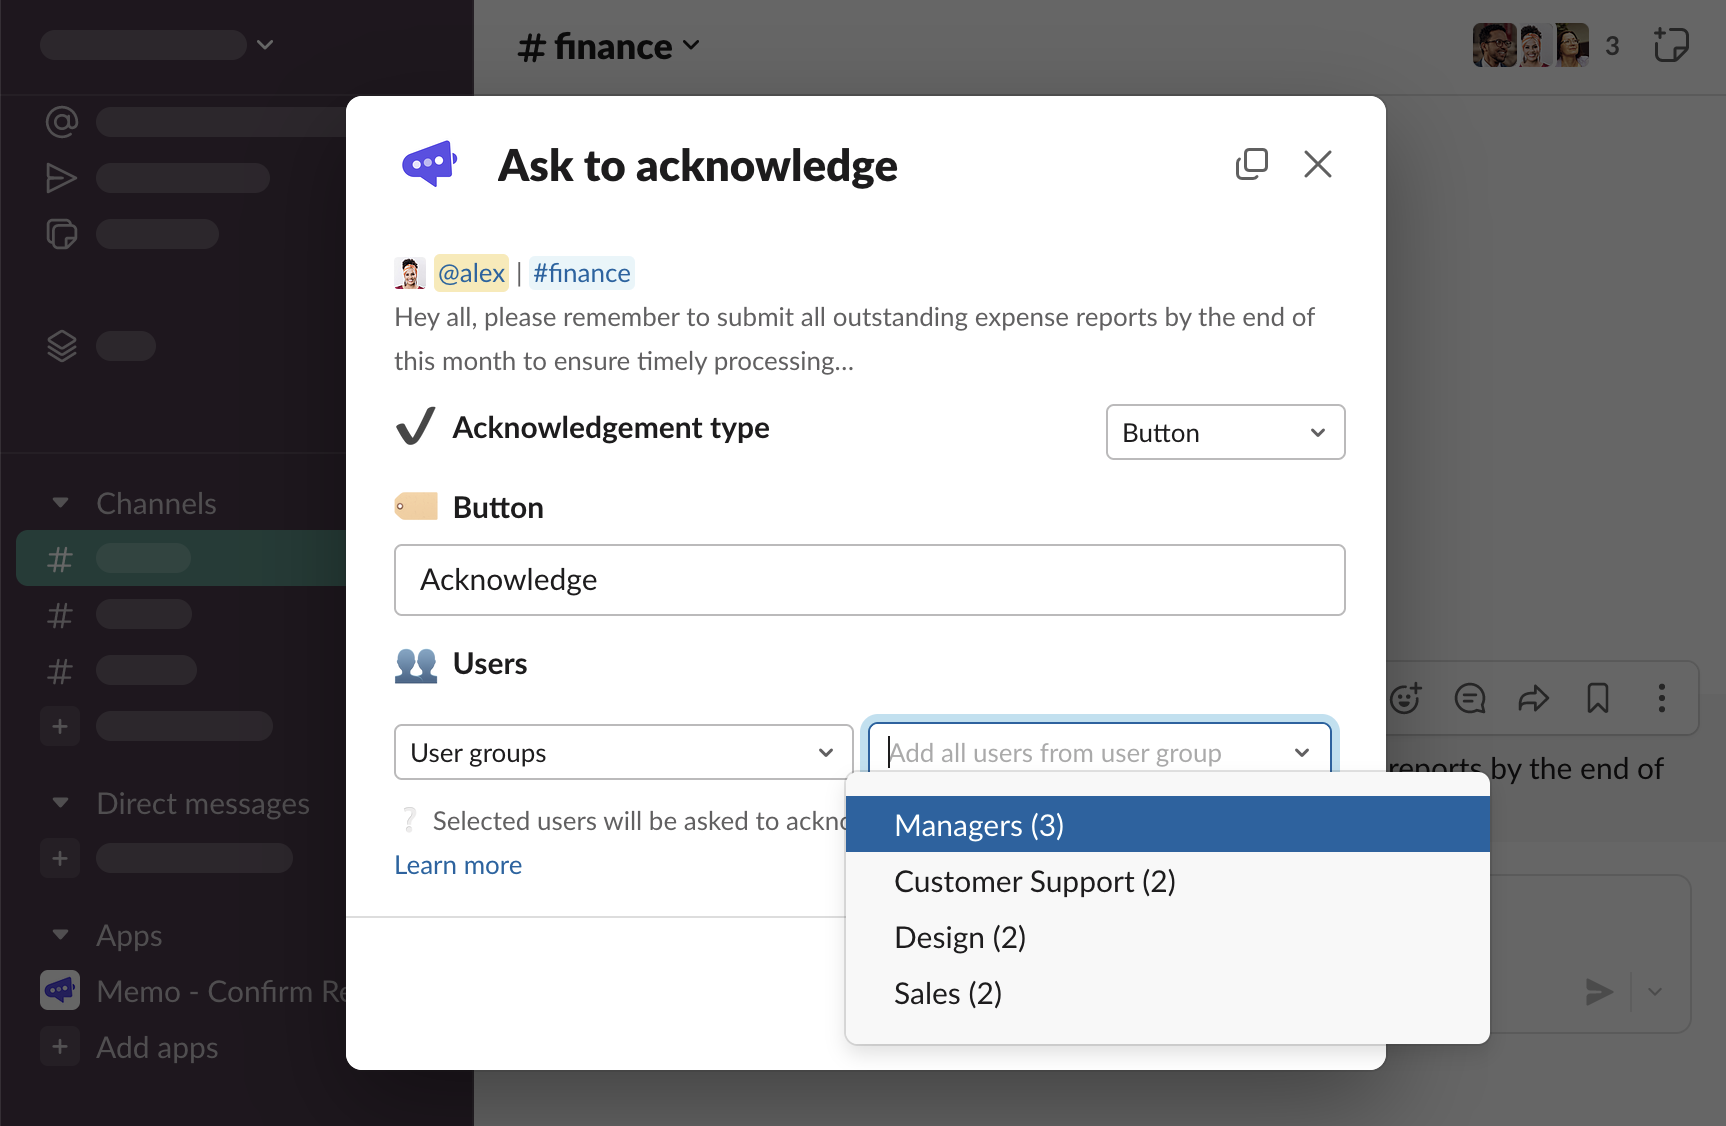
All members of the chosen user group will be added to the list of requestees.

Add members of the channel
Select “Channel members” from the left-side select
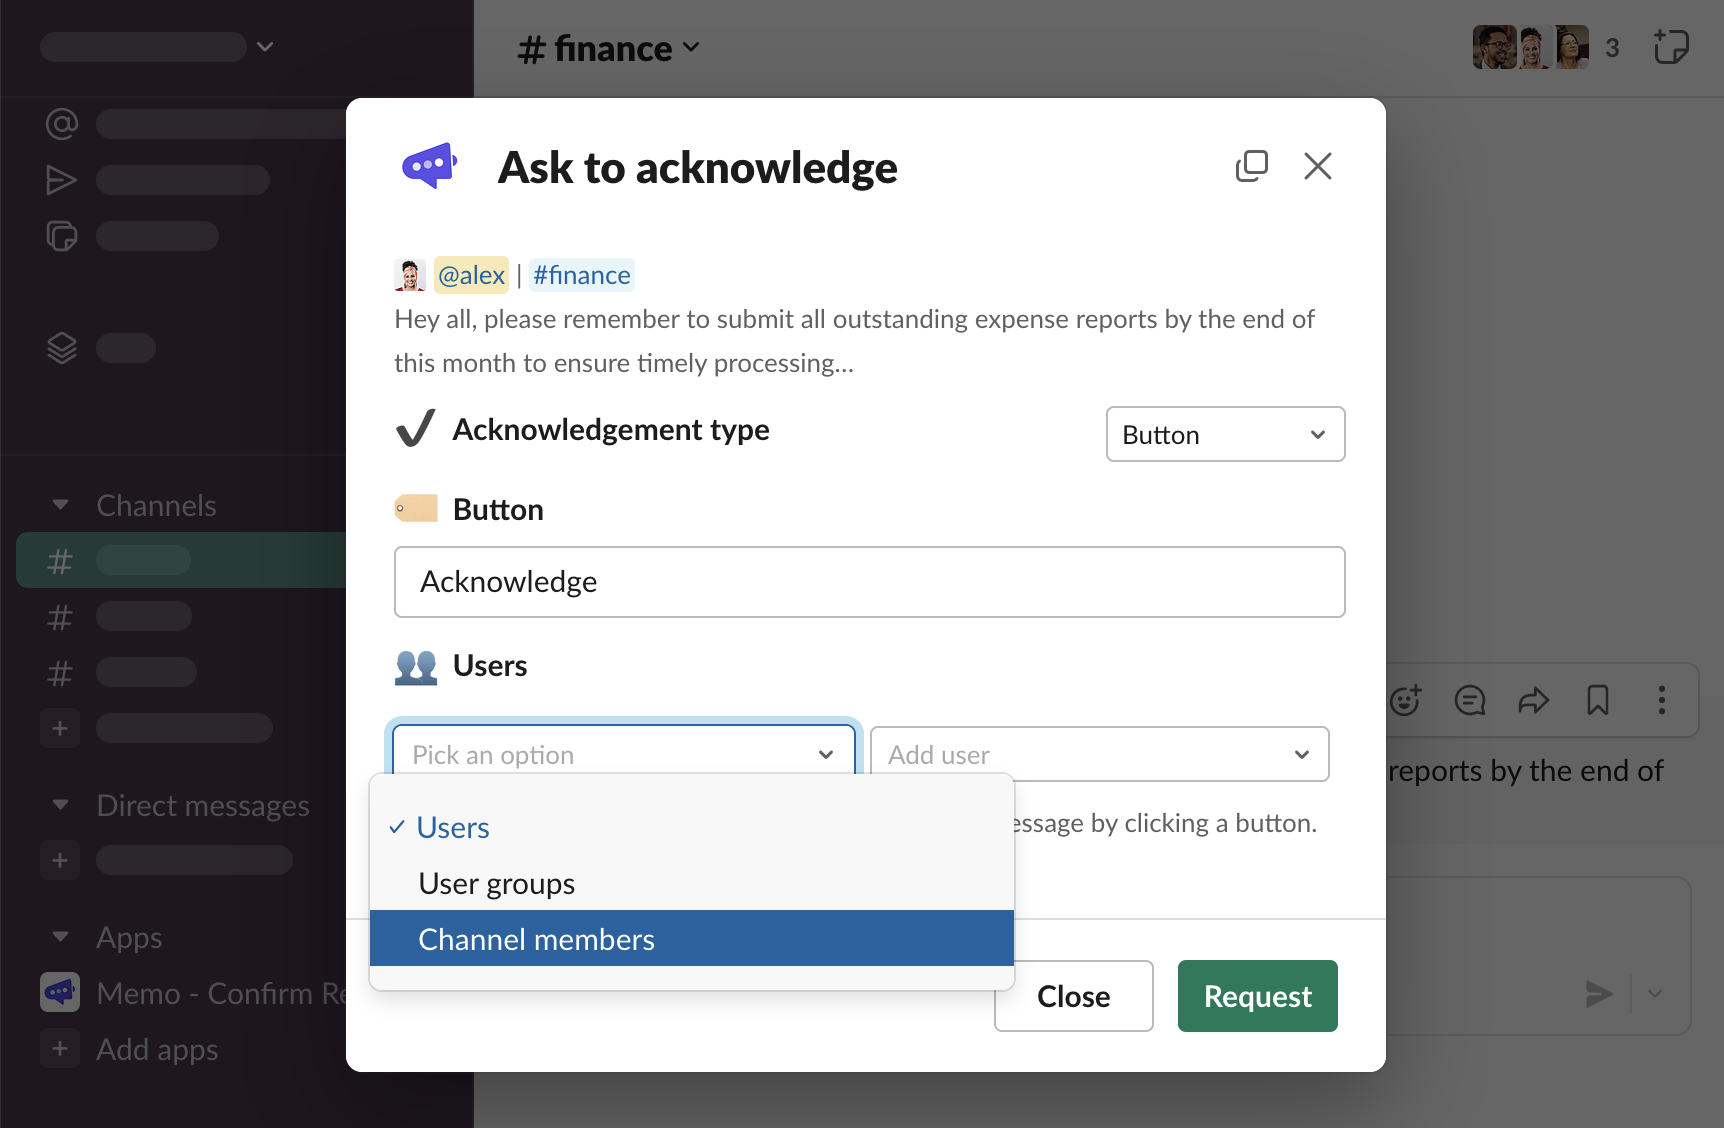
Click the right-side button to confirm
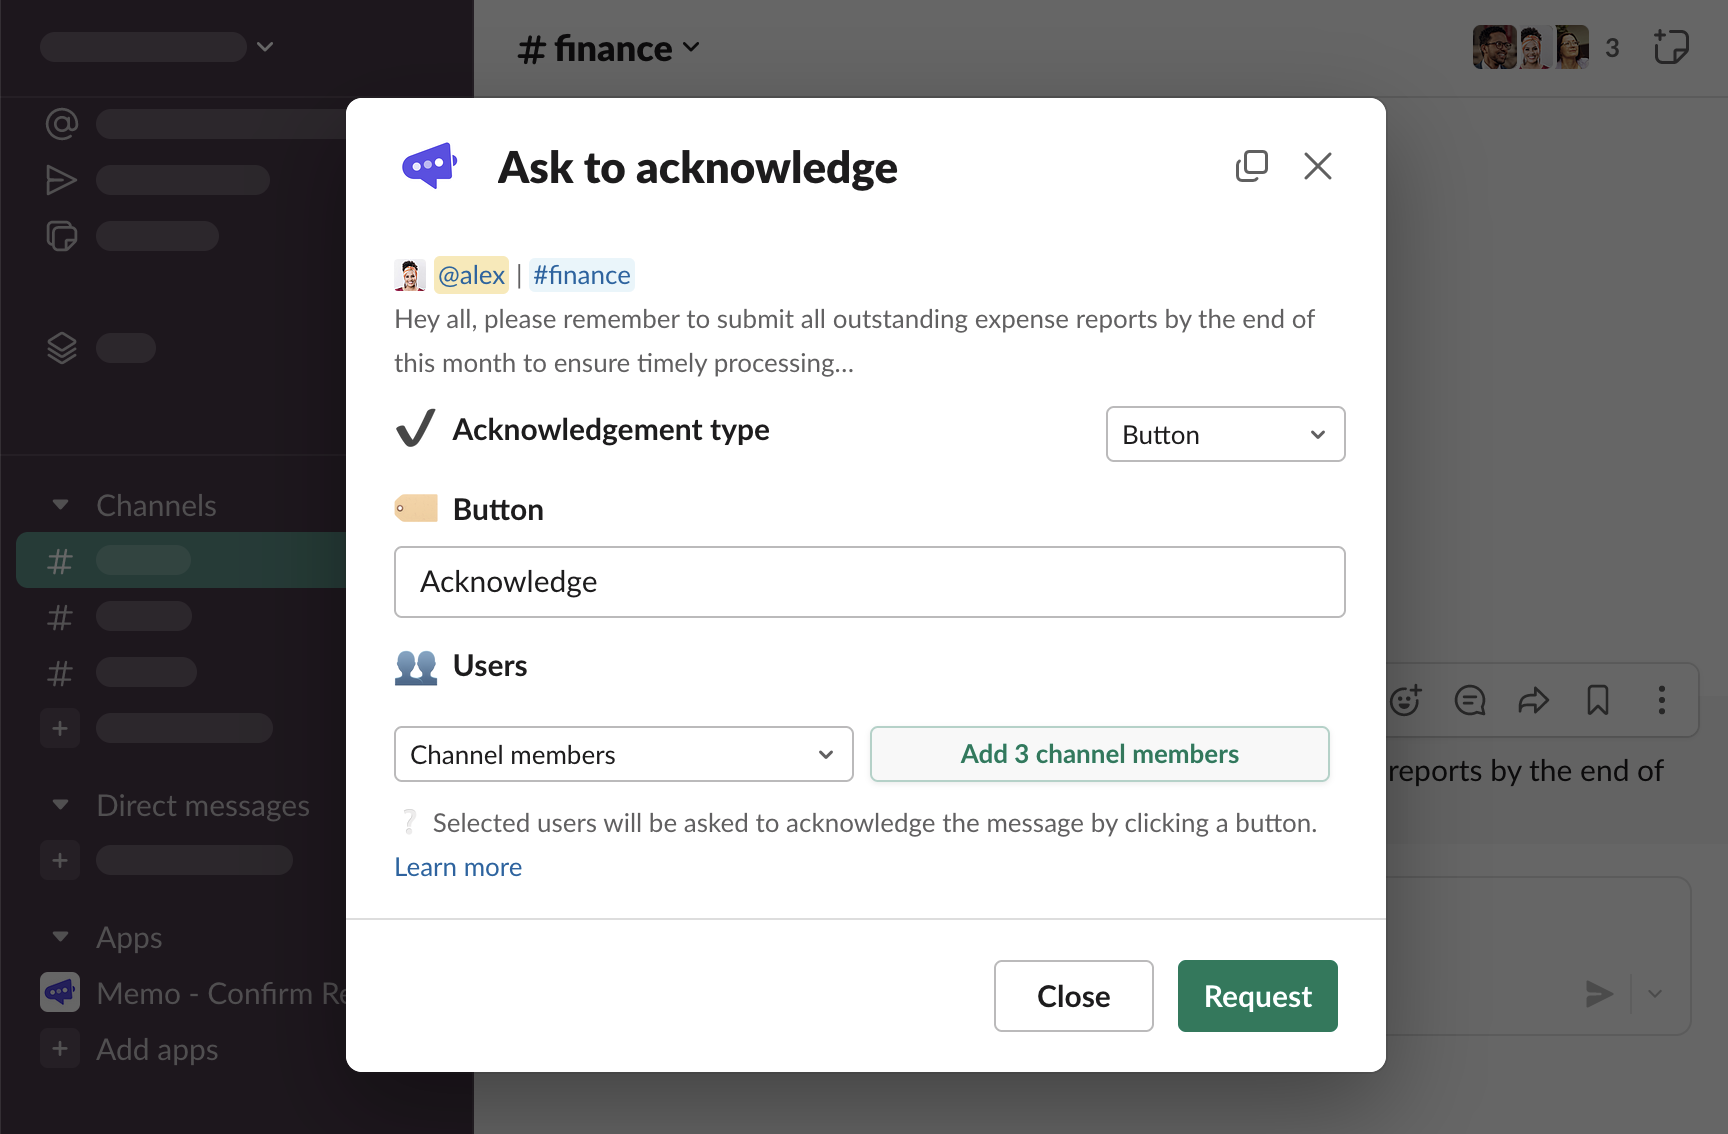
All members of the channel where the message has been sent to will be added to the list of requestees.
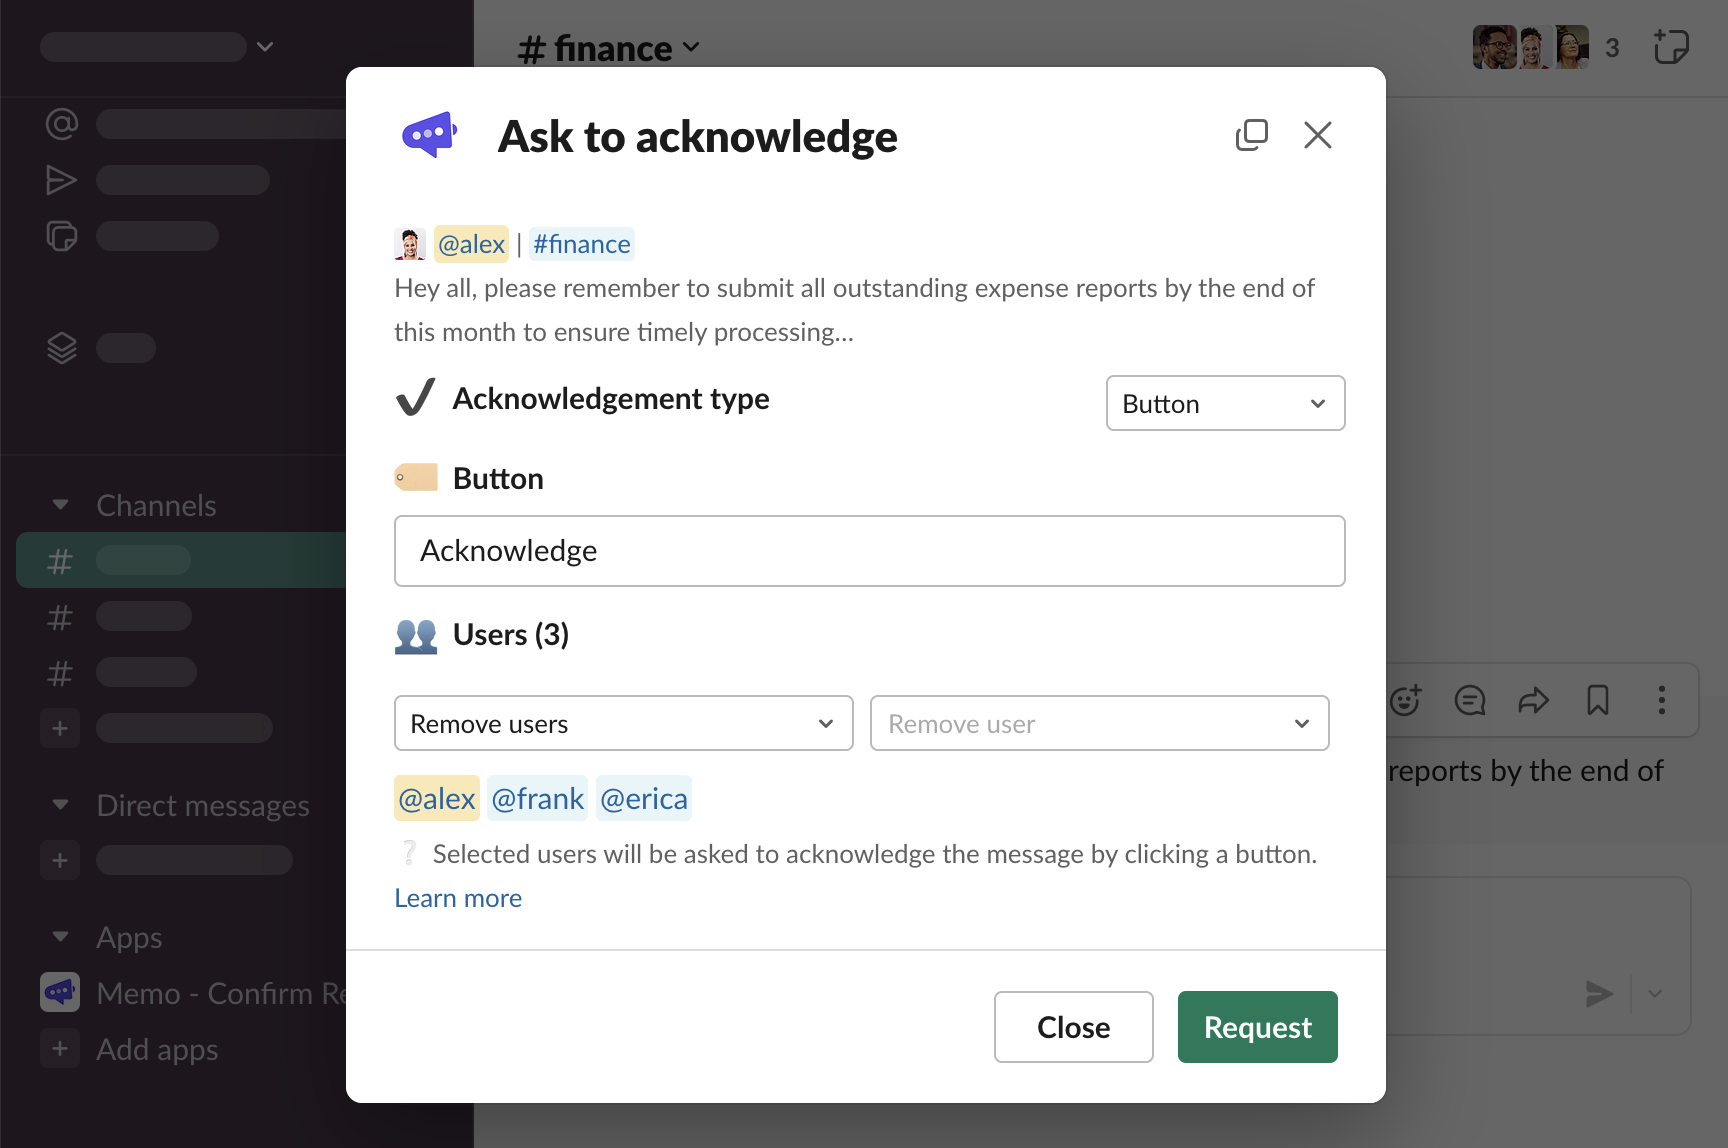
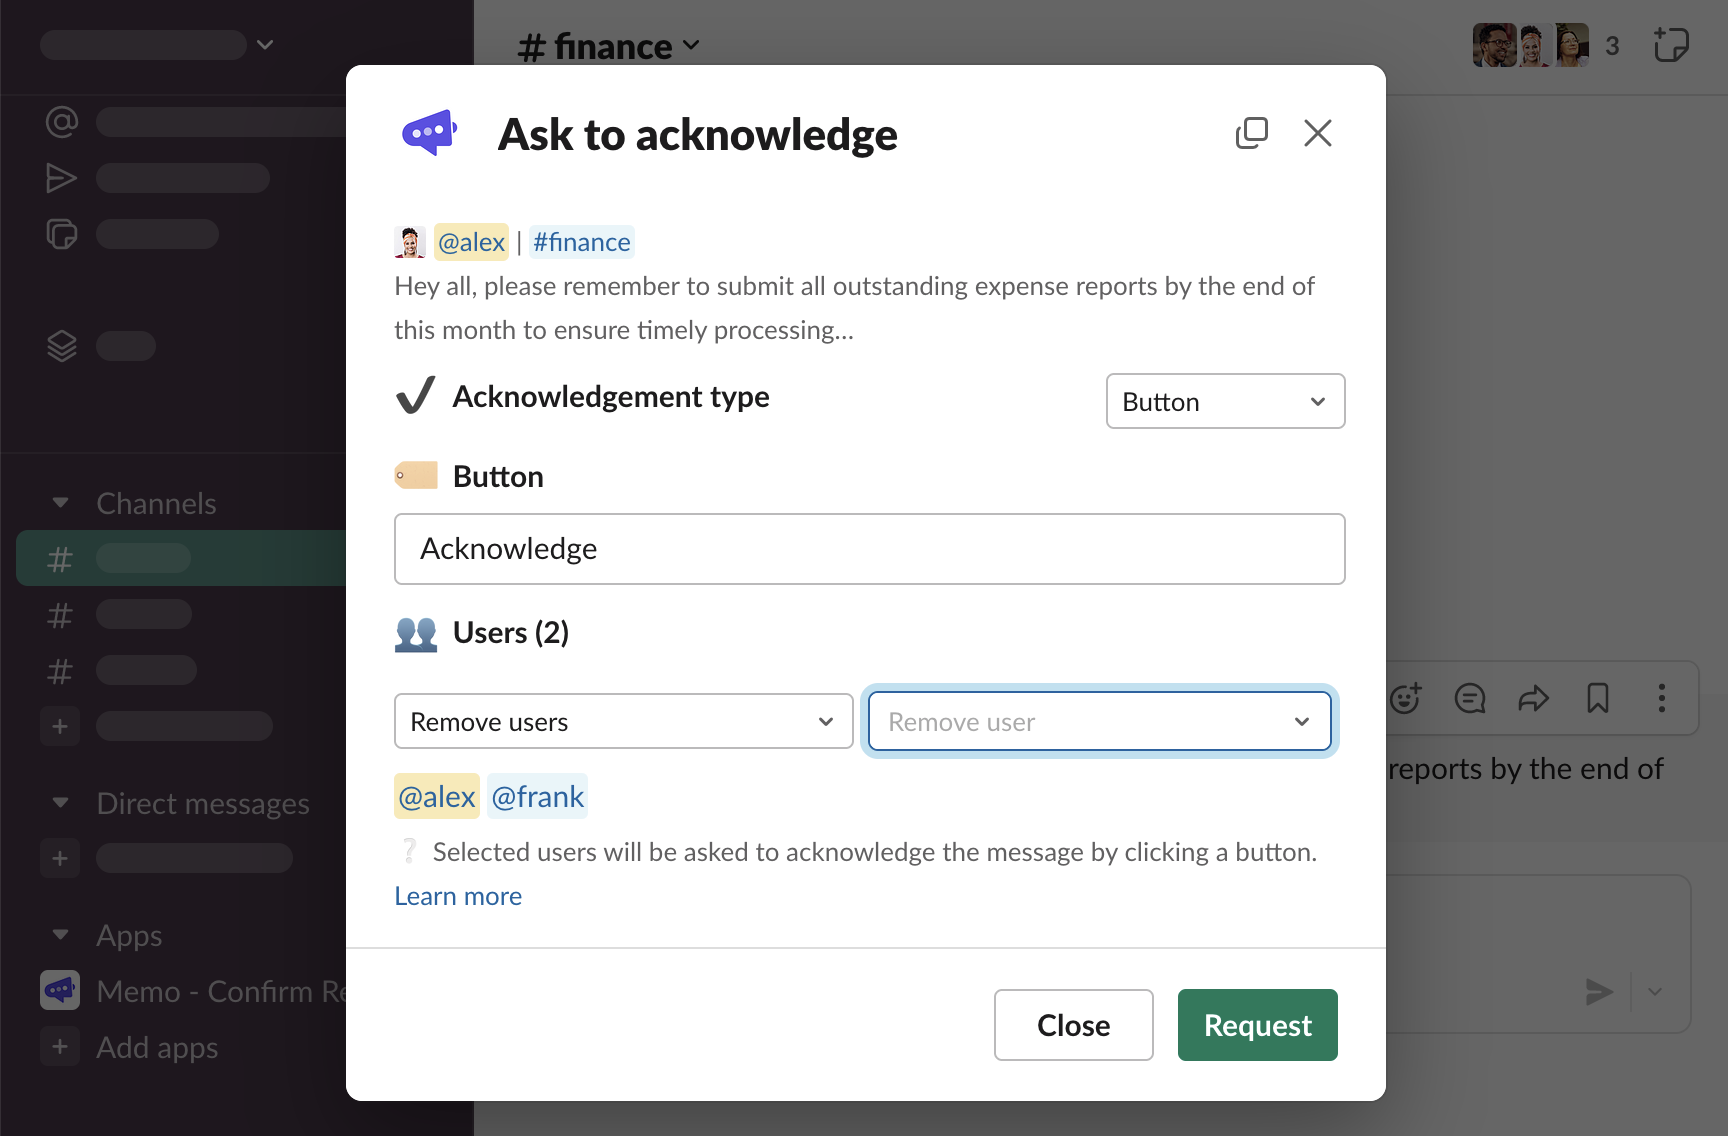
Remove users
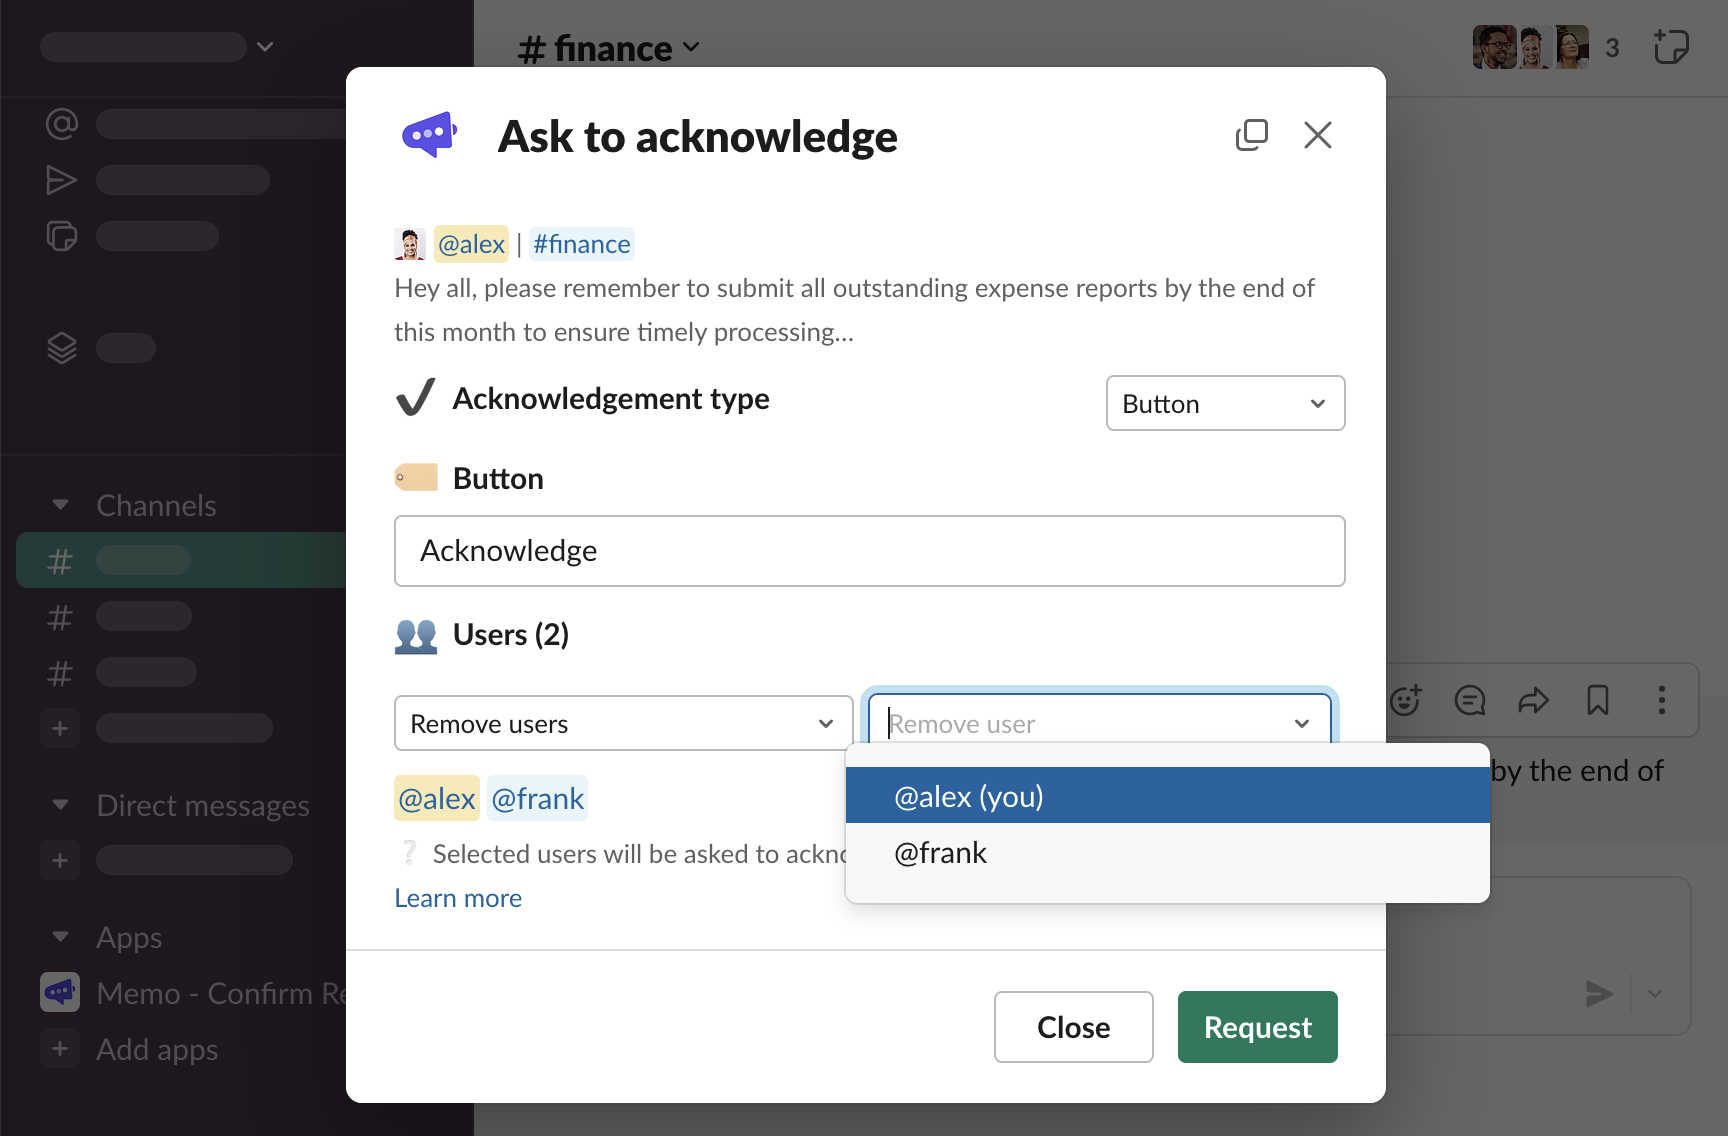
To remove a user from the list, select “Remove users” from the left-side select
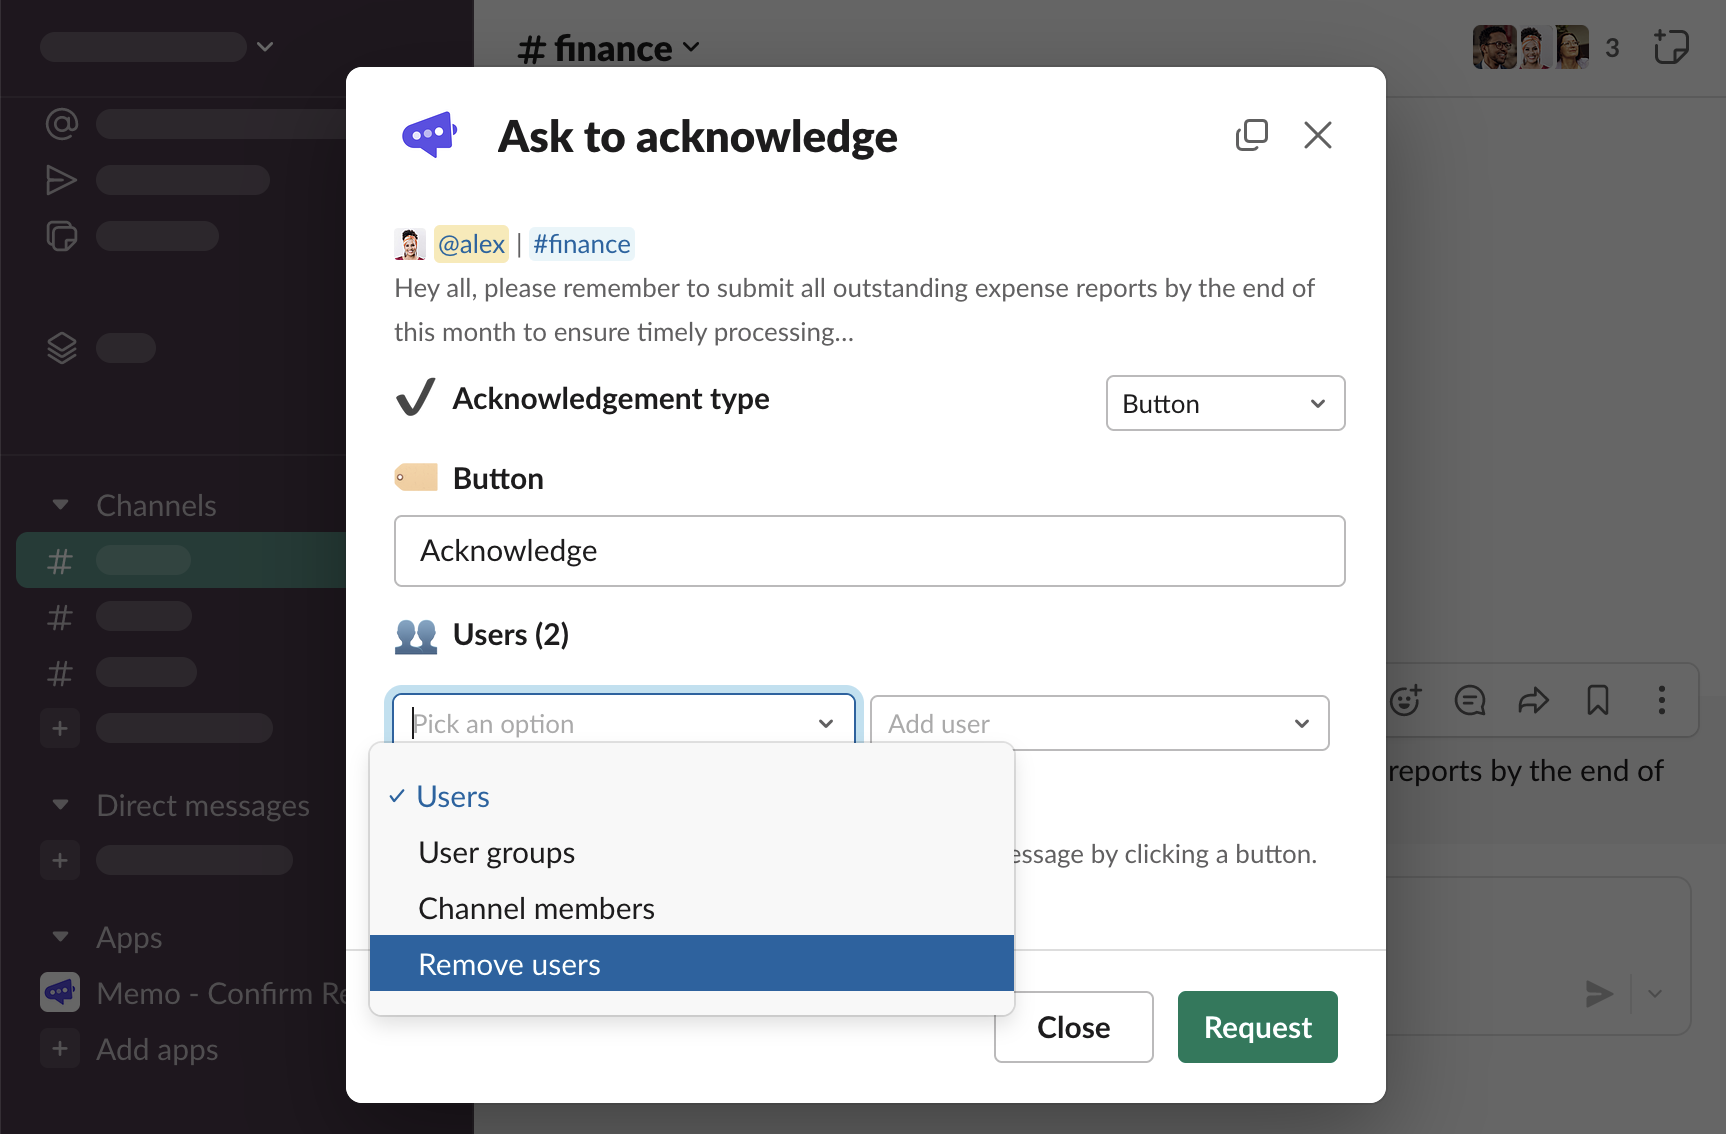
Then, click the right-side select with “Remove user” placeholder and choose the user to be removed
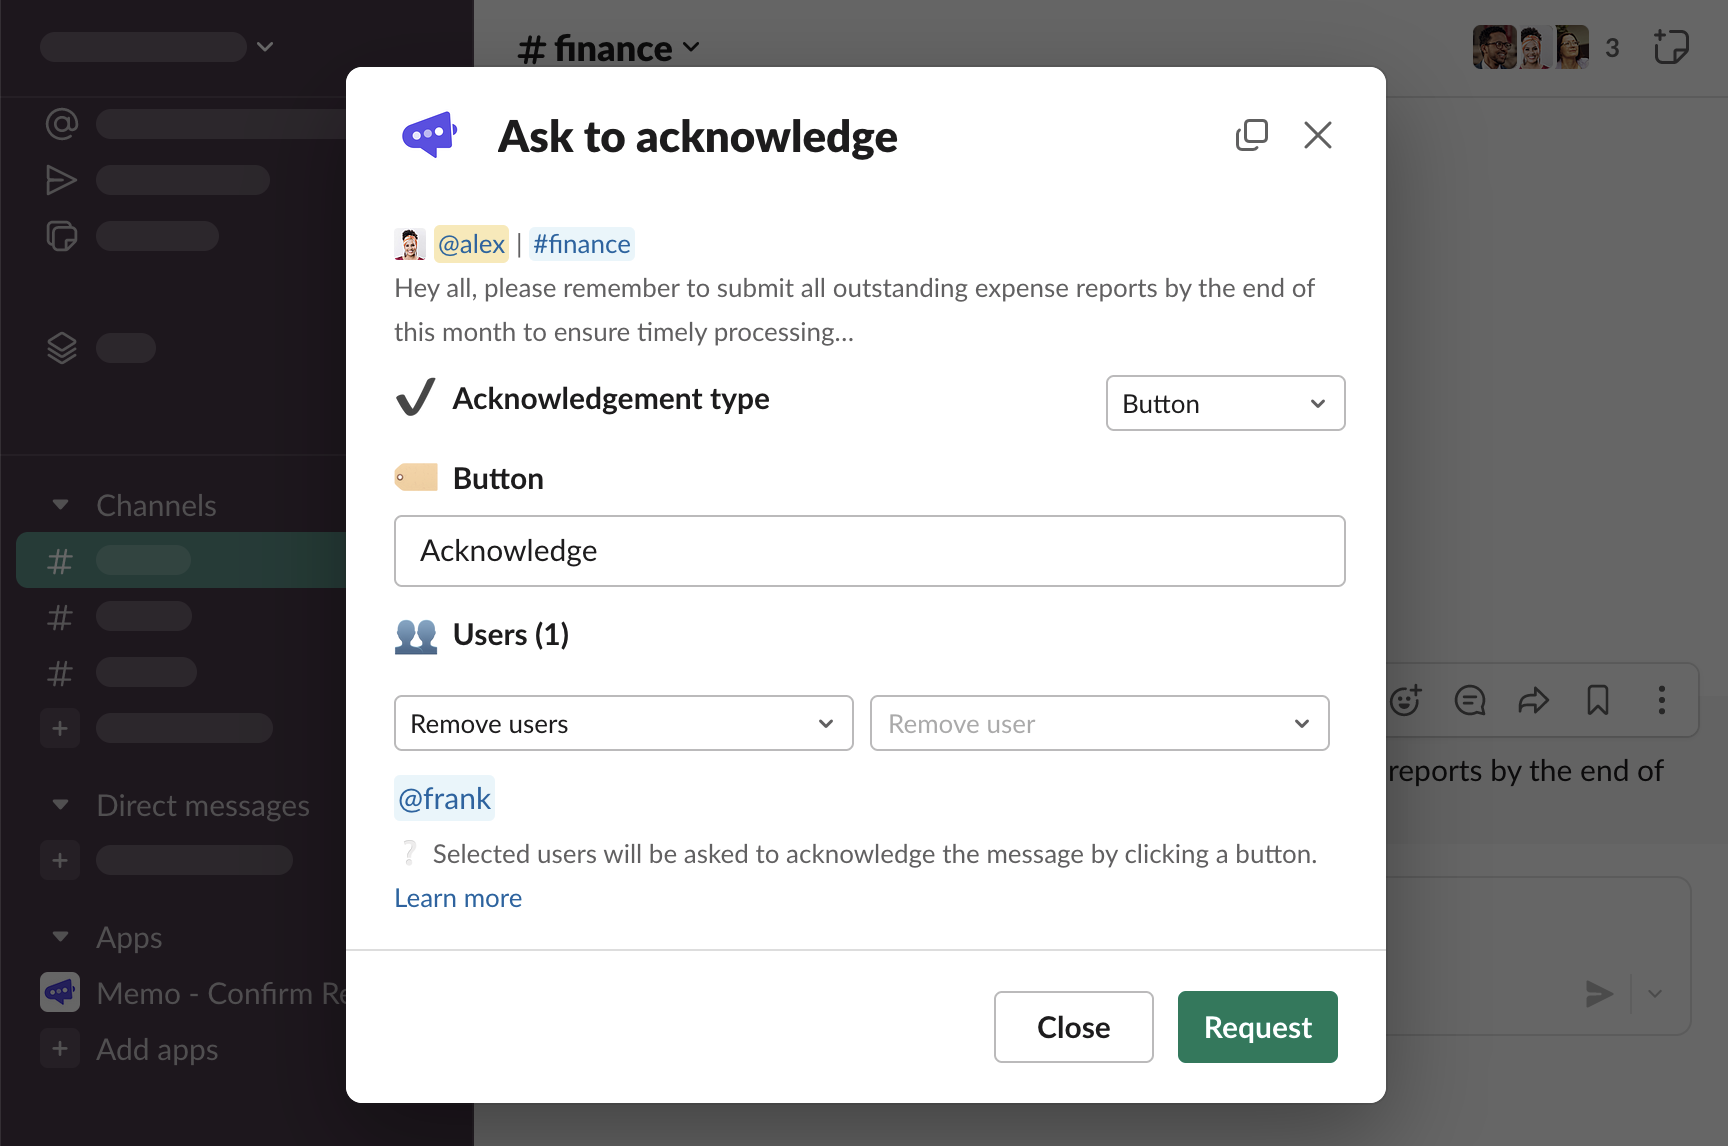
The user will be removed.
Editing acknowledgement request
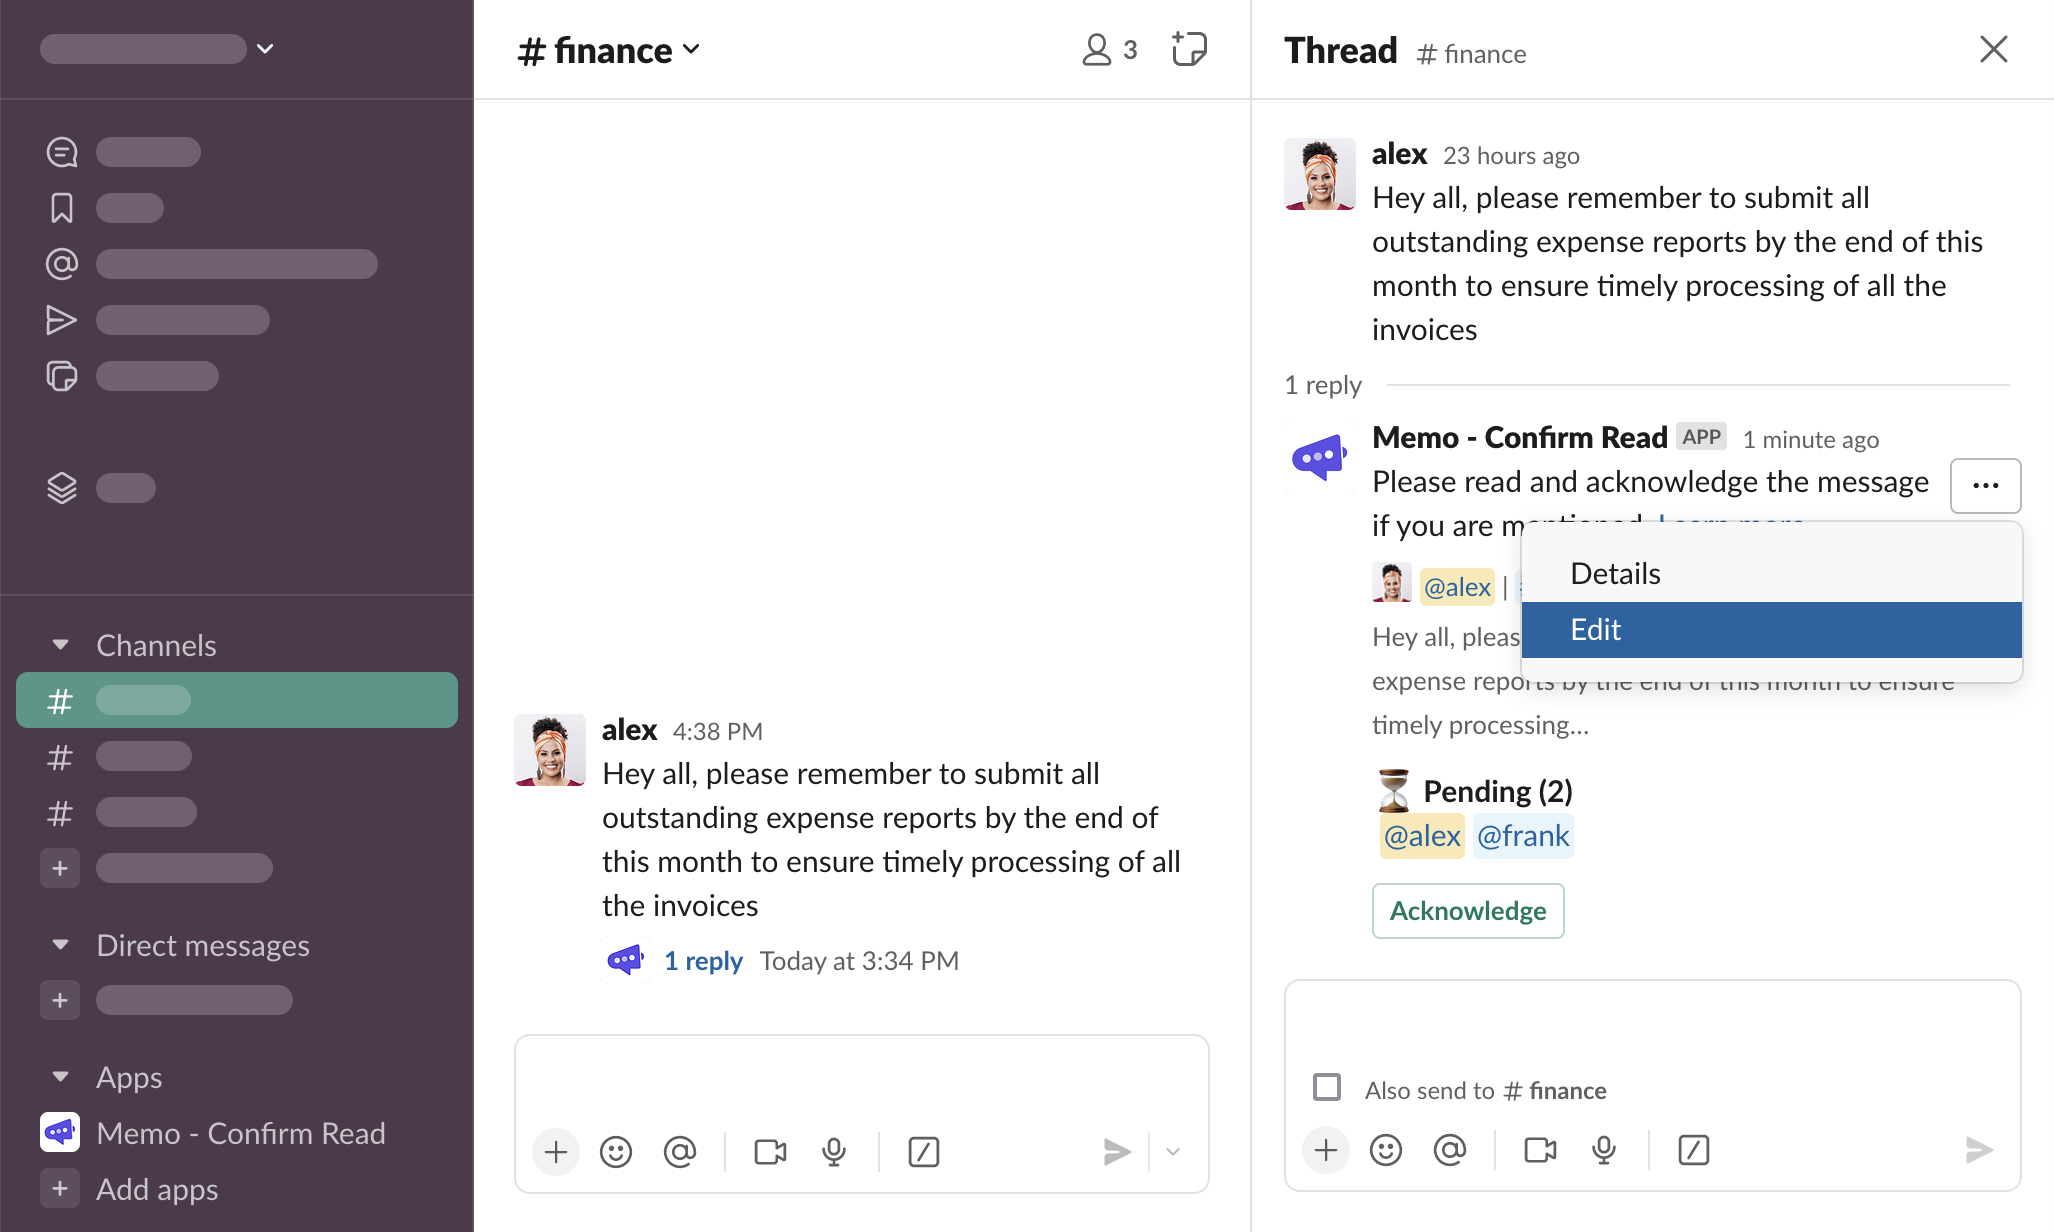
Click “…” button on the overview thread message
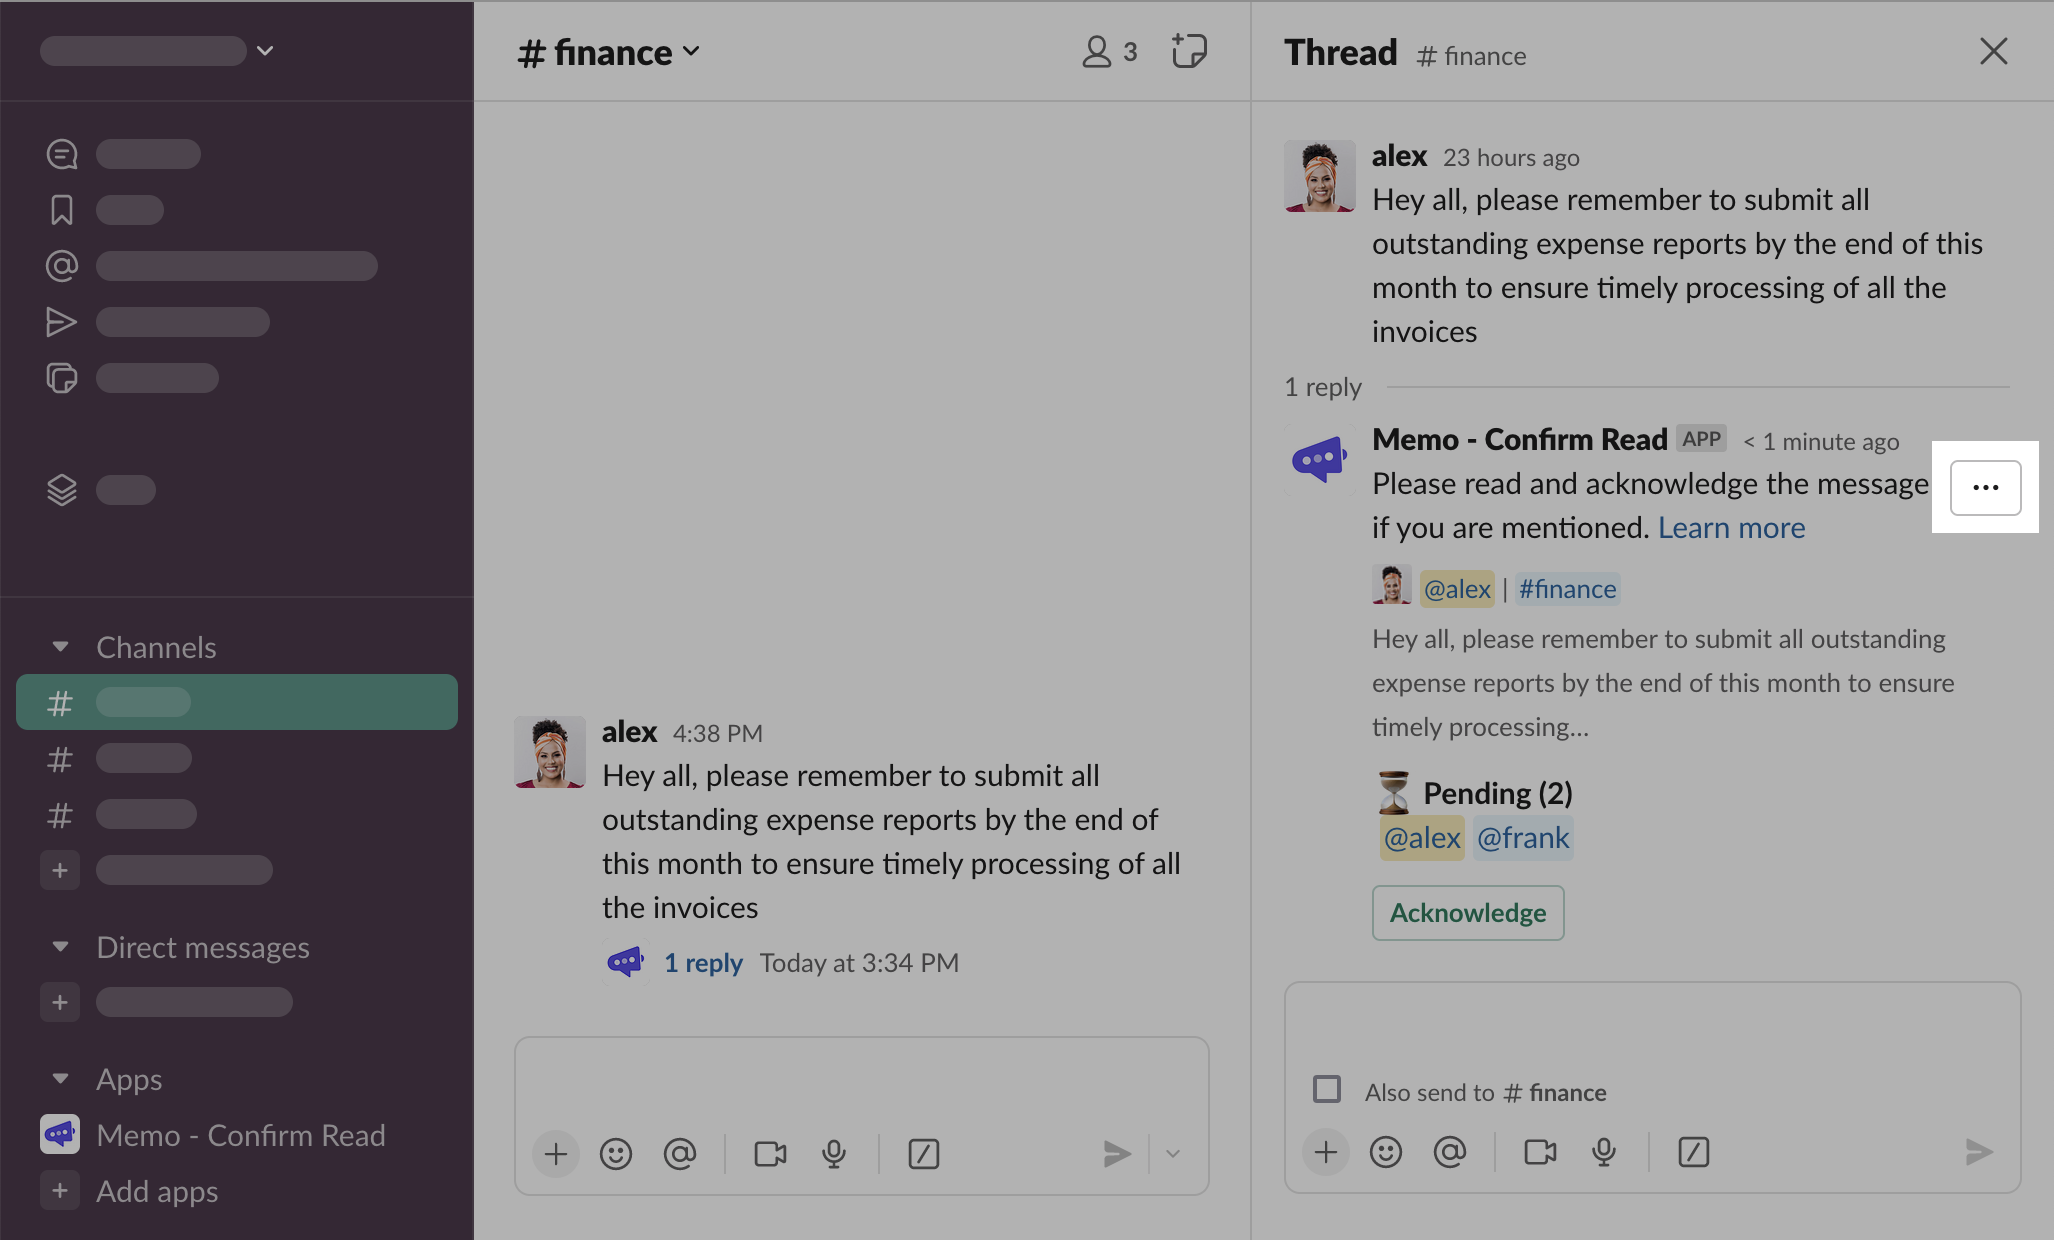
Click “Edit”
The form modal to edit the request will be opened
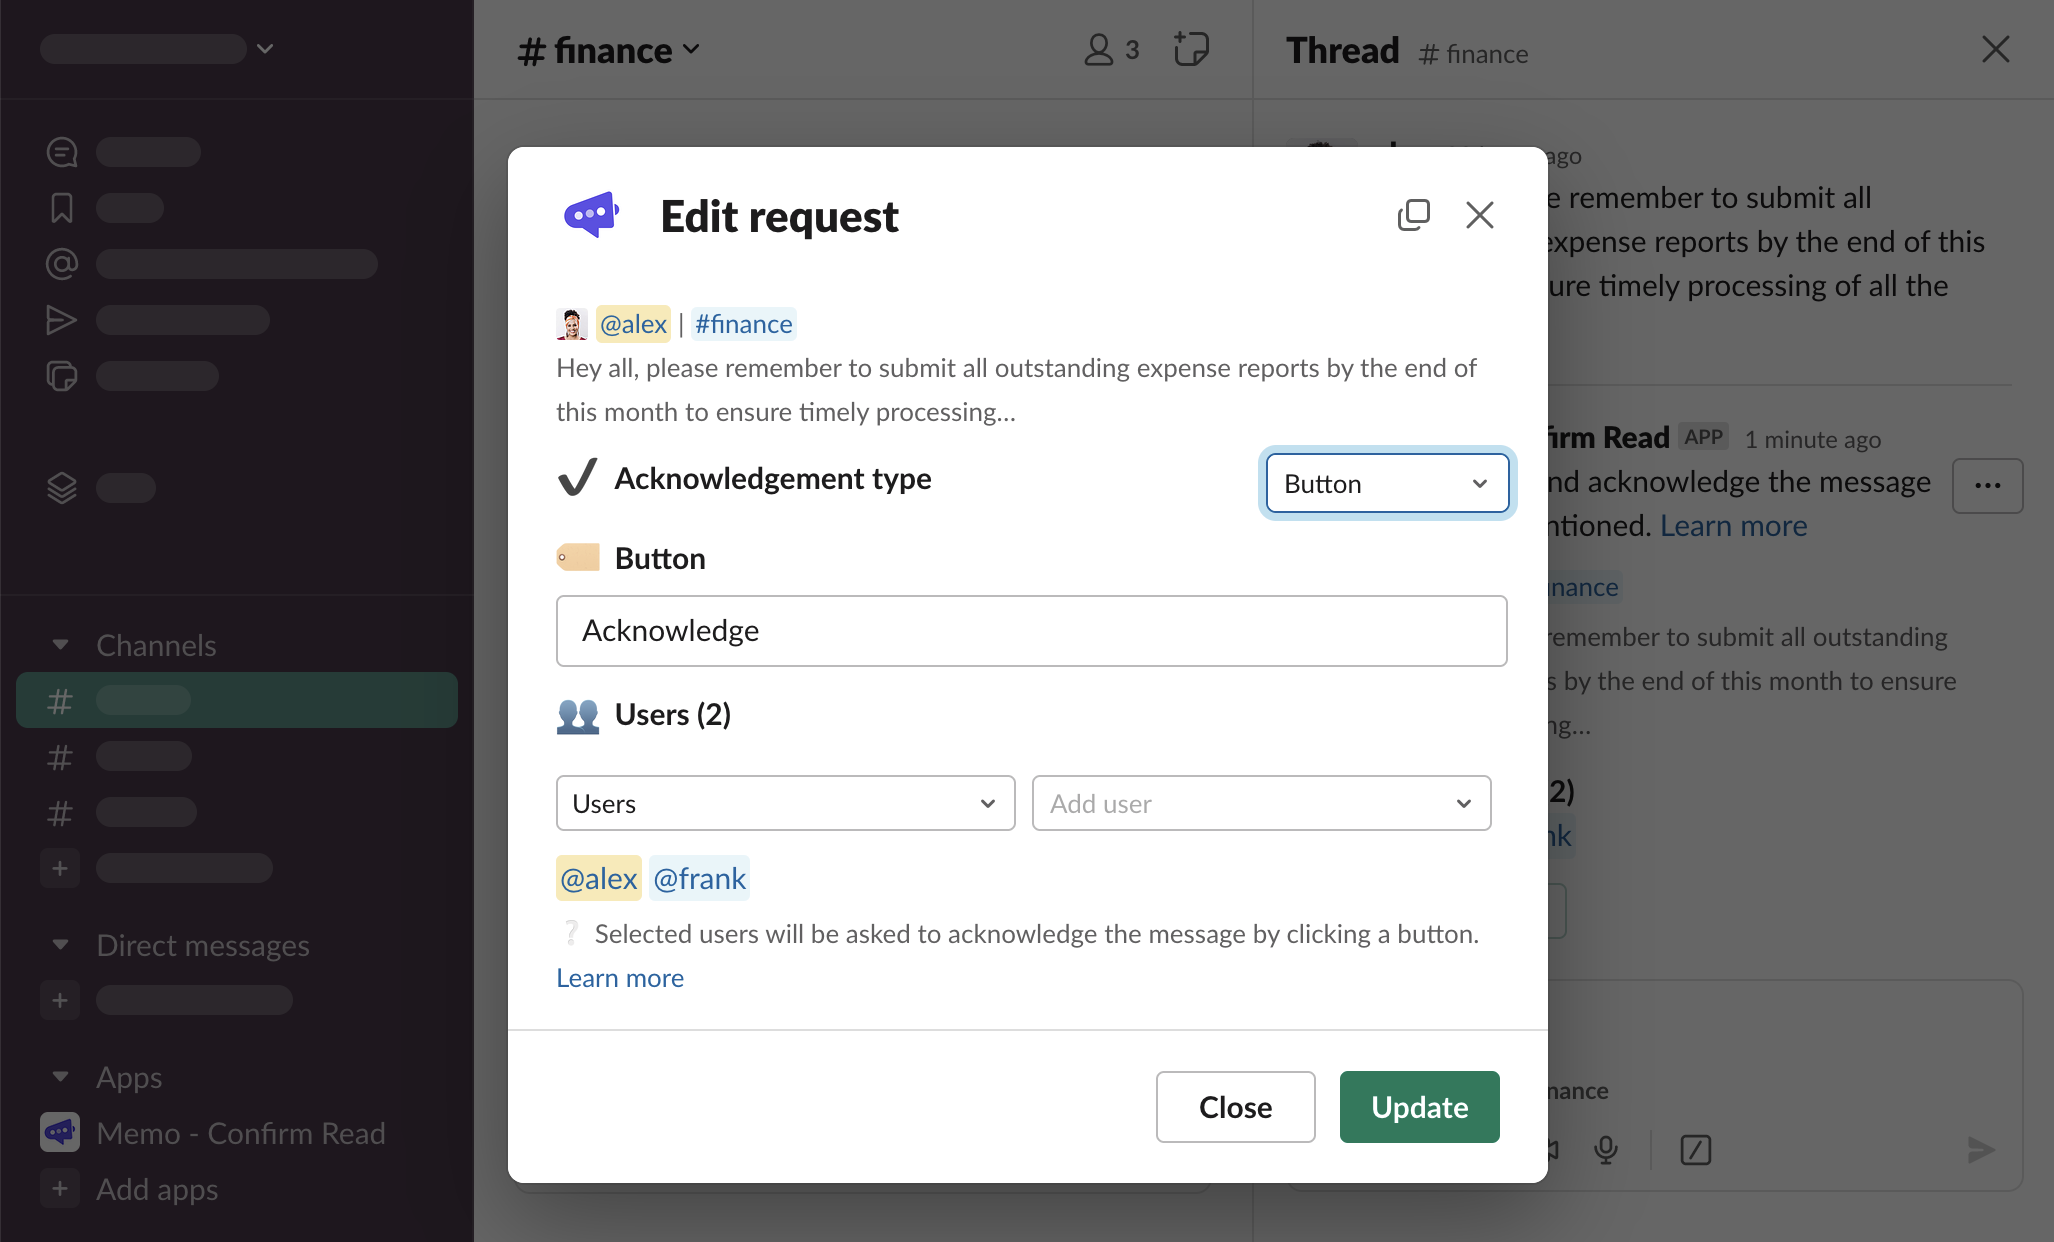
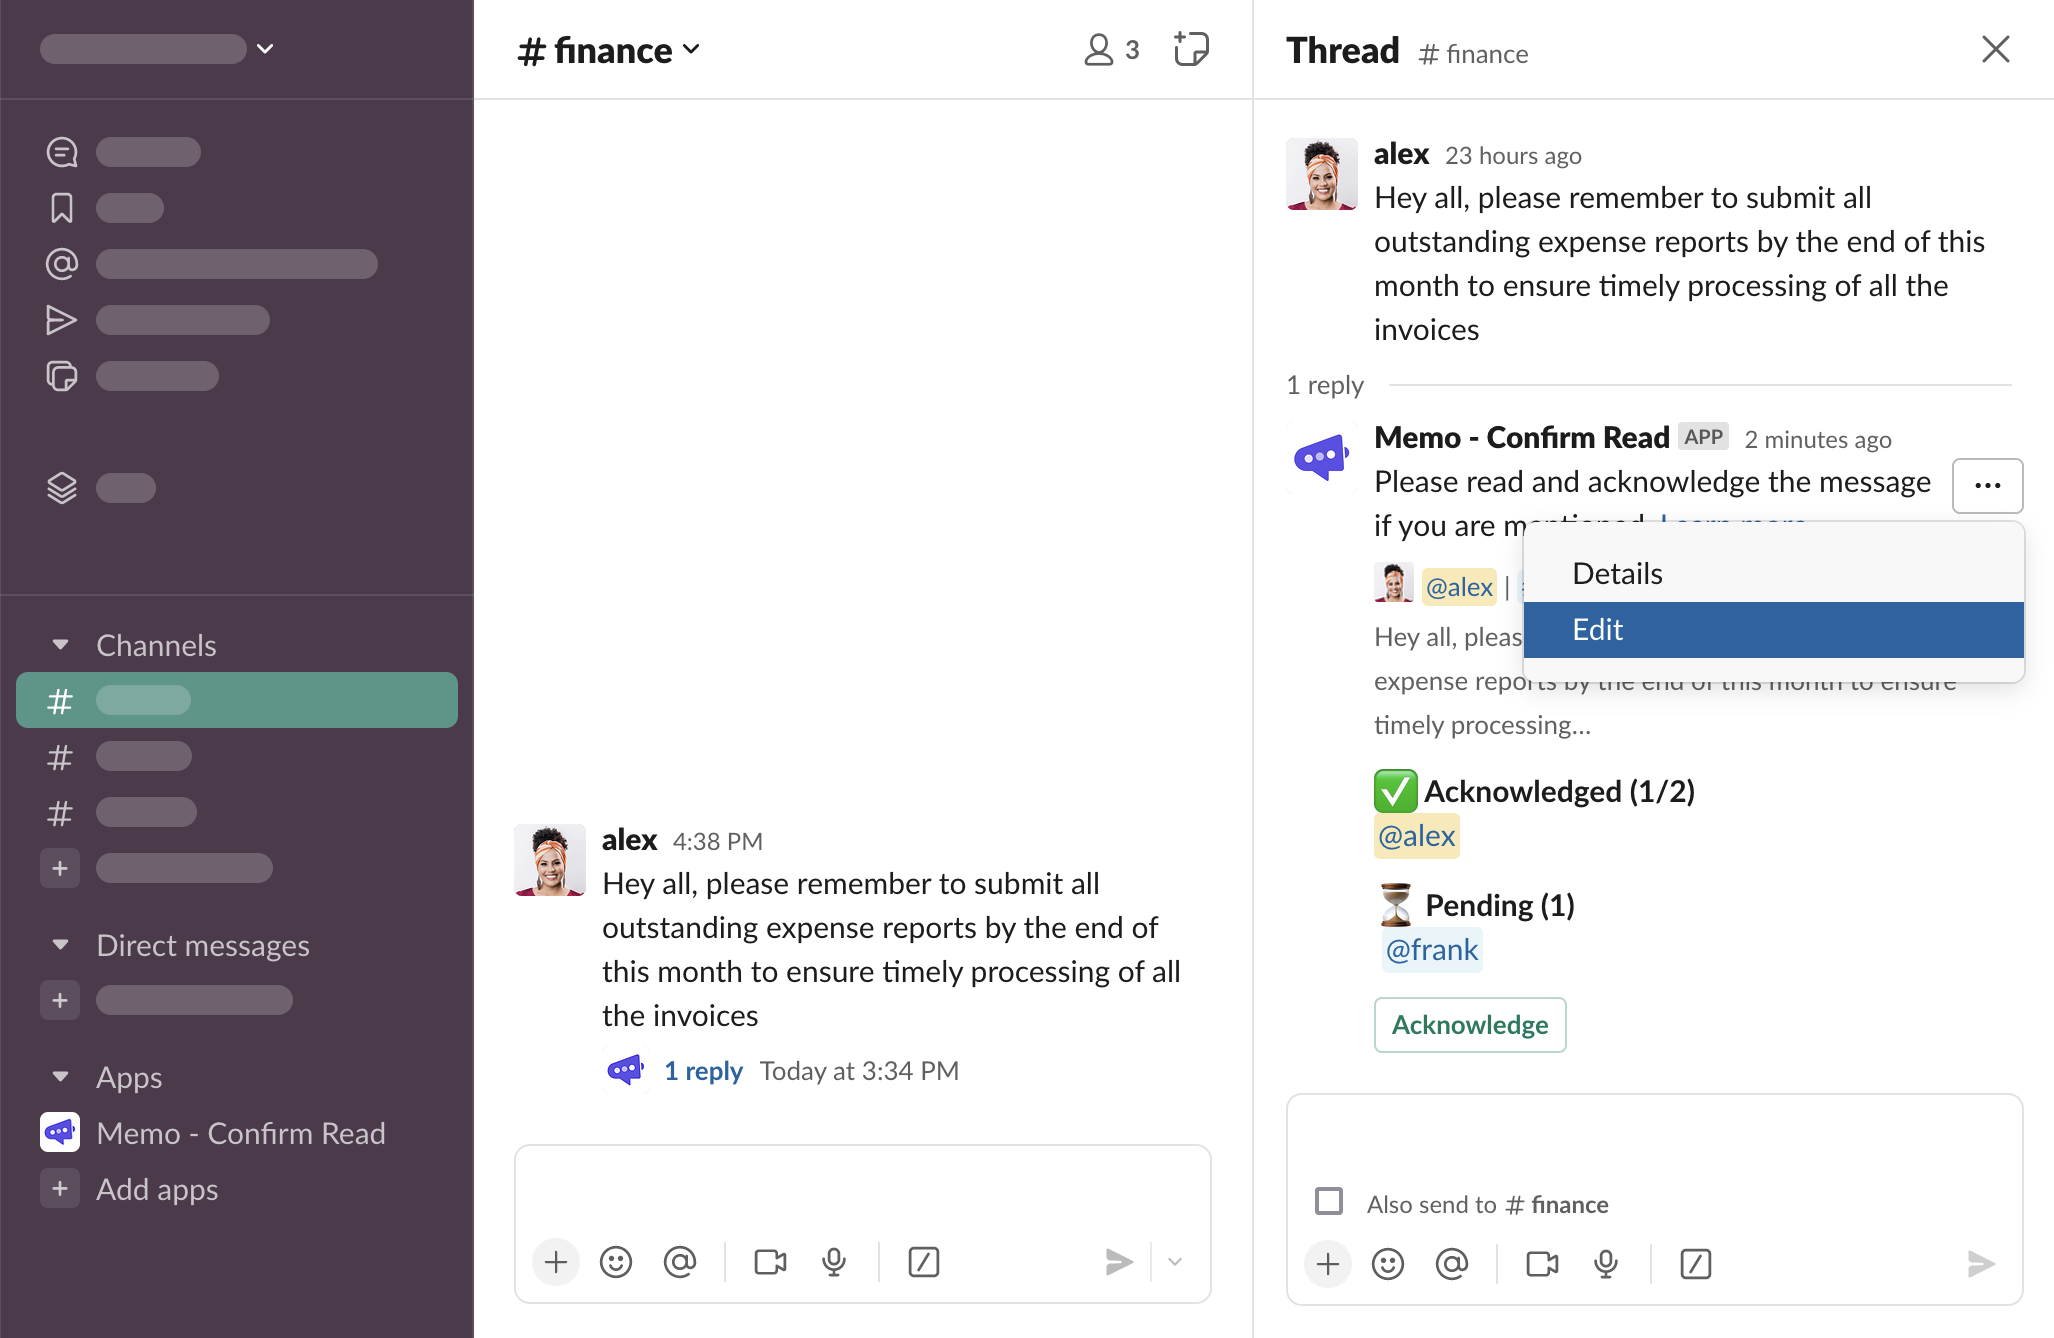
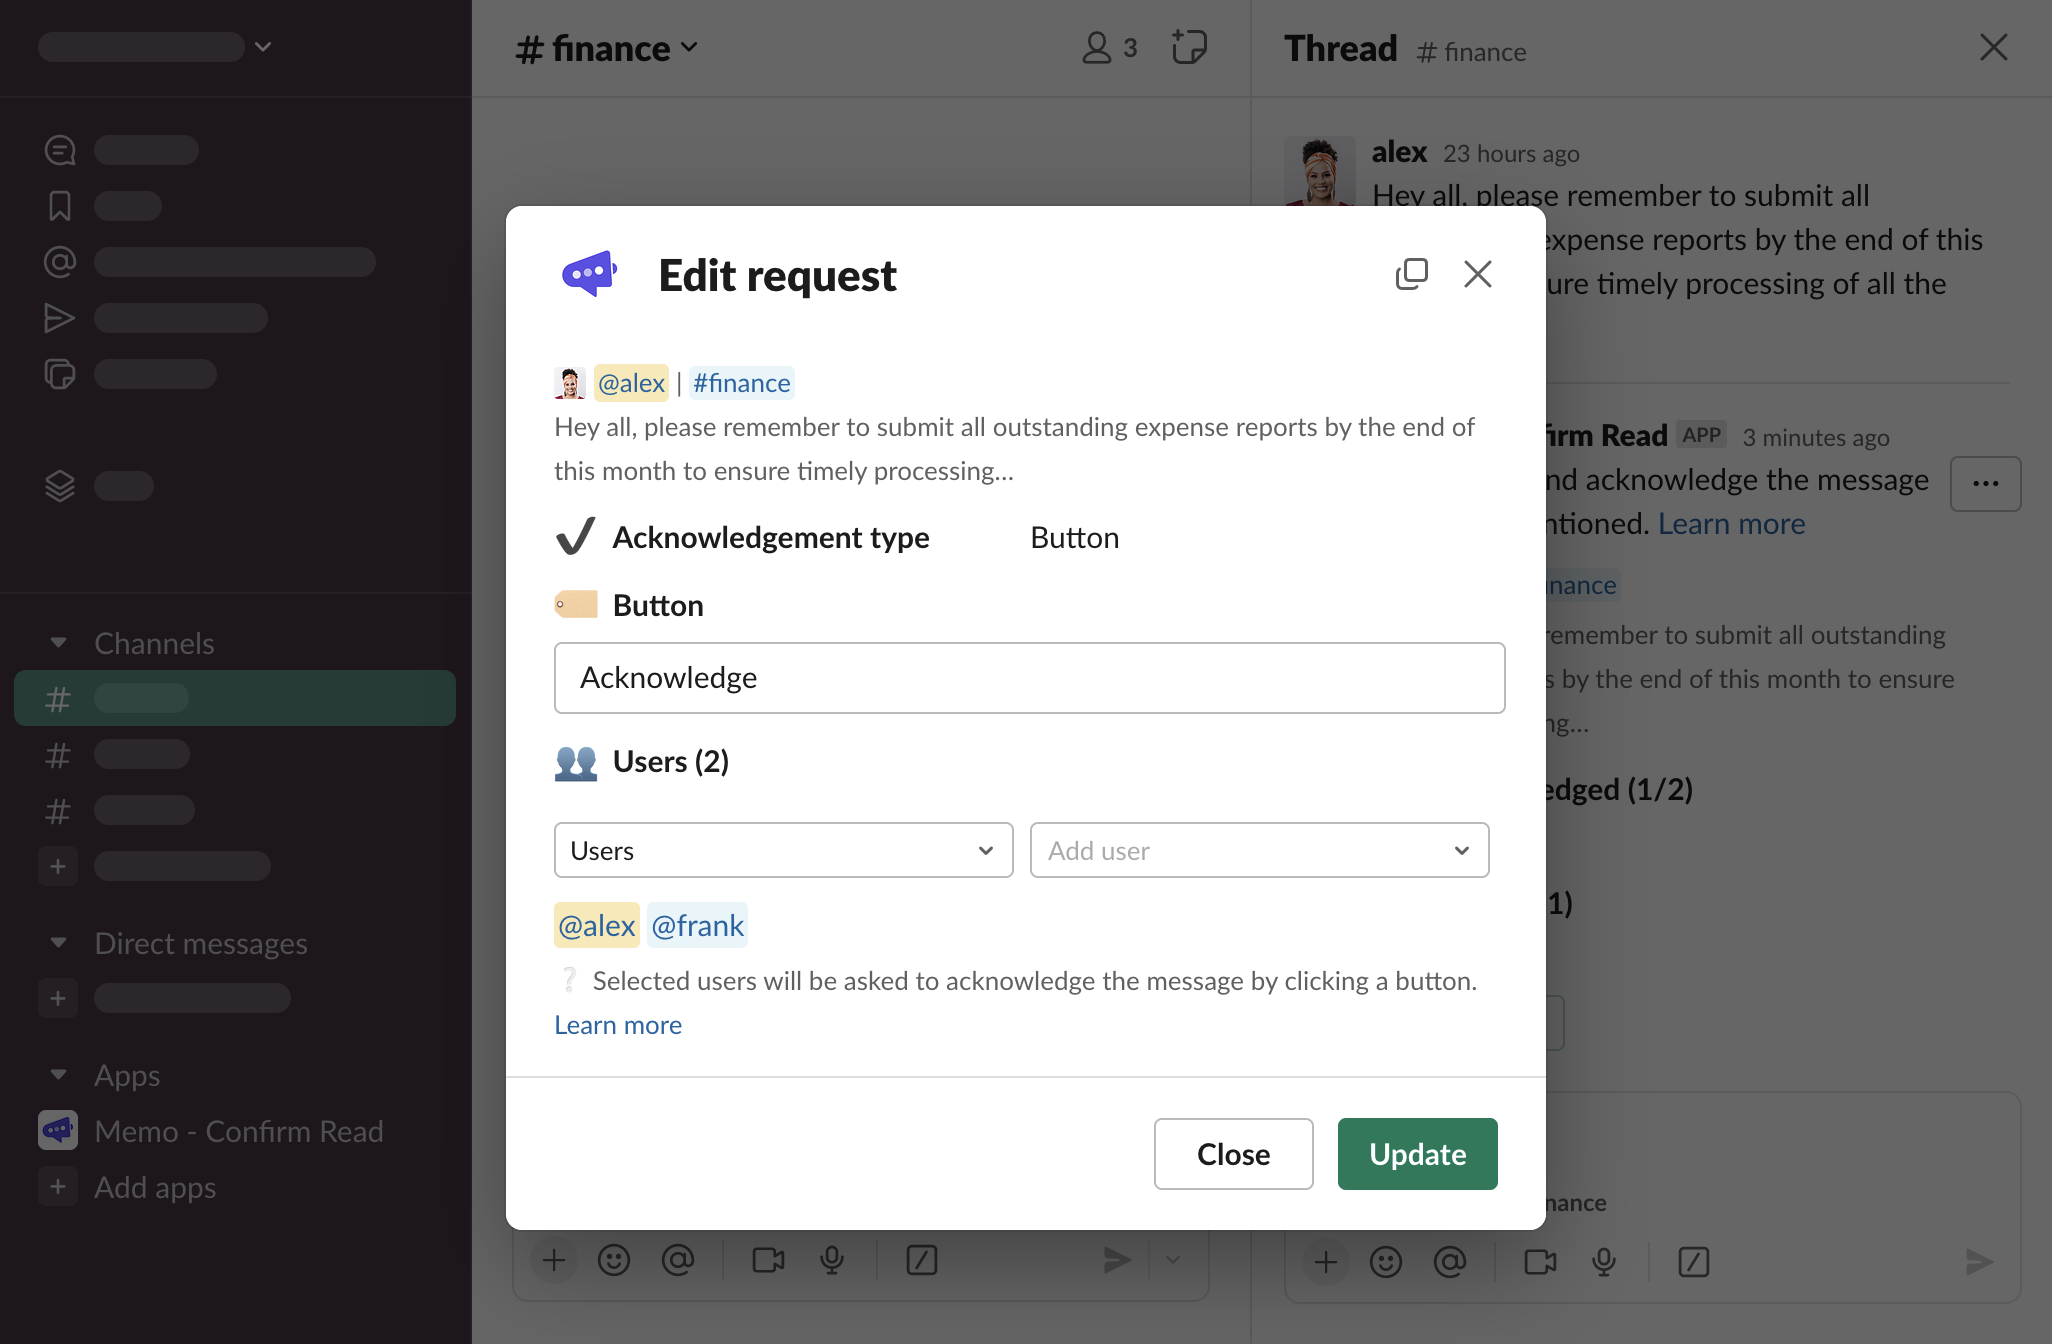
Note that it’s not possible to change the acknowledgement type after the first acknowledgement has been saved
Using Memo in private channels
Memo can be used in private channels only once the app has been explicitly invited to the channel.
Trigger the “Ask to acknowledge” message shortcut on a message sent in a private channel. If Memo is not part of the channel, you will see a following dialog
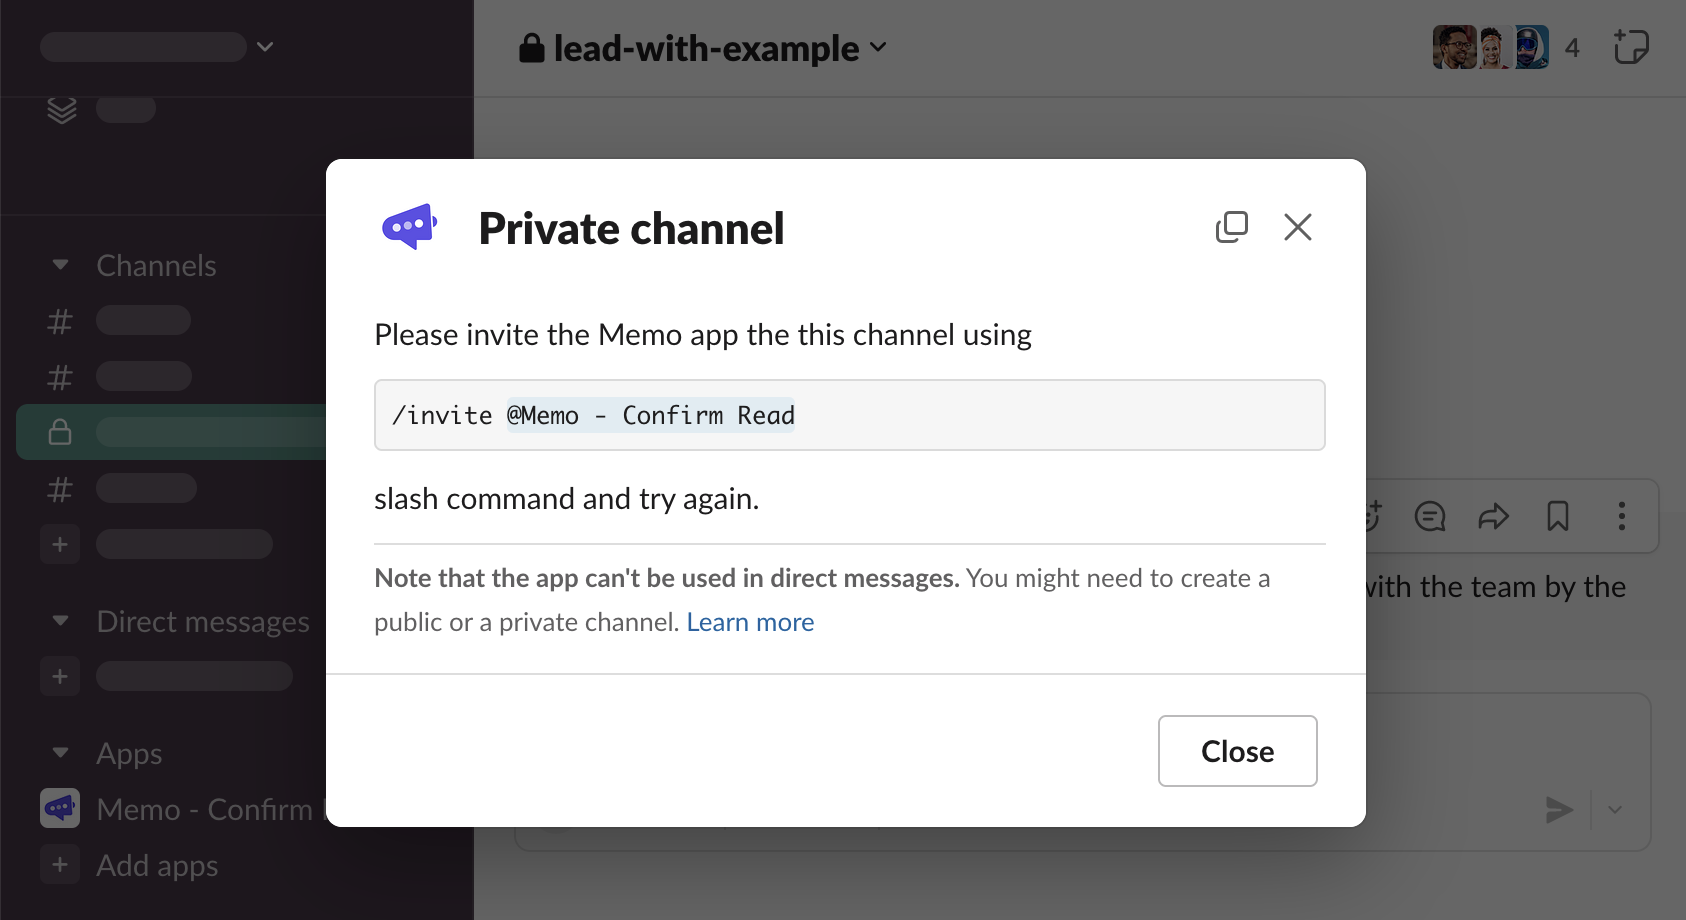
Close the modal, type
/invite @Memo - Confirm Readslash command, and send it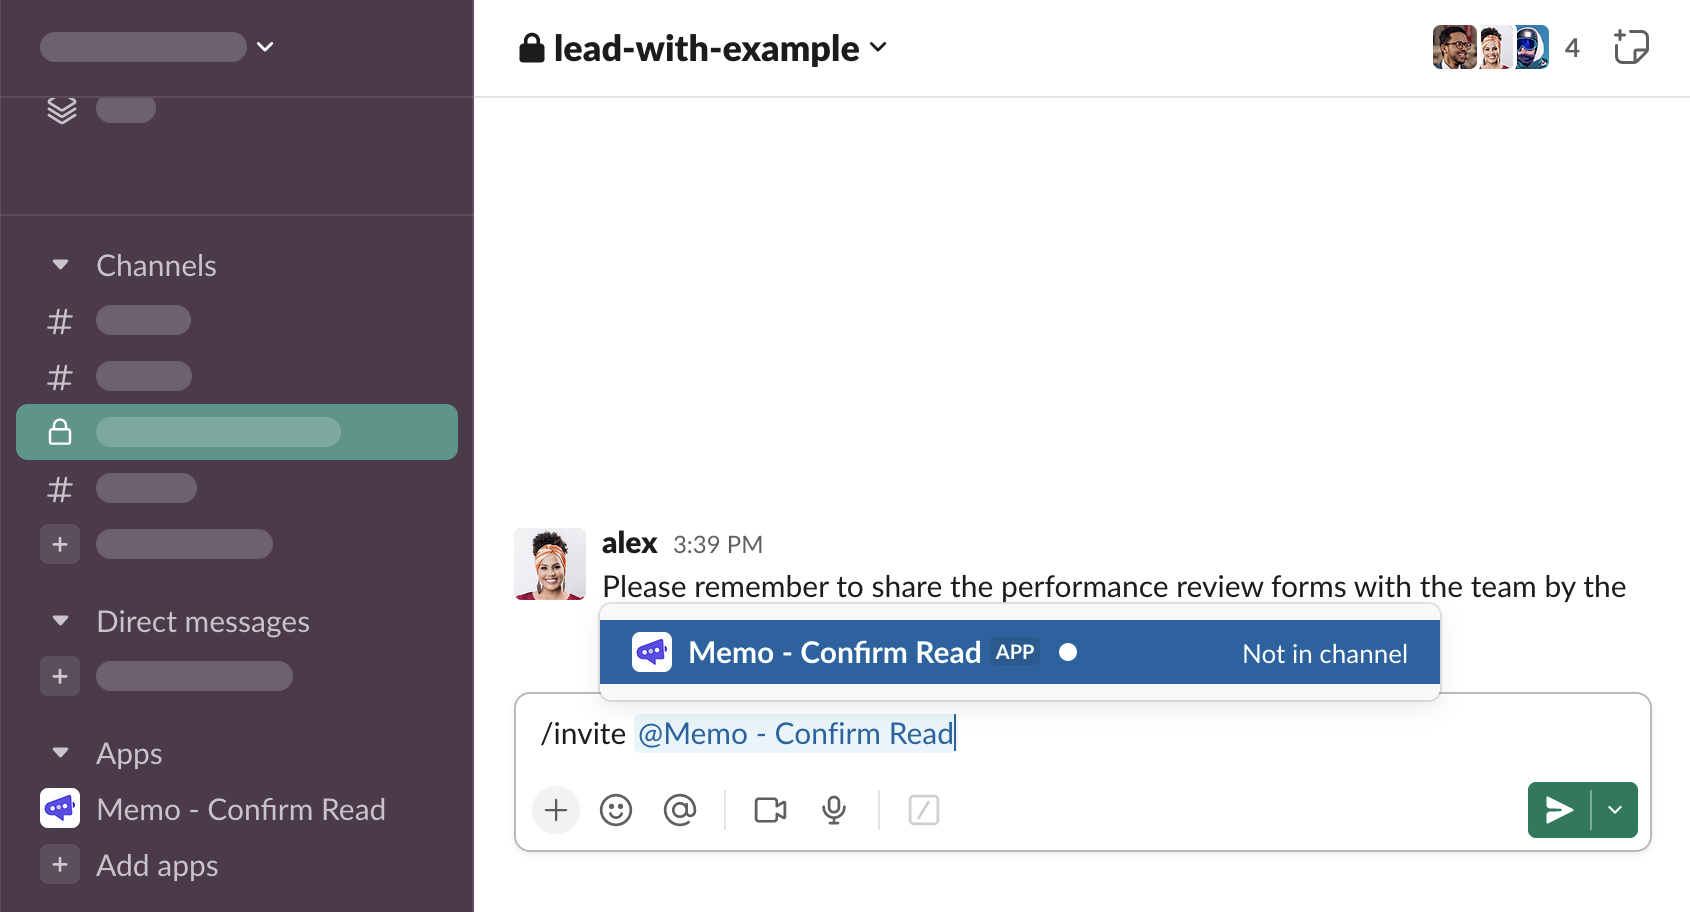

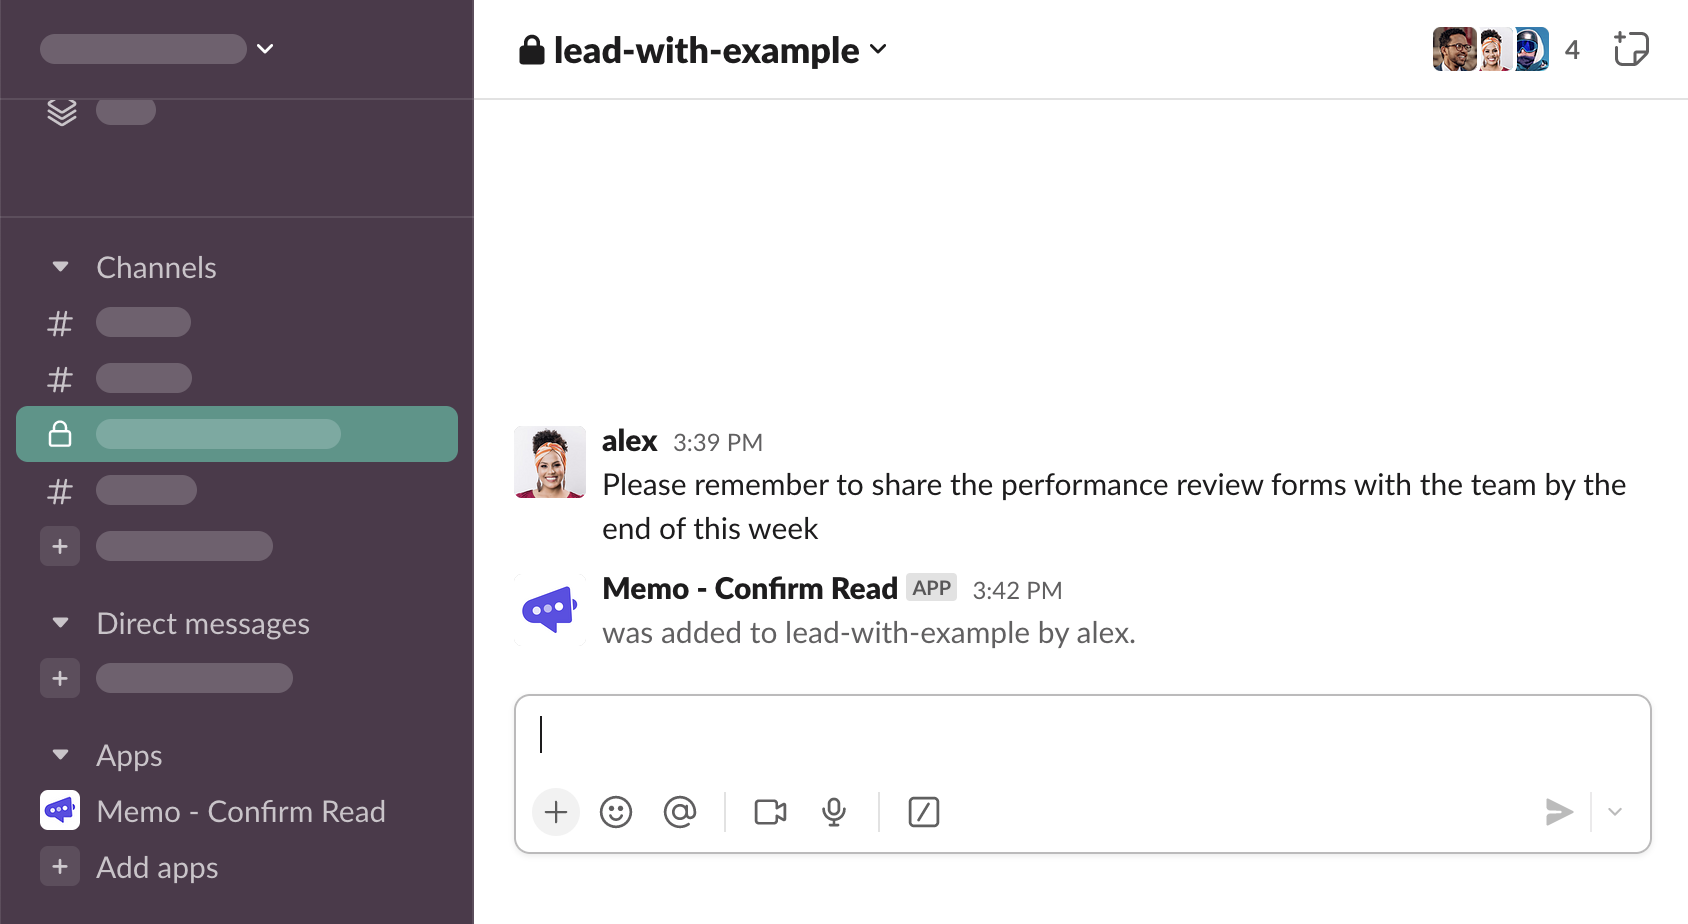
You will see an information that Memo has been successfully added to the channel
Trigger the “Ask to acknowledge” message shortcut again
A form modal to configure the request will be opened. As long as Memo remains part of the channel, the app will work on the private channel.